good to see you snip one wire at a time not like ive seen others cut all at once
cheers Troy
![]() by KTM525EXC on Tue, 17 Aug 2010 11:34 +0000
by KTM525EXC on Tue, 17 Aug 2010 11:34 +0000
![]() by fitzo on Tue, 07 Sep 2010 5:05 +0000
by fitzo on Tue, 07 Sep 2010 5:05 +0000
![]() by rodw on Tue, 07 Sep 2010 5:27 +0000
by rodw on Tue, 07 Sep 2010 5:27 +0000
fitzo wrote:Hi Rod
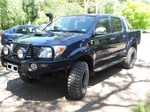
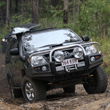
Nice rig mate, very envious.
Got a few questions.
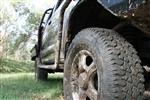
1. How much were the sliders
2. Who is brooksy
3. How do i contact him
![]() by bill_i_am on Tue, 07 Sep 2010 7:21 +0000
by bill_i_am on Tue, 07 Sep 2010 7:21 +0000
![]() by fitzo on Wed, 08 Sep 2010 5:57 +0000
by fitzo on Wed, 08 Sep 2010 5:57 +0000
![]() by ktm950adv on Sat, 18 Sep 2010 8:17 +0000
by ktm950adv on Sat, 18 Sep 2010 8:17 +0000
![]() by mechfx on Sun, 19 Sep 2010 8:08 +0000
by mechfx on Sun, 19 Sep 2010 8:08 +0000
![]() by toddie on Mon, 11 Oct 2010 7:03 +0000
by toddie on Mon, 11 Oct 2010 7:03 +0000
![]() by rodw on Mon, 11 Oct 2010 8:15 +0000
by rodw on Mon, 11 Oct 2010 8:15 +0000
mechfx wrote:just read all 34 pages....... loved it, thanks for putting in the effort.....
toddie wrote:yeah just read all 34 pages, and might i say rod very jealous mate
hope to talk to you tommorrow about the BL
![]() by rodw on Thu, 25 Nov 2010 3:39 +0000
by rodw on Thu, 25 Nov 2010 3:39 +0000


![]() by rodw on Thu, 25 Nov 2010 6:20 +0000
by rodw on Thu, 25 Nov 2010 6:20 +0000


![]() by rodw on Tue, 14 Dec 2010 8:48 +0000
by rodw on Tue, 14 Dec 2010 8:48 +0000


![]() by KTM525EXC on Tue, 14 Dec 2010 8:53 +0000
by KTM525EXC on Tue, 14 Dec 2010 8:53 +0000
![]() by rodw on Tue, 14 Dec 2010 8:59 +0000
by rodw on Tue, 14 Dec 2010 8:59 +0000


![]() by rodw on Tue, 14 Dec 2010 9:01 +0000
by rodw on Tue, 14 Dec 2010 9:01 +0000
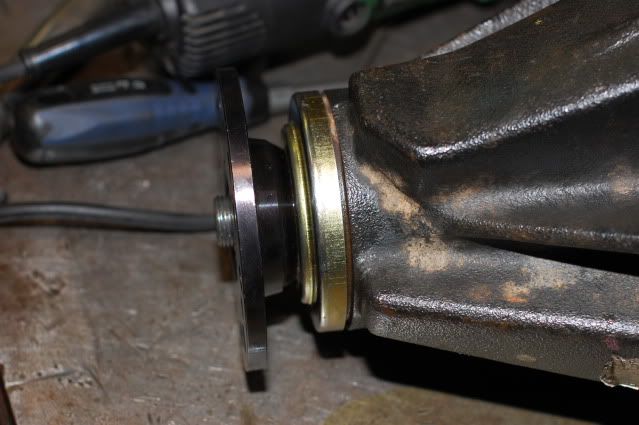
KTM525EXC wrote:Hey Rod,
Where the UCA ball joints are pressed into the camburg UCA arms what's stopping them from coming out again? Or is it totally relying on the press in fit to stop them coming apart?
Cheers Troy
![]() by rodw on Tue, 14 Dec 2010 9:32 +0000
by rodw on Tue, 14 Dec 2010 9:32 +0000


![]() by 9W6VX on Tue, 14 Dec 2010 10:16 +0000
by 9W6VX on Tue, 14 Dec 2010 10:16 +0000

![]() by bill_i_am on Tue, 14 Dec 2010 10:16 +0000
by bill_i_am on Tue, 14 Dec 2010 10:16 +0000
![]() by KTM525EXC on Tue, 14 Dec 2010 10:23 +0000
by KTM525EXC on Tue, 14 Dec 2010 10:23 +0000
rodw wrote:KTM525EXC wrote:Hey Rod,
Where the UCA ball joints are pressed into the camburg UCA arms what's stopping them from coming out again? Or is it totally relying on the press in fit to stop them coming apart?
Cheers Troy
Troy, It is not visible but the Ball joint presses in from the top and is secured by a big circlip underneath just like the factory one. If you look under your existing UCA, you should be able to see the circlip.
![]() by Hilux Max on Wed, 15 Dec 2010 8:39 +0000
by Hilux Max on Wed, 15 Dec 2010 8:39 +0000

Users browsing this forum: No registered users and 34 guests
![]()