****Edit - 12/12/2010 * - It Appears that Hilux's with compliance build dates of 2010 onwards now have this buzzer pre-installed. Please verify this by disconnecting the wire from the bottom of the fuel canister and shorting the two wires together and turning on the ignition. if a buzzer goes off in the cab along with the flashing fuel light you dont need this mod **** We have only had ONE member say this is the case though. Please verify yourself..
Ok.. as we Diesel Hilux owners know, the one thing we fear the most is the possibility of contaminated diesel. A lot of us have installed secondary fuel filters to help combat the problem, but the facts are that if we do take on a bad batch of fuel without realising, once water has got into the filters we've got less than 1km to stop the motor before the water gets into our common rail and injectors and can cost $8k+ to rectify.. something we all want to avoid..
Yes, filling at the same service stations, knowing when fuel deliveries are done etc is all good preventative measures, but we travel, we 4wd, we cant always fill at reputable service stations.. so what can we do ?
There is a fuel filter system available from Gold Coast Diesel (http://www.goldcoastdieselspecialist.com.au/products.ews which has water sensors in it, which upon detecting water will set off a buzzer.. sounds good, but from $462->$785 its a costly way to provide an audible alert..
Because Ive already got a Delphi secondary fuel filter which works perfectly well, i dont want to throw it away and have to spend another $462 on a water alert one.. so thought I why dont i modify what Ive got now to provide the audible alert that the more expensive system does..
Enter 'Steve9R's Contaminated Diesel Fuel Warning Mod'..
What this mod basically does is utilise the existing water sensor in the OEM Toyota Fuel filter. Currently this sensor will flash on the dash when it detects water in the fuel, but thats it.. so I wanted it to yell at me as well so that I really do notice something is wrong..
Skill level required to do mod :
----------------
LOW (everyone can and should do this)
Time to install :
----------------
1hr (ish)
Tools required :
-----------------
No2 phillips head screwdriver (stumpy & long)
Soldering iron & solder
Heat shrink
2 pieces of wire about 30cm long each (red & black)
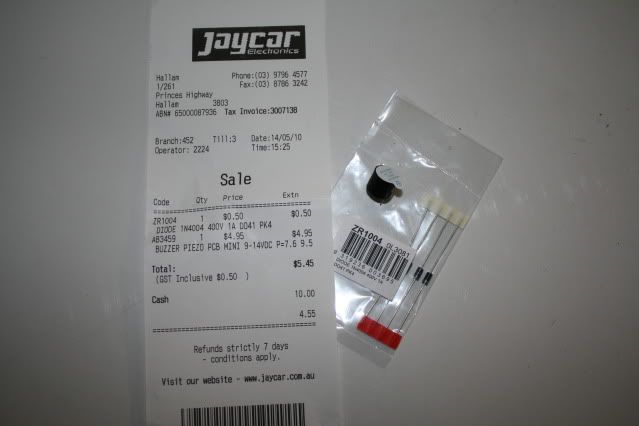
Items to buy :
--------------
(we are only using 1 of the 4 diodes, but for 50c for all 4 who cares)..
Step 1 :/
So.. what we're going to do is firstly solder up our piezo buzzer and diode as follows : (please make sure diode is around the right way). DO NOT REMOVE STICKER FROM PIEZO YET.
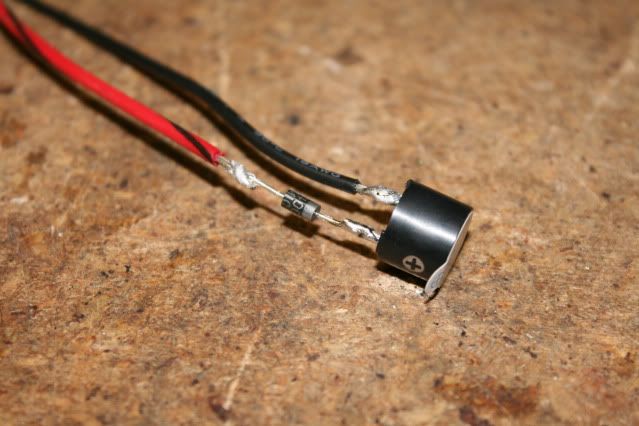
once this is done you need to insulate both terminals. I used some heat shrink to cover them so that nothing touching them will cause a short. you could always use electrical tape if you wanted..
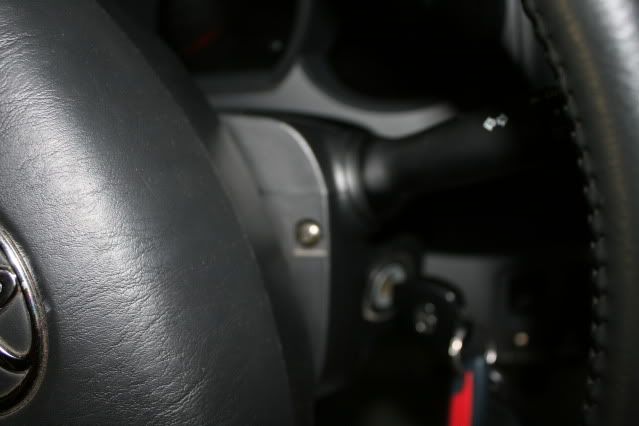
Step 2 :/
Into the cab and remove the surrounds from around the steering column. there is a screw either side of the steering wheel and one underneath securing the bottom. once these 3 screws are removed you will be able to remove the lower and upper pieces exposing the steering column.

Step 3 :/
Now we need to remove the facia around the instrument cluster. This is quite easy to do. grab the far left of the facia and pull towards yourself, it will click out. do the same on the right hand side. Now in the centre at the top there is a black phillips head retaining clip. unscrew it and pull it downwards. it will pop out. You can now remove the facia surround. I found it was a tricky to get out past the steering column, buy if you move the indicator stalk down, and lower the steering column you will get it out no problems at all.
Step 4 :/
We now have to remove the 3 x screws retaining the instrument cluster.
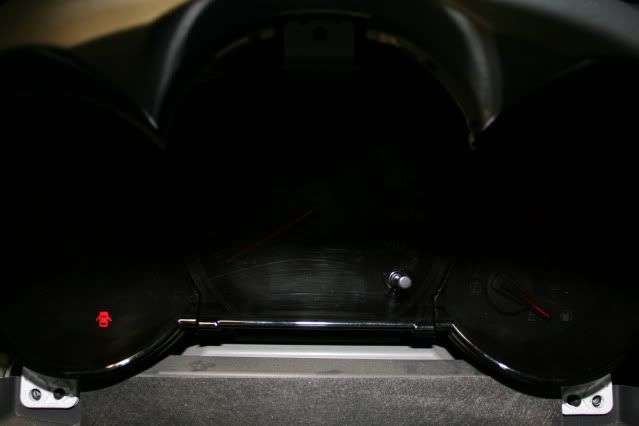
2 at the bottom and one at the top. Ok. slide the instrument cluster towards you and out to the drivers door side. you can now unplug both plugs from the top of the cluster. The only thing this will effect is your Trip meters which will both reset to 0.0.. no biggy.
Step 5 :/
on the larger connector find the blue wire with the red stripe :
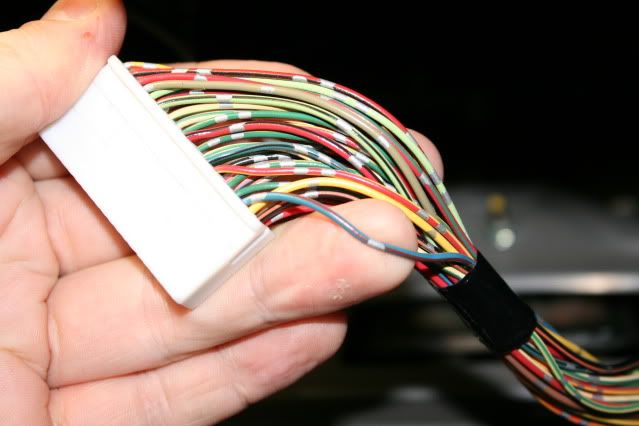
we now need to strip some of this wire and solder the loose end of our black wire to this one :

Tape it up nice and firmly and feed the piezo buzzer back under the dash towards the drivers floor.
Step 6 :/
find the loose Red wire from your Piezo and this needs to be connected to +12v. I have mine connected to the accessory circuit, but either constant +12v or accessory +12v is fine. Once you've soldered the connections up, you can remove the sticker on the top of the piezo and secure it somewhere out of the way.
Thats it.. You've basically done the mod. Now simply reverse everything you pulled apart, so reconnect and reinstall the instrument cluster, reinstall the facia and steering column surrounds and you're done.
If however you want to make sure that what you've done will actually work, as well as verifying that your water alert in your OEM filter ACTUALLY works!, then watch the following 3 x videos i've made in order as well..
Video1 : http://www.youtube.com/watch?v=5EXr2BZr1qs
Video2 : http://www.youtube.com/watch?v=RkE4xCsyRO4
Video3 : http://www.youtube.com/watch?v=ocxezmddUF0
Thats it.. you've now got an audible piezo buzzer warning system for next to no $$'s well done.
I'd like to thank Paulba who set me straight on the hilux negative earth wiring for this mod. Thanks mate.
Hope you all enjoy this $5.45 mod !.. Post up and let me know !
Cheers
Steve