How to replace a driveshaft
Re: How to replace a driveshaft
![]() by Skitz-4x4 on Sun, 26 Jan 2014 8:56 +0000
by Skitz-4x4 on Sun, 26 Jan 2014 8:56 +0000
Will a 36mm socket work or stuff up the nut? 235nm is the torque setting? Man that is tight 
Why Drink And Drive When You Can DriFt And Slide?!
-

Skitz-4x4 - Posts: 166
- Joined: Tue, 11 Sep 2012 1:51 +0000
- Location: Townsville, Qld
Re: How to replace a driveshaft
![]() by boxhead55 on Sun, 26 Jan 2014 11:39 +0000
by boxhead55 on Sun, 26 Jan 2014 11:39 +0000
It sure is tight. but! Get that wrong and your bearing will die a noisy death!
-

boxhead55 - Posts: 2864
- Joined: Sat, 15 Jun 2013 3:46 +0000
Re: How to replace a driveshaft
![]() by jakelux on Sun, 26 Jan 2014 11:46 +0000
by jakelux on Sun, 26 Jan 2014 11:46 +0000
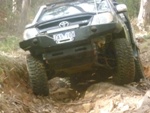
Skitz-4x4 wrote:Got the break on video too check it out.. https://www.youtube.com/watch?v=NKJL5Pmuqq0
Geez ya wern't doing much to break that... How high you got it lifted?
-
jakelux - Moderator
- Posts: 2582
- Joined: Mon, 12 Oct 2009 5:38 +0000
- Location: MELBOURNE, AUSTRALIA
How to replace a driveshaft
![]() by boxhead55 on Sun, 26 Jan 2014 12:06 +0000
by boxhead55 on Sun, 26 Jan 2014 12:06 +0000
Yep this is what happens when. You lift and don't drop the front diff to reduce the cv angles at full flex.because there is no stopper in the inner cv it will just pop out like that. As if you were pulling on it.
-
boxhead55 - Posts: 2864
- Joined: Sat, 15 Jun 2013 3:46 +0000
Re: How to replace a driveshaft
![]() by white_hilux on Fri, 31 Jan 2014 11:55 +0000
by white_hilux on Fri, 31 Jan 2014 11:55 +0000
Hey guys. I've read all the posts in this thread but I am still struggling to remove the shaft from the diff housing. Any ideas as I've been trying for about 2 hours now
Ben
2006 SR Extra Cab
2" lift, 32" Bighorns, F & R Diff Locked, Rock sliders, TJM Bullbar and Winch
Even if you are on the right track, you'll get run over if you just sit there
2006 SR Extra Cab
2" lift, 32" Bighorns, F & R Diff Locked, Rock sliders, TJM Bullbar and Winch
Even if you are on the right track, you'll get run over if you just sit there
-
white_hilux - Posts: 1791
- Joined: Wed, 07 Jul 2010 7:50 +0000
- Location: Holland Park, QLD
Re: How to replace a driveshaft
![]() by kyle300exc on Fri, 31 Jan 2014 1:53 +0000
by kyle300exc on Fri, 31 Jan 2014 1:53 +0000
You tried levering with 2 large flat screw drivers either side of the axle where it meets the diff housing?
Kyle
Never, under any circumstances, take a sleeping pill and a laxative on the same night.
Never, under any circumstances, take a sleeping pill and a laxative on the same night.
-

kyle300exc - Moderator
- Posts: 8567
- Joined: Mon, 20 Sep 2010 12:32 +0000
- Location: Narellan
Re: How to replace a driveshaft
![]() by Skitz-4x4 on Fri, 31 Jan 2014 2:04 +0000
by Skitz-4x4 on Fri, 31 Jan 2014 2:04 +0000
jakelux wrote:Skitz-4x4 wrote:Got the break on video too check it out.. https://www.youtube.com/watch?v=NKJL5Pmuqq0
Geez ya wern't doing much to break that... How high you got it lifted?
It was only lifted 2.5 inches in the front with a 2inch body lift.. BUT I was using strut spacers at the time. It was at full droop and full lock left and bounced on the FRH wheel.. Didn't break, just popped out. I've since upgraded to rekon and what a huge difference it makes.. It now sits at 3inch suspension but I have not yet fitted the diff drop kit.. So Its a town vehicle until the diff drop kit goes in!
Cheers Skottie
Why Drink And Drive When You Can DriFt And Slide?!
-
Skitz-4x4 - Posts: 166
- Joined: Tue, 11 Sep 2012 1:51 +0000
- Location: Townsville, Qld
Re: How to replace a driveshaft
![]() by white_hilux on Fri, 31 Jan 2014 2:28 +0000
by white_hilux on Fri, 31 Jan 2014 2:28 +0000
kyle300exc wrote:You tried levering with 2 large flat screw drivers either side of the axle where it meets the diff housing?
Yeah I've tried two huge screw drivers, pry bars, racket straps and hammers.
Ben
2006 SR Extra Cab
2" lift, 32" Bighorns, F & R Diff Locked, Rock sliders, TJM Bullbar and Winch
Even if you are on the right track, you'll get run over if you just sit there
2006 SR Extra Cab
2" lift, 32" Bighorns, F & R Diff Locked, Rock sliders, TJM Bullbar and Winch
Even if you are on the right track, you'll get run over if you just sit there
-
white_hilux - Posts: 1791
- Joined: Wed, 07 Jul 2010 7:50 +0000
- Location: Holland Park, QLD
Re: How to replace a driveshaft
![]() by kyle300exc on Fri, 31 Jan 2014 2:52 +0000
by kyle300exc on Fri, 31 Jan 2014 2:52 +0000
Not sure dude it shouldn't be that hard.
Kyle
Never, under any circumstances, take a sleeping pill and a laxative on the same night.
Never, under any circumstances, take a sleeping pill and a laxative on the same night.
-
kyle300exc - Moderator
- Posts: 8567
- Joined: Mon, 20 Sep 2010 12:32 +0000
- Location: Narellan
Re: How to replace a driveshaft
![]() by white_hilux on Fri, 31 Jan 2014 3:41 +0000
by white_hilux on Fri, 31 Jan 2014 3:41 +0000
I finally got it but in the process the dust hat came off which is now a pain to put back on the retaining clips. On top of that the seal that I was going to replace looks fine
Ben
2006 SR Extra Cab
2" lift, 32" Bighorns, F & R Diff Locked, Rock sliders, TJM Bullbar and Winch
Even if you are on the right track, you'll get run over if you just sit there
2006 SR Extra Cab
2" lift, 32" Bighorns, F & R Diff Locked, Rock sliders, TJM Bullbar and Winch
Even if you are on the right track, you'll get run over if you just sit there
-
white_hilux - Posts: 1791
- Joined: Wed, 07 Jul 2010 7:50 +0000
- Location: Holland Park, QLD
Re: How to replace a driveshaft
![]() by kyle300exc on Fri, 31 Jan 2014 3:44 +0000
by kyle300exc on Fri, 31 Jan 2014 3:44 +0000
Well done Im sure a cold beer will make it all feel better. 
Kyle
Never, under any circumstances, take a sleeping pill and a laxative on the same night.
Never, under any circumstances, take a sleeping pill and a laxative on the same night.
-
kyle300exc - Moderator
- Posts: 8567
- Joined: Mon, 20 Sep 2010 12:32 +0000
- Location: Narellan
Re: How to replace a driveshaft
![]() by Cruiserdog on Fri, 31 Jan 2014 5:40 +0000
by Cruiserdog on Fri, 31 Jan 2014 5:40 +0000
Yeah I've tried two huge screw drivers, pry bars, racket straps and hammers.[/quote]
Might be worth getting yourself a slide-hammer mate. You can pick them up pretty cheap and it makes getting the cv out real easy. Also cuts down the chance of wrecking the seal and munting the dust cover. Plus you don't have to crawl around underneath the truck either!!!
Might be worth getting yourself a slide-hammer mate. You can pick them up pretty cheap and it makes getting the cv out real easy. Also cuts down the chance of wrecking the seal and munting the dust cover. Plus you don't have to crawl around underneath the truck either!!!
- Cruiserdog
Re: How to replace a driveshaft
![]() by white_hilux on Fri, 31 Jan 2014 9:01 +0000
by white_hilux on Fri, 31 Jan 2014 9:01 +0000
I really just to get it fixed so I can sell it soon
Ben
2006 SR Extra Cab
2" lift, 32" Bighorns, F & R Diff Locked, Rock sliders, TJM Bullbar and Winch
Even if you are on the right track, you'll get run over if you just sit there
2006 SR Extra Cab
2" lift, 32" Bighorns, F & R Diff Locked, Rock sliders, TJM Bullbar and Winch
Even if you are on the right track, you'll get run over if you just sit there
-
white_hilux - Posts: 1791
- Joined: Wed, 07 Jul 2010 7:50 +0000
- Location: Holland Park, QLD
Re: How to replace a driveshaft
![]() by Diezel45 on Mon, 10 Mar 2014 12:07 +0000
by Diezel45 on Mon, 10 Mar 2014 12:07 +0000
Hilux Max wrote:This thread is going to be your number one resource on how to replace a front driveshaft on your hilux.
To better understand your front end here is a layout of components.Front Suspension Layout showing location of front driveshaft
Driveshaft Assembly Diagram
And here is the exerpt from the Toyota Workshop Manual that shows you how to do it going by the book.Front Driveshaft Removal Instructions
1. REMOVE FRONT WHEEL
2. DRAIN DIFFERENTIAL OIL
3. REMOVE FRONT AXLE HUB GREASE CAP
4. REMOVE FRONT AXLE HUB NUT
a - Remove the cotter pin and adjusting cap.
b - Remove the axle hub nut.
5. REMOVE FRONT SPEED SENSOR LH
a - Remove the bolt and speed sensor.
b - Disconnect the 2 clamps.
c - Remove the bolt and disconnect the speed sensor wire harness from the steering knuckle.
6. DISCONNECT TIE ROD END SUB-ASSEMBLY
a - Remove the cotter pin and nut.
b - Using SST, disconnect the tie rod end from the steering knuckle.
SST 09628-62011
7. DISCONNECT FRONT SUSPENSION LOWER ARM ASSEMBLY WITH ATTACHMENT
a - Remove the 2 bolts and disconnect the suspension arm from the steering knuckle.
8. REMOVE FRONT DRIVE SHAFT ASSEMBLY
a - Using SST, tap out the drive shaft.
SST 09520-01010 09520-24010 (09520-32040)
NOTICE: Be careful not to damage the oil seal.
How to replace your front driveshaft when offroad?
Pretty much the same method as above but you improvise a little.
Tools Required to be carried -
1. Replacement Driveshaft
2. Some sort of Jack to raise vehicle
3. Small Crowbar or Long chisel/Cold Punch of some form or Flat head Screwdriver.
4. Medium Sized Hammer
5. Small Flathead Screwdriver
6. 10mm spanner/socket for speed sensor nut
7. 17mm spanner with a 6mm Allen Key to remove Sway Bar Link from Steering Knuckle
8. 19mm single Hex socket and breaker bar for 2 x lower bolt joint to hub bolts.
9. 35mm Single Hex socket
10. 21mm socket for wheel nuts.
Process for Changing Driveshaft Offroad
1. Find some flat clear ground to park your vehicle where your not going to bother anyone and is safe.
2. Jack up the side of the vehicle that needs the driveshaft replaced.
3. Remove Wheel on that side and place below the vehicle chassis rails as a safety precaution in case the jack lets go.
4. With hammer and small flathead screwdriver gently tap off the grease cap off the hub.
5. With the same screwdriver straighten out the cotter pin and gently tap it ou with the hammer and screwdriver.
6. Remove cotter pin and adjusting cap.
7. Get someone to put their foot on the brake pedal and with the 35mm single hex nut and breaker bar, very carefully put pressure and loosen driveshaft nut.
Note: you will be using considerable force/leverage to loosen this nut, be careful not to slip as you risk knocking yourself out on the disc brake!
8. Remove 10mm bolt holding speed sensor and carefully place speed sensor on the side, even tie it up. Do not touch the face of the sensor.
9. Use 17mm spanner over the nut whilst holding the 6mm allen key within the nut to loosen it and remove swaybar link.
10. Use breaker bar and 19mm single hex socket to remove lower 2 balljoint to hub bolts.
Note: as the bolts come loose the lower control arm "may" jerk downwards with pressure from the coil over releasing.
11. Using a piece of wood, rest it onto the end of the driveshaft and give the wood a couple taps with the hammer to loosen the outer stub in the hub.
12. Get someone to leverage the hub, out and forwards whilst you pull the outer stub out of the hub from the inner side.
13. Use the hammer and chisel/screwdriver etc and place the chisel/screwdriver against the ribs on the inner driveshaft cup angled outwards. Give a couple hard taps, and driveshaft should come loose out of the diff housing.
Note:
- Be careful not to damage the driveshaft seal on the diff housing.
- Do not drop the driveshaft so as to damage the splines on rocks.
- Reverse is the same except to note that the C-Clip at the end of the driveshaft on the inner stub should be positioned with the open end facing downwards as you push it back into the diff housing. Do not attempt to fit outer stub through hub until inner stub has seated fully.
Appendices
Toyota GSIC link - http://toyota.esealtd.com/toyota/hilux/repair2/html/frame_rm000000zz9000x.html
Pdf File Link to workshop manual Instructions (05+Tacoma-USA) - http://www.ncttora.com/fsm/05+/data/ileaf/06toyrm/06toypdf/06rmsrc/rm2006ta/03600.pdf


any chance someone has one of these downloaded on there computer with the pictures still on there? I cant seem to get the CV out of the hub. have read over this many times and I cant seem to work it out. I know everyone says its fool proof, but im a pretty big fool so I dunno haha
cheers
-

Diezel45 - Posts: 537
- Joined: Sat, 29 Dec 2012 5:32 +0000
Re: How to replace a driveshaft
![]() by Hilux Max on Tue, 25 Mar 2014 1:50 +0000
by Hilux Max on Tue, 25 Mar 2014 1:50 +0000
Have you undone the lower ball joint bracket bolts?
Theres 2 x 19mm bolts from underneath.
Once you undo this, place a block of wood over the end of the cv shaft and give it a couple light taps.
Then level the hub/steering knuckle assem out and forward out of the way, and the cv shaft will drop out of the hubs splines.
Theres 2 x 19mm bolts from underneath.
Once you undo this, place a block of wood over the end of the cv shaft and give it a couple light taps.
Then level the hub/steering knuckle assem out and forward out of the way, and the cv shaft will drop out of the hubs splines.
The Punisher 2.0 N80 Build - http://www.newhilux.net/phpbb/viewtopic.php?f=119&t=26631
The Punisher 1.0 N70 Build - http://www.newhilux.net/phpbb/viewtopic.php?f=41&t=747&hilit=Punisher
The Punisher 1.0 N70 Build - http://www.newhilux.net/phpbb/viewtopic.php?f=41&t=747&hilit=Punisher
-

Hilux Max - Valued Contributor
- Posts: 12434
- Joined: Sun, 07 Jan 2007 12:00 +0000
Re: How to replace a driveshaft
![]() by JOEKA on Thu, 17 Apr 2014 7:56 +0000
by JOEKA on Thu, 17 Apr 2014 7:56 +0000
Ahhh I need piks.
I've got a problem with my 06' SR5, manual, 50mm lift at the front...
When driving, its got this rough thudder from the front left that sounds as if it only happens like every 4th rotation of the tyre.
Thinking it might of been the front wheel bearing, I changed it and the front hub too, what a job that was, lol. But yes, the sound is still there.
I was also told, to check if you need new driveshafts, you full lock it to the left and right and listen for clicking sounds, I can't hear any clicking. Does this mean its a little more serious than the driveshaft?
Any help would be much appreciated.
- JOEKA
- Posts: 7
- Joined: Thu, 17 Apr 2014 7:20 +0000
Re: How to replace a driveshaft
![]() by Hilux Max on Fri, 25 Apr 2014 6:32 +0000
by Hilux Max on Fri, 25 Apr 2014 6:32 +0000
Check rear wheel bearings. when my rear wheel bearing was noisy it sounded like it was coming from the front. replaced both front unneccessarily as the noise was still there till the bearing let go. once fixed, noise gone.
The Punisher 2.0 N80 Build - http://www.newhilux.net/phpbb/viewtopic.php?f=119&t=26631
The Punisher 1.0 N70 Build - http://www.newhilux.net/phpbb/viewtopic.php?f=41&t=747&hilit=Punisher
The Punisher 1.0 N70 Build - http://www.newhilux.net/phpbb/viewtopic.php?f=41&t=747&hilit=Punisher
-
Hilux Max - Valued Contributor
- Posts: 12434
- Joined: Sun, 07 Jan 2007 12:00 +0000
Re: How to replace a driveshaft
![]() by Torsion on Thu, 07 Aug 2014 9:47 +0000
by Torsion on Thu, 07 Aug 2014 9:47 +0000
235NM torque on the axle nut for a >2tonne vehicle.
Man a 500kg Yamaha Rhino side by side axle nut is 350NM!!!!
Whats the Jap's doing these days?
Man a 500kg Yamaha Rhino side by side axle nut is 350NM!!!!
Whats the Jap's doing these days?
-
Torsion - Posts: 382
- Joined: Mon, 07 Jan 2008 2:00 +0000
- Location: Mulgoa NSW
Re: How to replace a driveshaft
![]() by Torsion on Sat, 09 Aug 2014 12:08 +0000
by Torsion on Sat, 09 Aug 2014 12:08 +0000
Fella's looking for visual / pictures to help with this repair or replacement, try this link;
http://www.moranbahweather.com/toyota/h ... 9000x.html
http://www.moranbahweather.com/toyota/h ... 9000x.html
-
Torsion - Posts: 382
- Joined: Mon, 07 Jan 2008 2:00 +0000
- Location: Mulgoa NSW
Re: How to replace a driveshaft
![]() by Richiesupercharged on Thu, 13 Nov 2014 7:56 +0000
by Richiesupercharged on Thu, 13 Nov 2014 7:56 +0000
Hilux Max wrote:Just to add....the Monster Rides Driveshaft Tool is an awesome bit of gear to have in your offroad toolkit aswell. It is very strong and can be used as both a breaker bar, chisel, and has a 35mm single hex cutout thats perfect for the driveshaft nut -
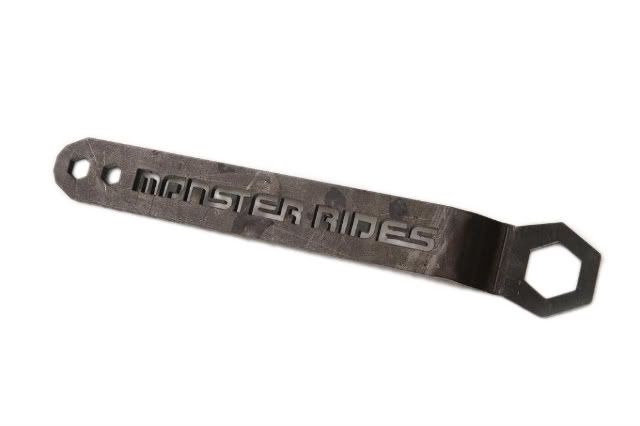
Are these still available ?
-
Richiesupercharged - Posts: 557
- Joined: Fri, 28 Sep 2012 8:47 +0000
- Location: Newcastle
Return to Drive Train Components
Who is online
Users browsing this forum: No registered users and 31 guests
![]()