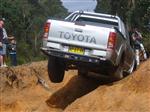
I had a Hilux (well a Vigo if you want to split hairs) for about 6 years - I imported it from the Far East back when grey importing was the done thing. 100,000 miles+ later I was in a position to buy a new one - it must be noted that my previous one had never ever missed a beat and the biggest bill it ever had was when the A/C went last summer, aside from that it was brake pads and the odd shock.
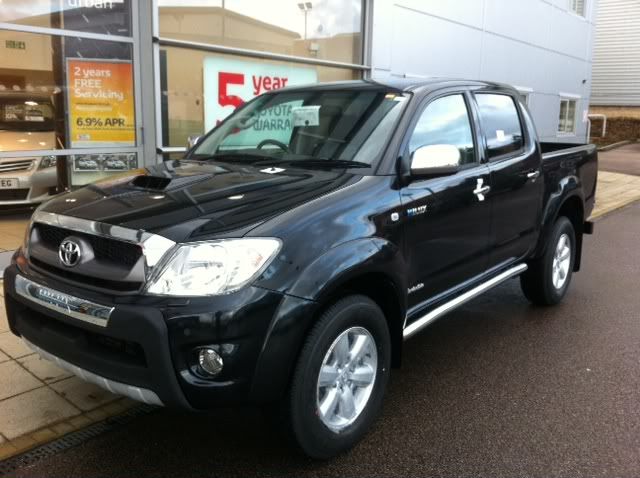
I got my new MK 6 pretty much the week the new 2012 model came out. I went up to Milton Keynes Toyota and had a look, personally I couldn't really see where all the extra cash was going, plus the new front end in my opinion looked a bit too car-like, a stick on reverse camera and some 'special' audio/nav system. They also had a 2011 Hilux Invincible auto which was apparently (?) a cancelled customer order which had every optional extra going. After some negotiation we came to 21k plus VAT (which we get back). SOLD
I knew from the off what I wanted to do to this truck as I'd been thinking about mods for my previous Hilux for a few years but never did much about it aside from a few speakers, headunit and a remap.
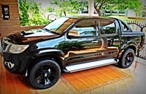
Whilst I still had my old truck I did some renderings of what my next one could look like with a few added extras - halo lights, fender flares, different wheels, lift kit and of course everything in black. I was also thinking about a matte black wrap - hence why the pictures look grey:
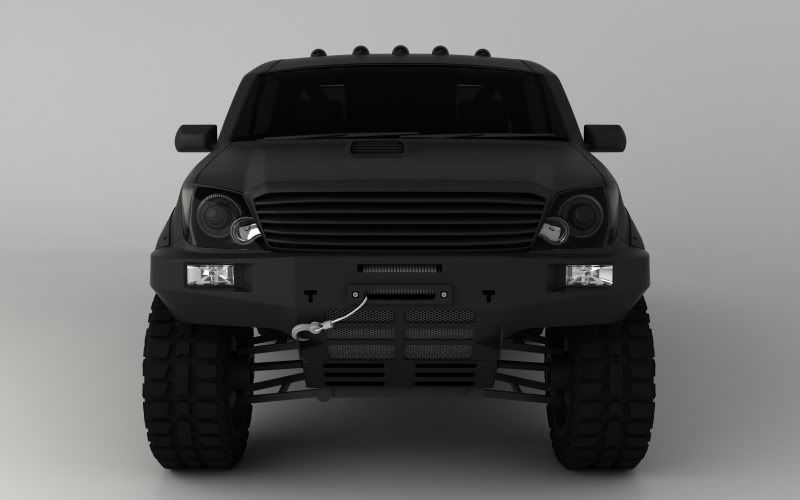
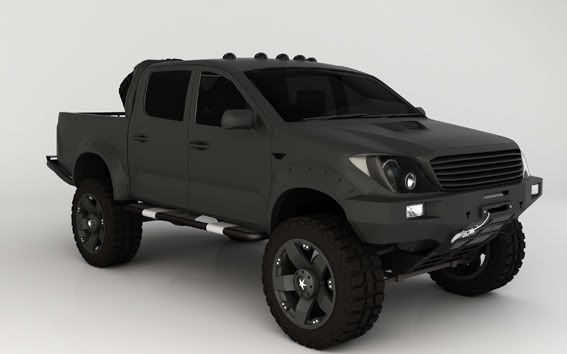
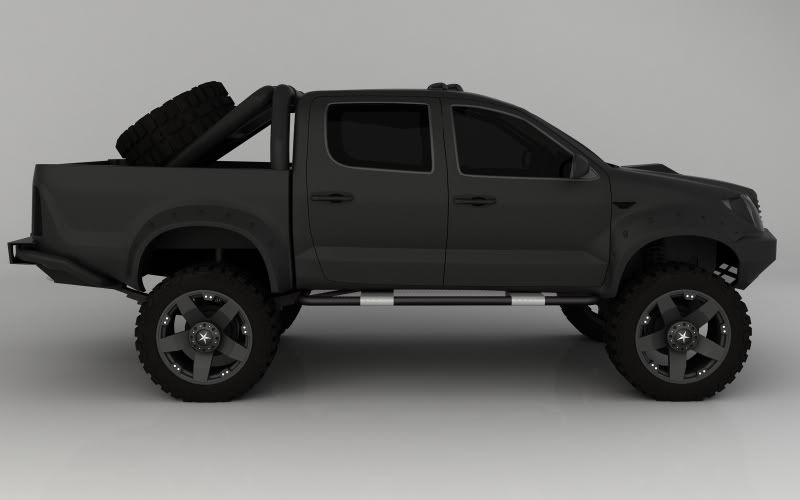
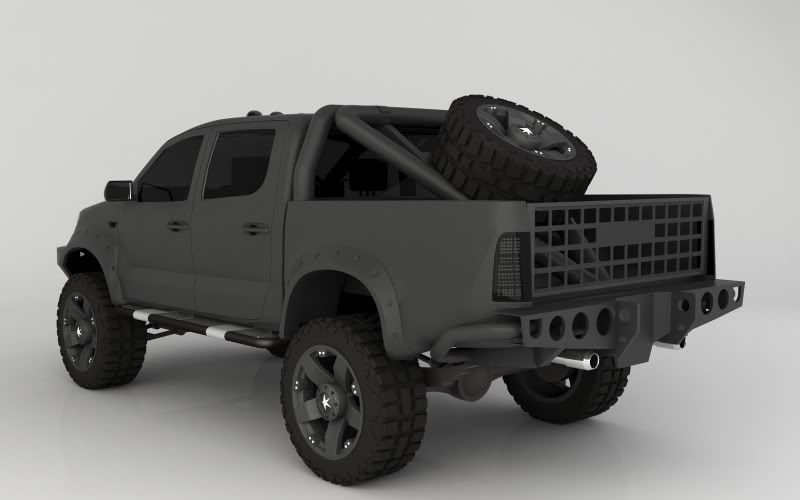
What I want to build is a truck that I would be happy to be driving around in should the 2012 end of the world predictions come true or we have a mass pandemic and eventual zombie uprising - hence I'll be calling my special edition Hilux the "Apocalypse" (yes this is my inner child speaking to you right now, bear with me!).
What follows now is a pretty comprehensive list of what will be going into the truck:
Exterior:
1. Custom roof rack and ladder
2. Rear custom bumper
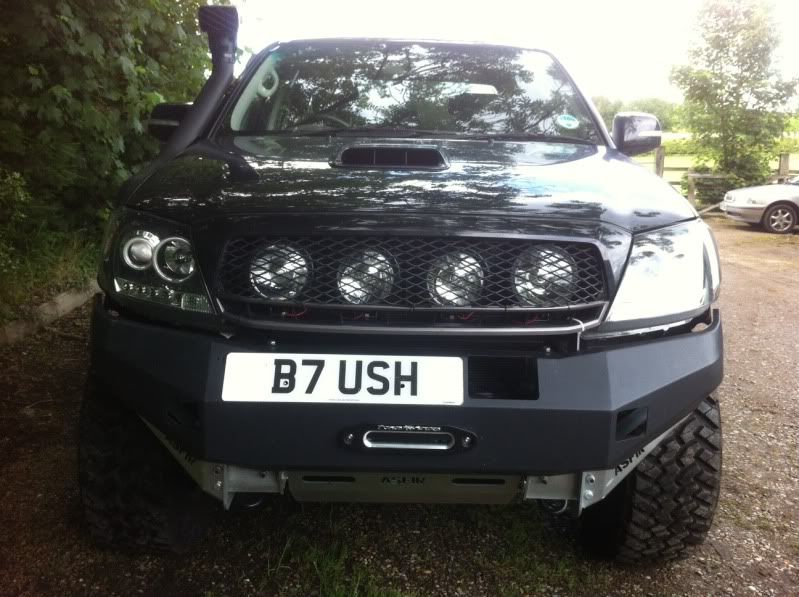
3. Front ASFIR winch bumper
4. Warn 9000 XD winch
5. 17 x 9 black KMC XD ADDICT wheels
6. 295/70/17 Nitto Trail Grappler MTs
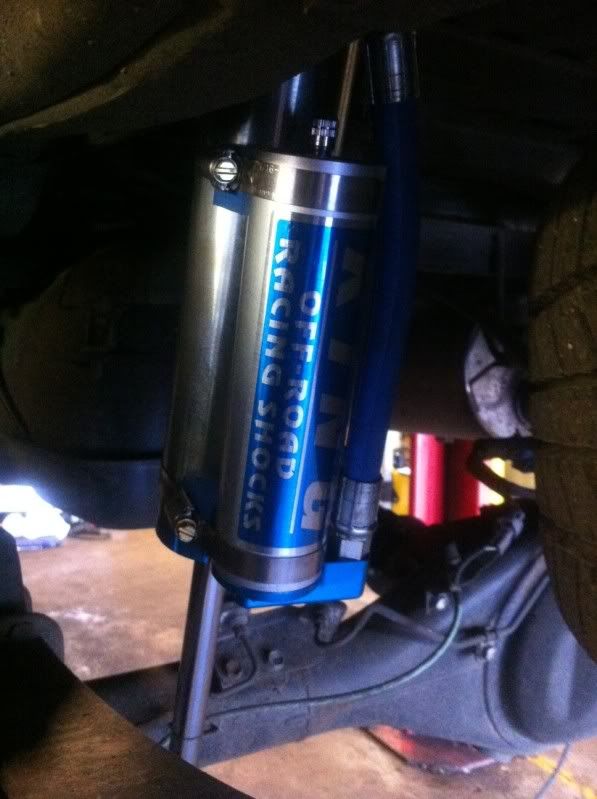
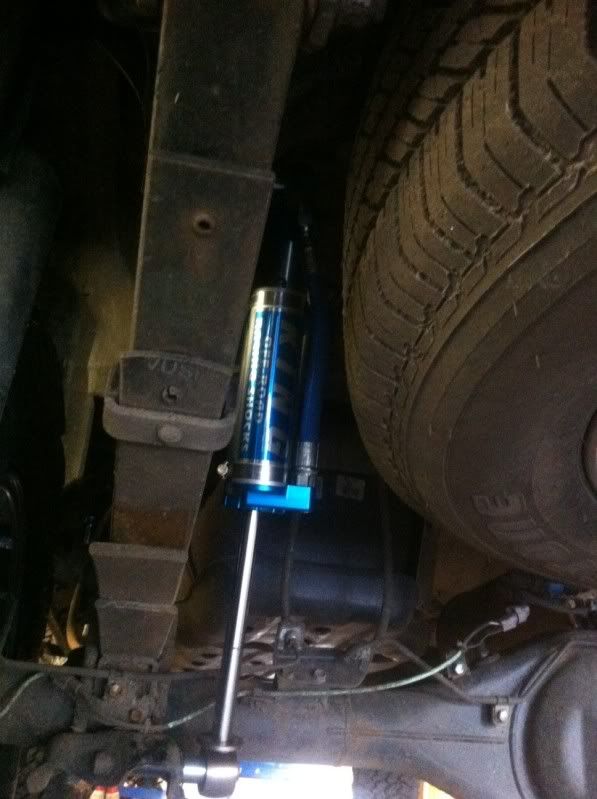
7. King Shocks front and rear + coil over
8. Fender flares
9. TRD style front grill - custom made
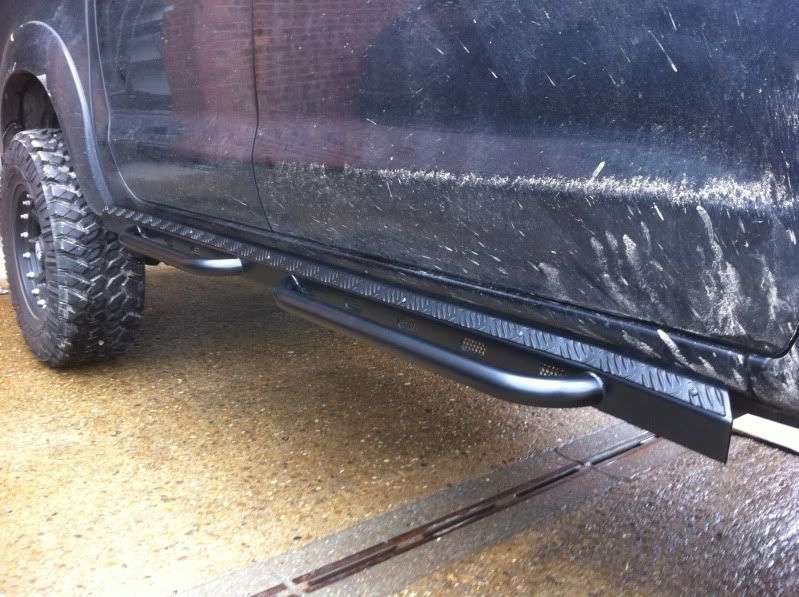
10. Custom designed and made side steps
11. ASFIR engine bash guard
12. Tint all windows
13. 4 x 7" HID spots mounted behind grill
14. Roof mounted 40" LED light bar (front)
15. 2 x 13.5" LED light bars roof mounted (rear)
16. Custom made chequer plate bed liner, powder coated matte black with black deckmaster floor and waterproof lights & versatie track kit anodised black.
17. Halo headlights
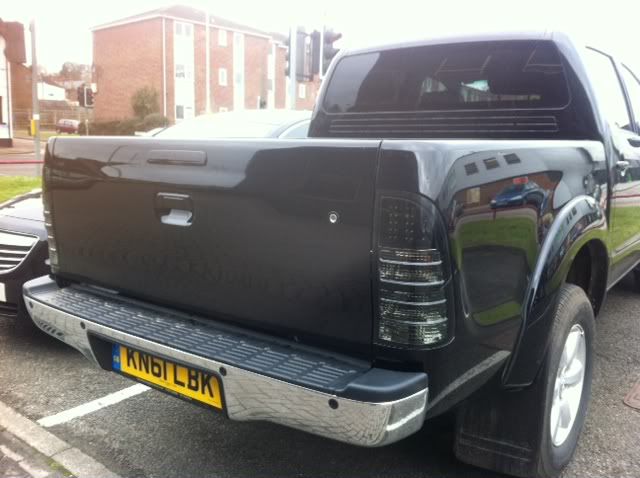
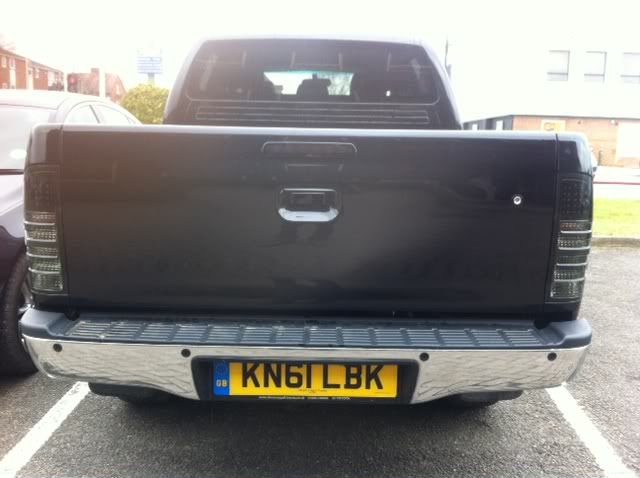
18. Smoked tail lights
19. Smoked 3rd brake light
20. Smoked side repeaters
21. Reverse camera
22. Snorkel
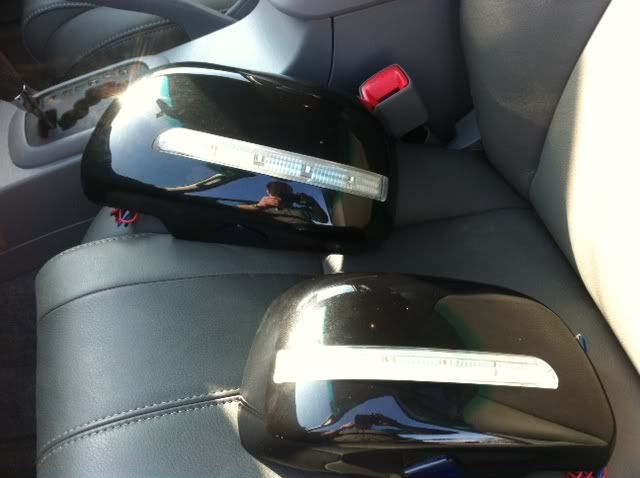
23. Wing mirror covers with LEDs
24. Colour code door handles, wing mirrors
Interior:
1. Pioneer F40BT 7" touch screen double DIN headunit
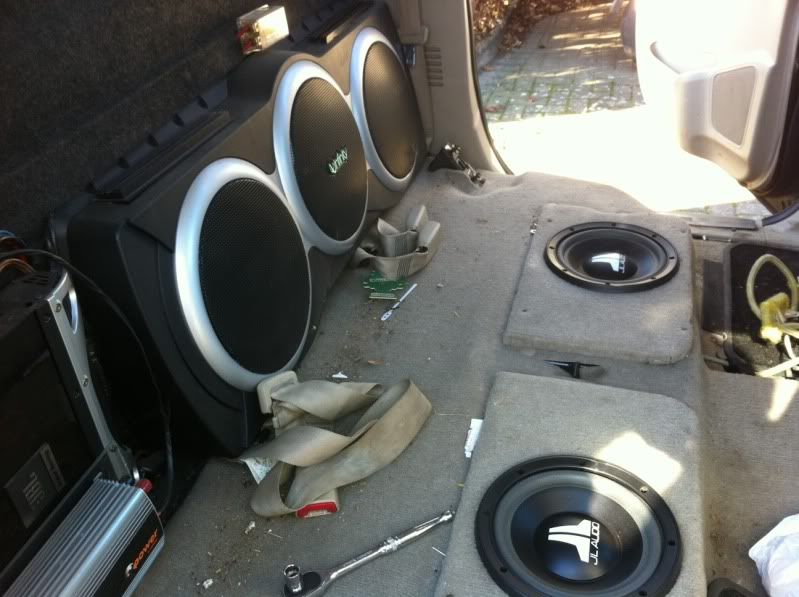
2. 2 x boxed shallow mount 12" Kicker subs
3. 2 x 7" JL Audio subs mounted in the floor under rear seats
4. 2 x 6.5" JL Audio C5 650 2 way door speakers and tweeters
5. 2 x 6" JL Audio C2-600 component speakers and tweeters for front doors
6. Remapped Steinbauer tuning box to boost furling and turbo boost pressure
7. Power pedal
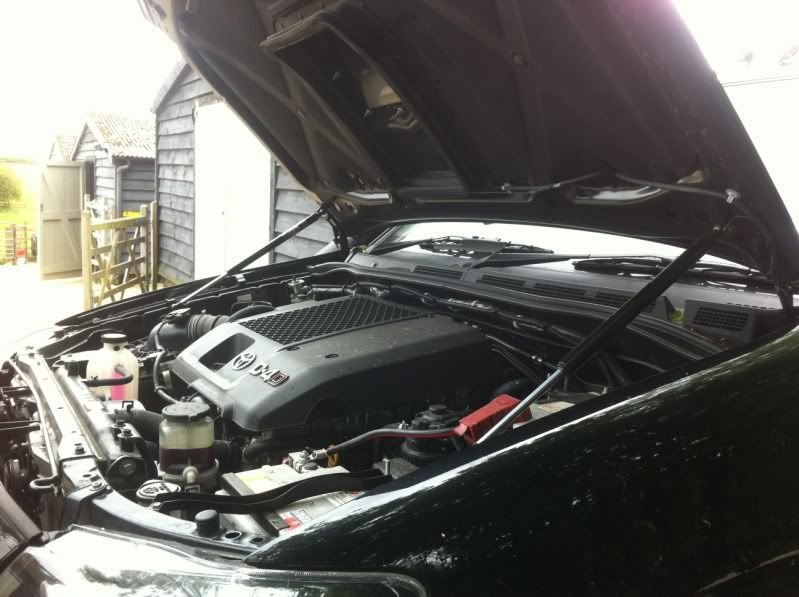
8. Engine bay strip lights
9. Bonnet gas lifts
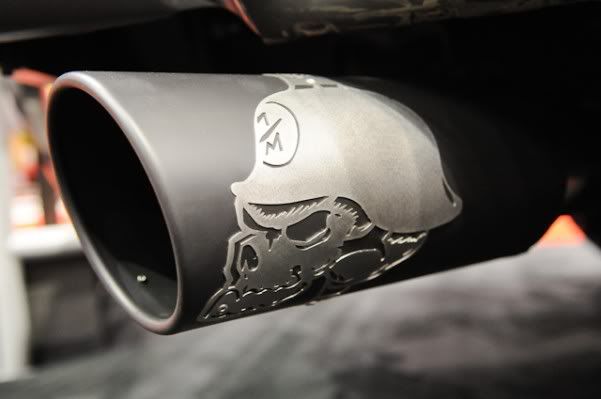
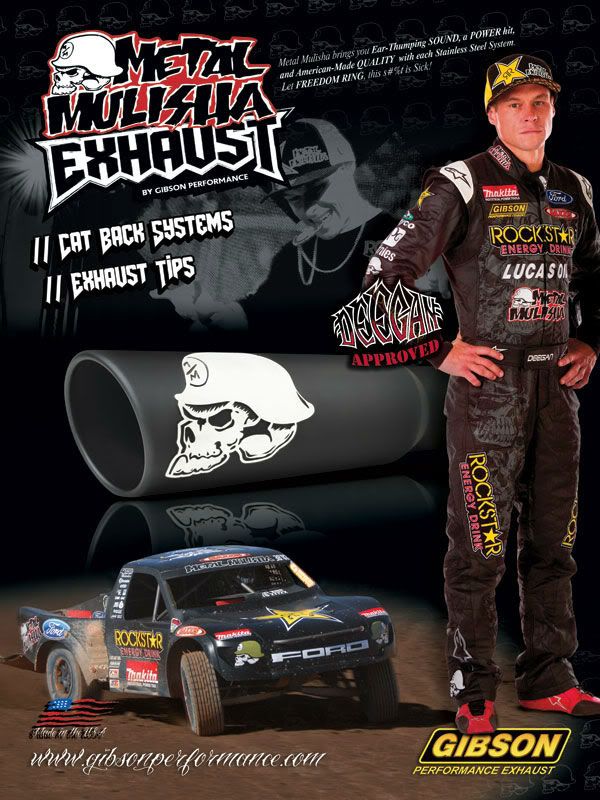
10. Full handmade exhaust system with Gibson Performance Metal Mulisha tips
11. Dynamat the entire cabin, to eliminate road noise from big tyres and improve stereo sound
12. Roof console fitted with various fighter pilot style switches for all the new aux lights
I started buying things way before I got my new truck - as you can imagine this lot will come to a tidy sum by the time I'm finished. To save money I have and will be making a few things myself and obviously doing all the install myself and roping in a few friends along the way
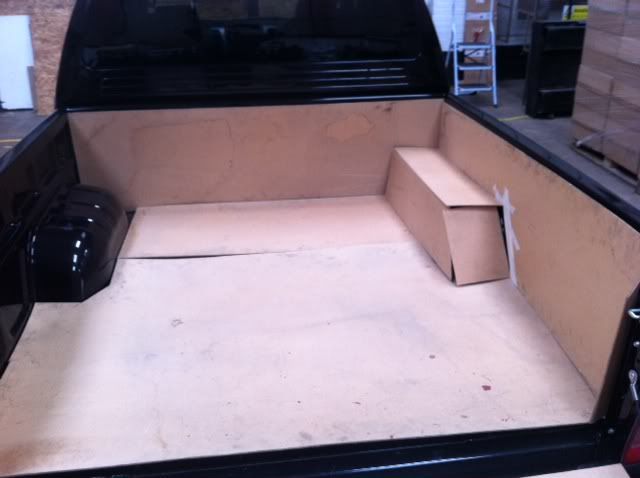
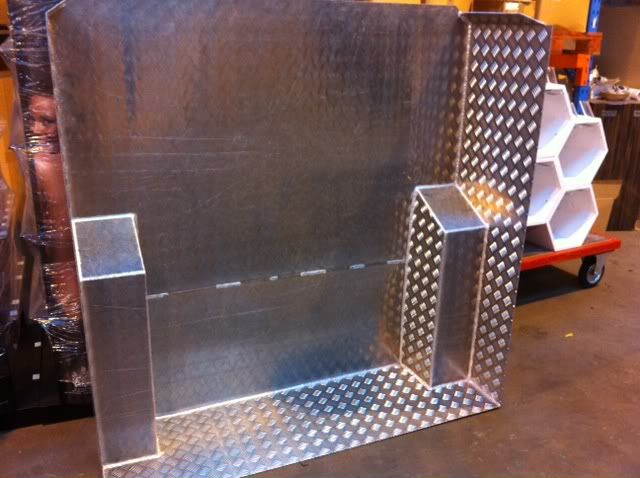
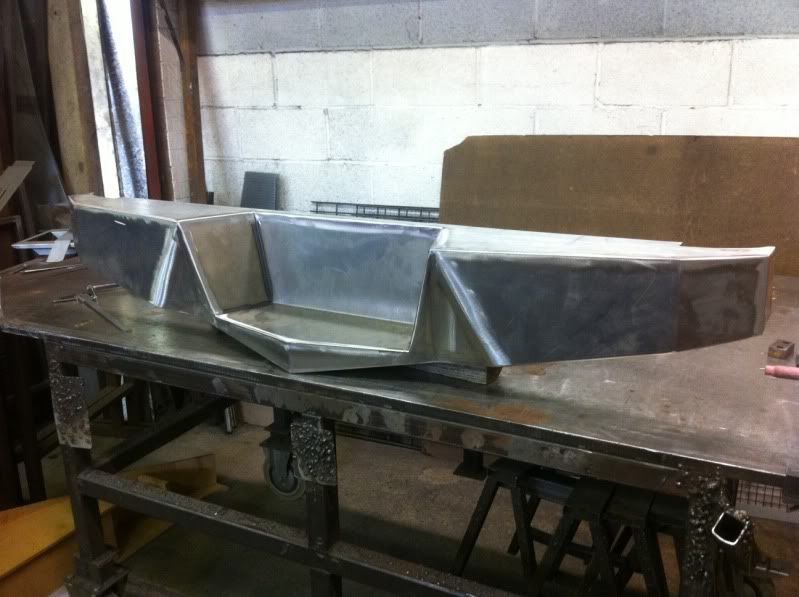
First home made effort was the bed liner. My last truck had a standard plastic over rail job which was great and served me well but there were two things I hated about it. 1. Anything you put in there had to be secured down (apart from 1 ton sand bags ) as the nylon liner was as slippery as oiled ice, and (2) the ridges in the floor were really uncomfortable to kneel on.
We had a load of chequer plate at work so I "borrowed" some! Made some hardboard templates and then cut out the metal.
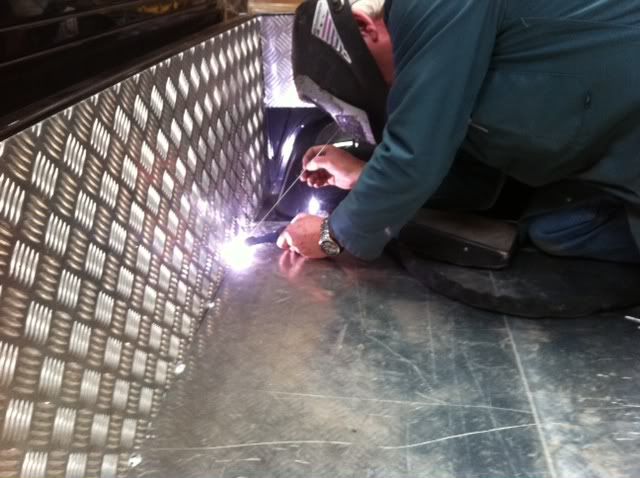
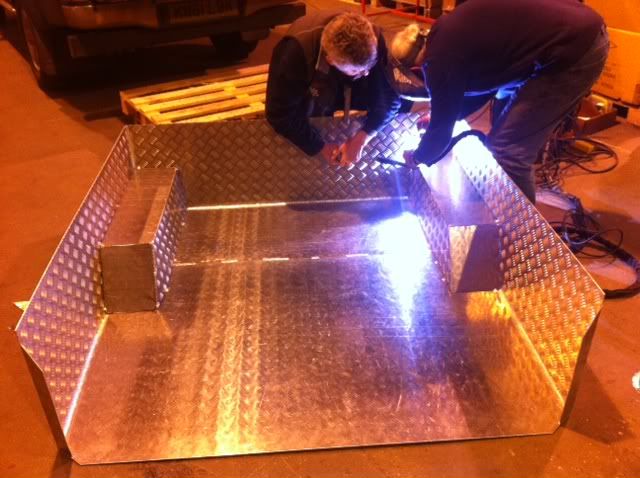
This is where the first of my friends were roped in. Ally welding is not my forte, but it is Rays!
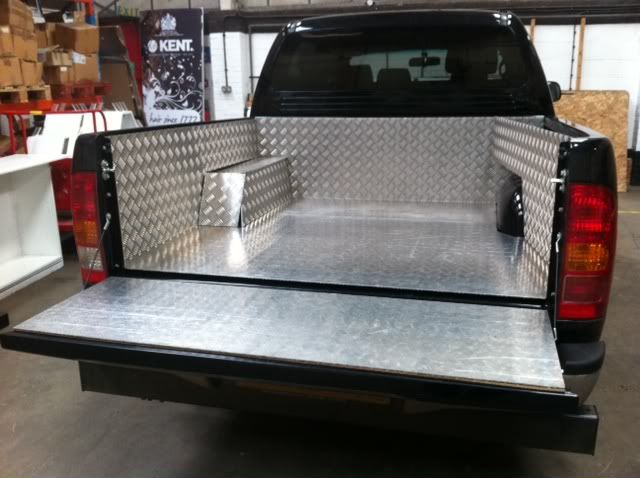
Next it was off to the powder coater for a splash of matte black: £50 oh and I also cut the holes for the waterproof LEDs
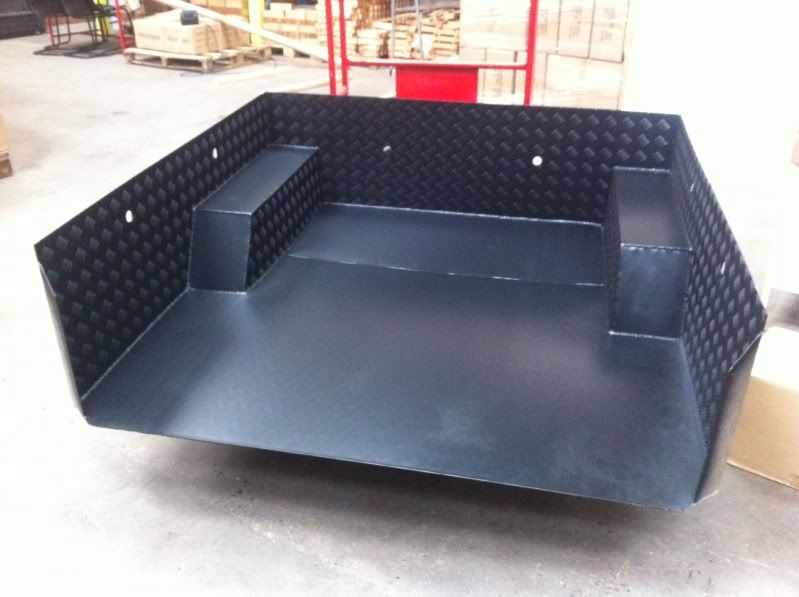
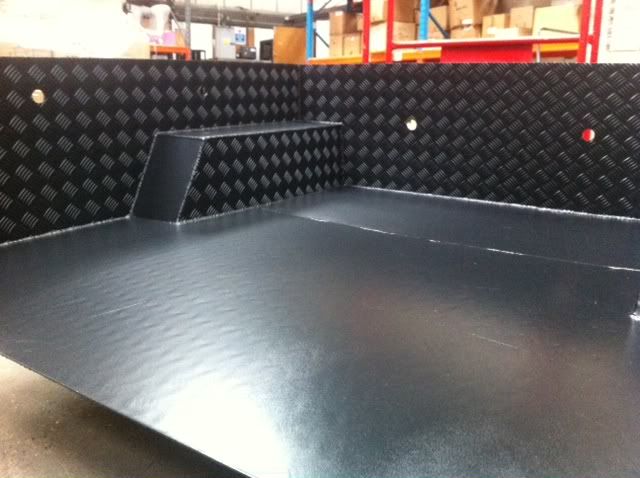
The reason there are some smooth surfaces in my bed liner is because I will be lining it with a product called Treadmaster. They use it on boat decks and lifeboats. Its extremely grippy and hard wearing - again I ordered it in black. It will be glued to the floor of the liner.
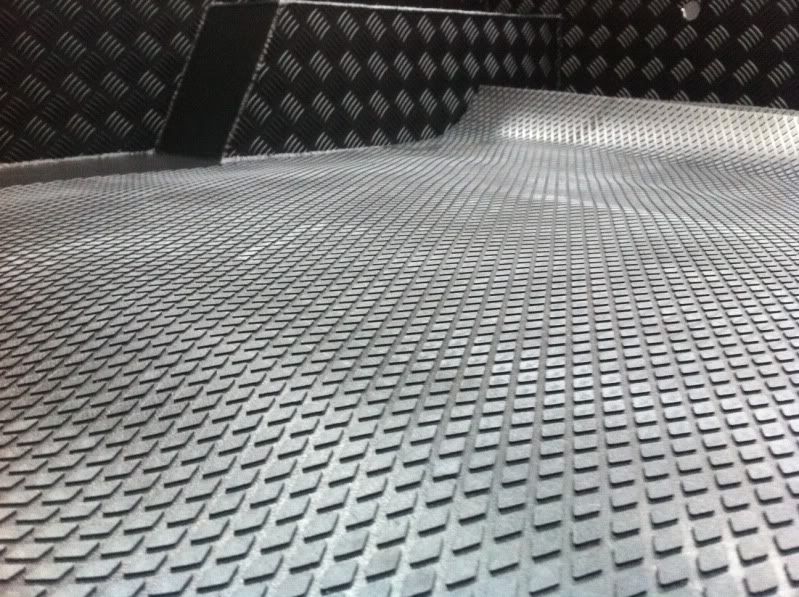
This is as far as I have got so far - the next job will be cutting and applying the Treadmaster, fitting the 6 waterproof lights and wiring them up to work off the tailgate, anodising a couple of lengths of tie down track that I have bought and then fitting the thing to the truck.
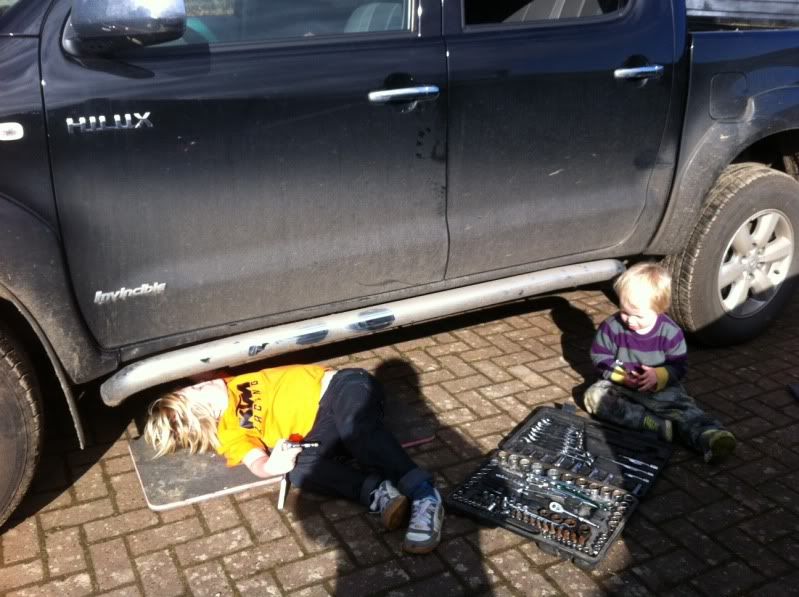
Next job was to remove the horrible chrome side bars:
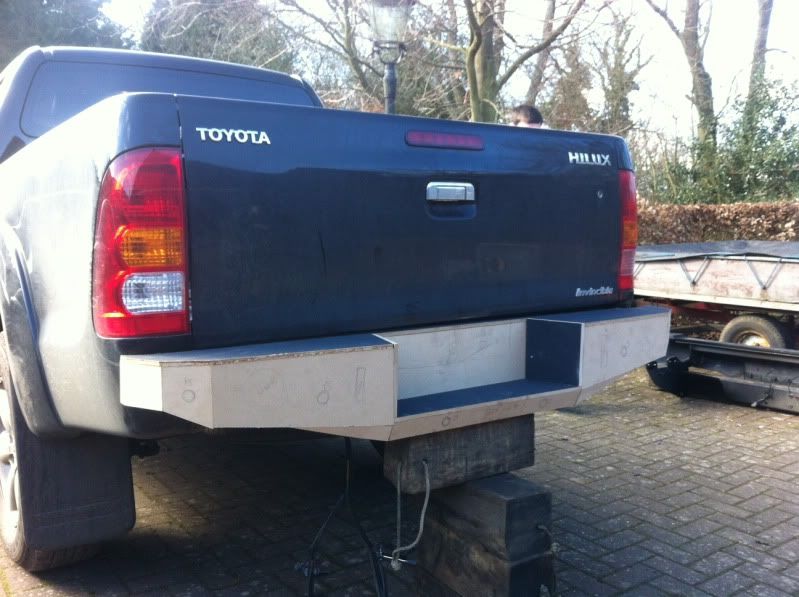
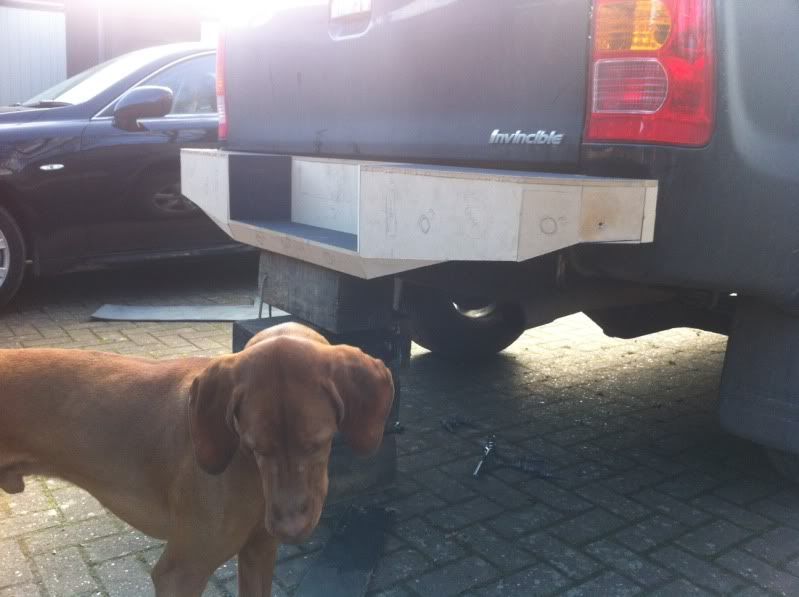
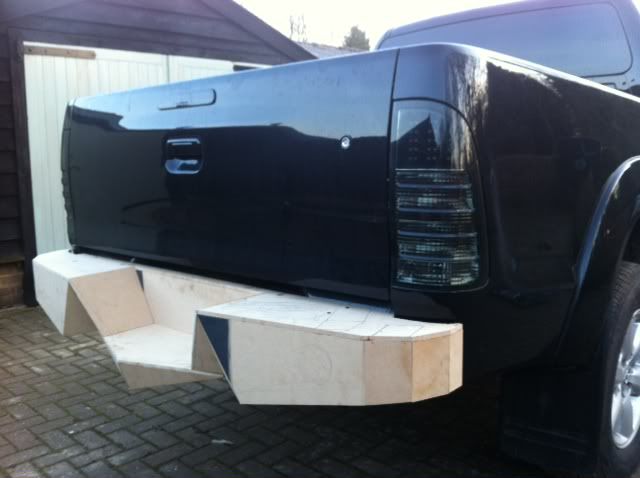
Next on the to-do list was to removed the rear bumper and again have a measure up. I'd mocked up an MDF version of what I might build as a rear winch bumper a few weeks ago, but this was done without removing the bumper and using guesstimate measurements. I also wanted to remove that ridiculous safety (?) bar that the modern trucks come fitted with - I guess it's there for the safety of people driving into the back of us? Nothing prepared me for how heavy that bloody thing was?!?! I might actually weigh it this week and post the results - it was totally ridiculous.
The MDF model fitted reasonably well. I need to make the walls at either end longer but apart from that I was quite happy - although I have been sketching a rear bumper that takes inspiration from the front valance of a Lamborghini Aventador. If I have time this week I might mock up another one to see what it looks like, but for now this is what I have:
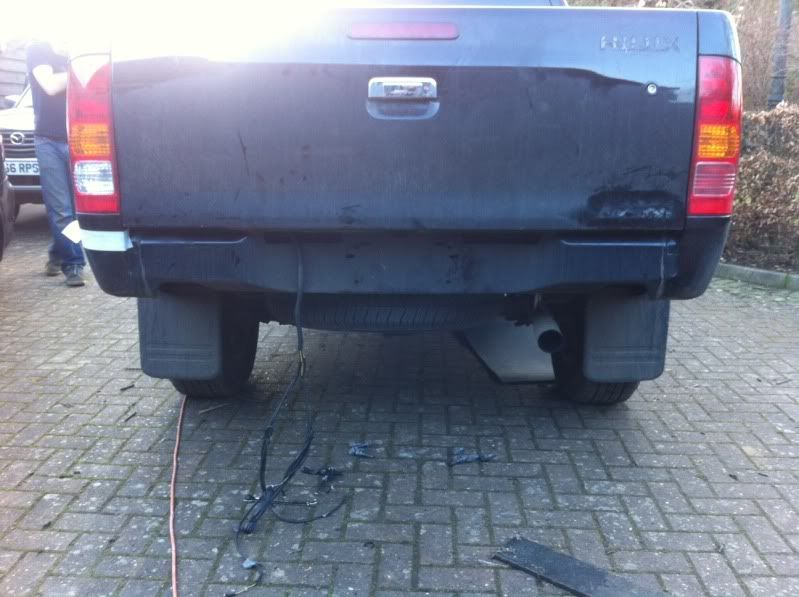
Final bit of Hilux play for saturday was remving the lead RSJ off the rear bumper. At first I thought I could just unbolt the bracket at either end but I quickly realised that on the exhaust exit end they have very kindly welded the bracket to the RSJ. Time to angle grind:
Result:
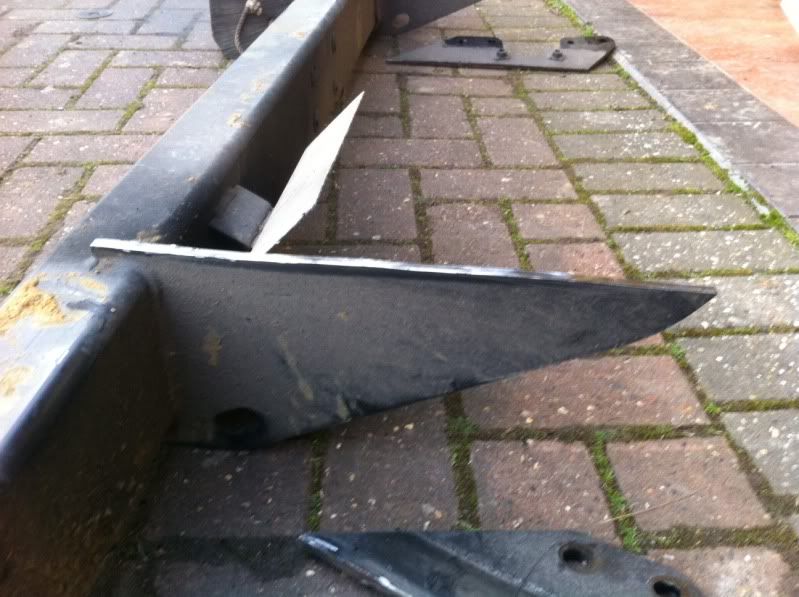
I swear I can feel a difference driving now that lump has been removed?!
Dropped the truck off with "Lee-the-paint" this morning to have all the door handles colour coded and the new LED wing mirror covers done as well. I also de-badged the whole thing but got bored of picking off the glue, so I've asked him to finish it off
Got the bits back from colour coding:
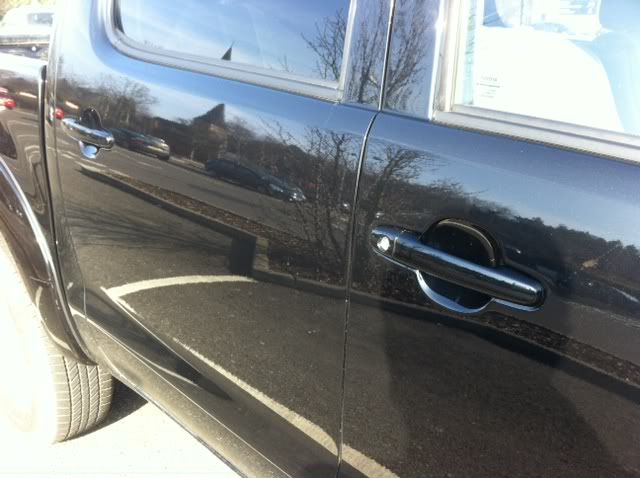
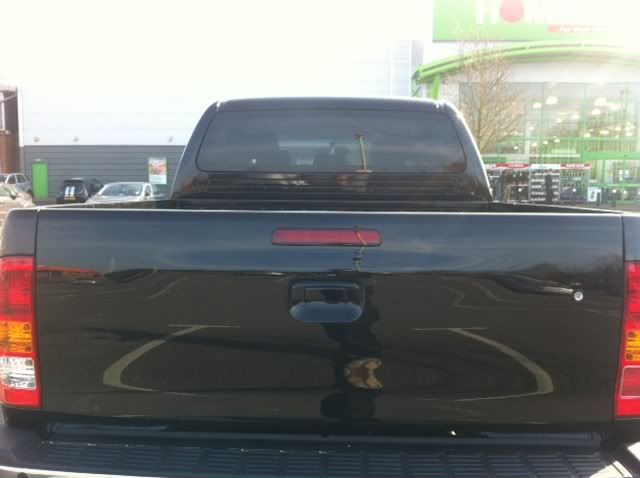
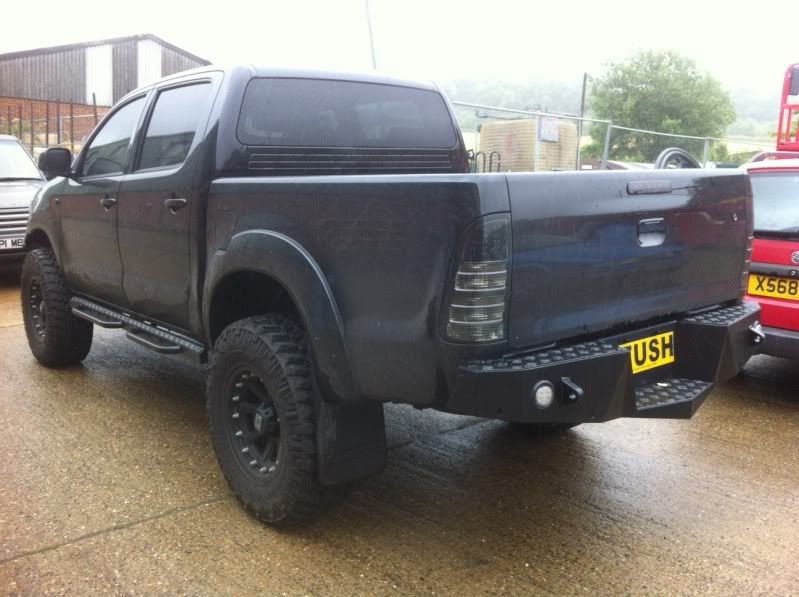
Next job was to change all my rear lights. Super easy job, just a matter of undoing a few screws and bolts, unplugging some plugs and replacing. The black/black stealth look has started.

The next job will be to fit my new wing mirror covers and at the same time wire them up to some new smoked side repeaters. I'm just trying to work out how to run the wires from the mirror covers (they don't replace the existing chrome covers - they simply fit over the top) - so I guess I have to drill a small hole in the existing covers and feed the wires through the mirror body?
Also knocked together a new look rear bumper model out of MDF which takes inspiration from the front end of the new Lambo - pics to follow.
BREAK
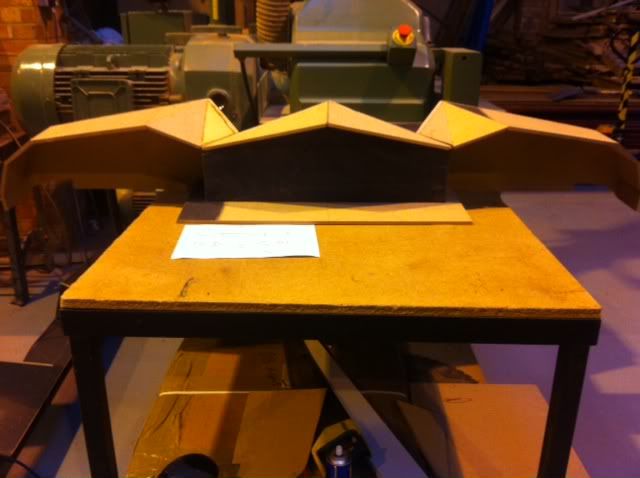
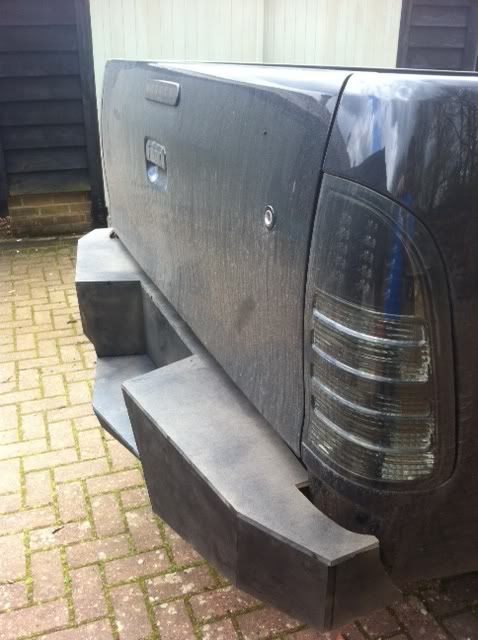
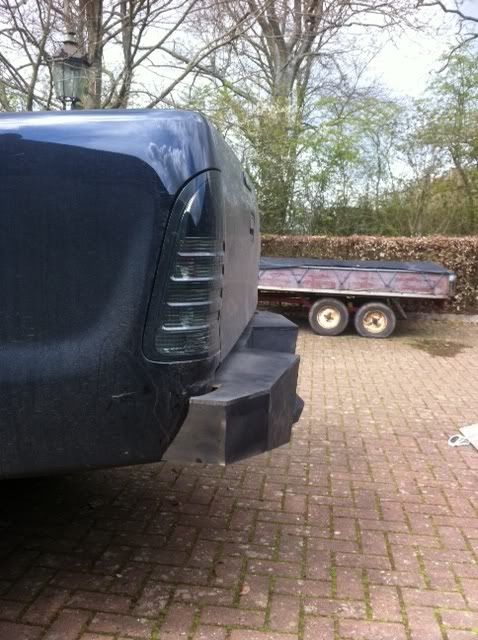
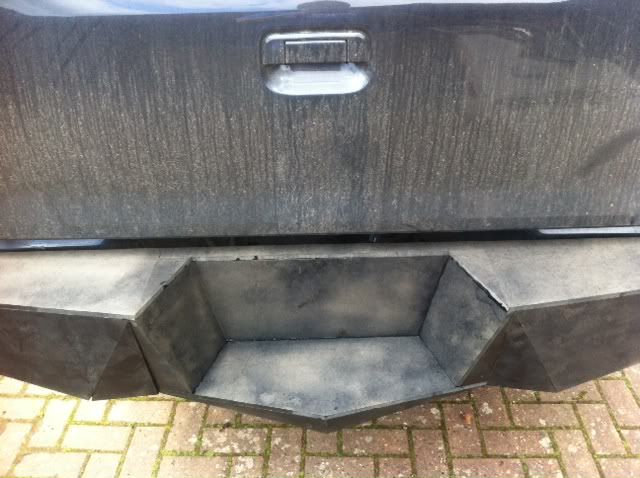
Just finished knocking together another MDF model of a potential rear winch bumper. This is the one that I took some inspiration from the nose of the new Lamborghini Aventador - the middle goes to a point but returns on itself. I think it looks pretty stealth fighter plane-like.

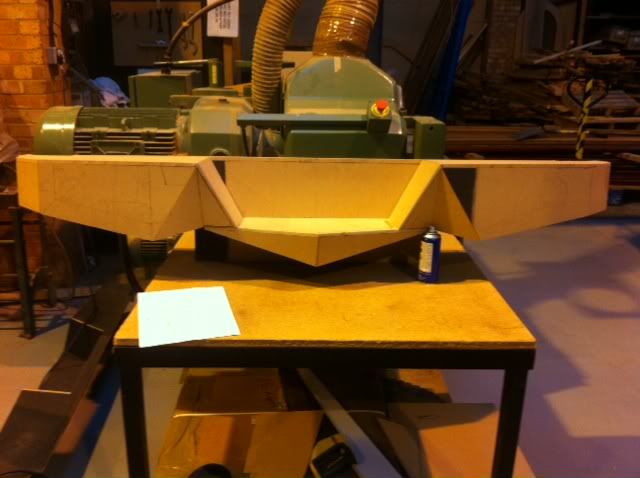
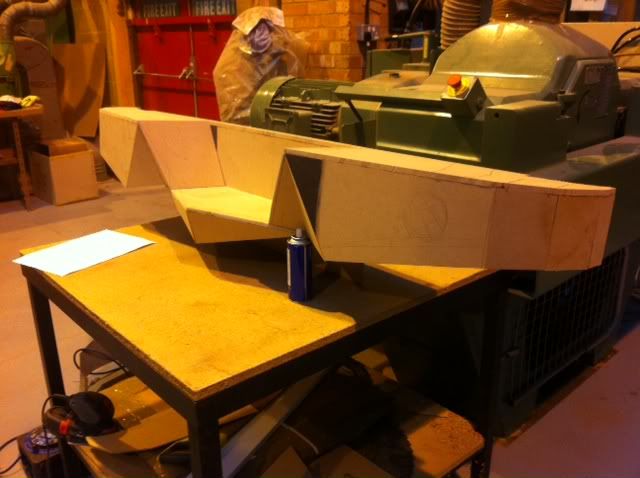

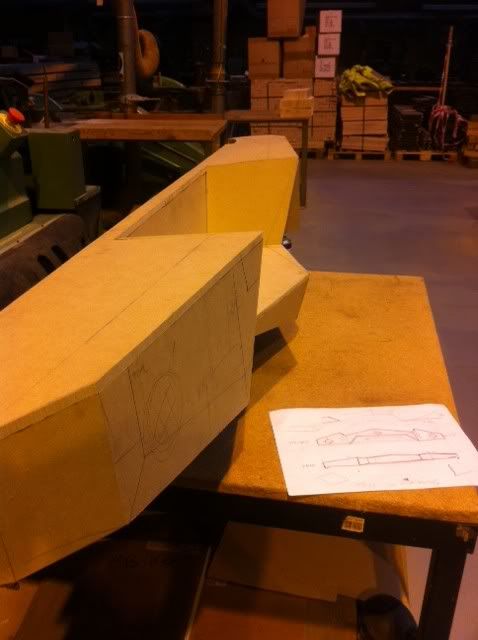
This is a shot of the underside - if I make this there will be a return of 2-3" all the way round the bumper.
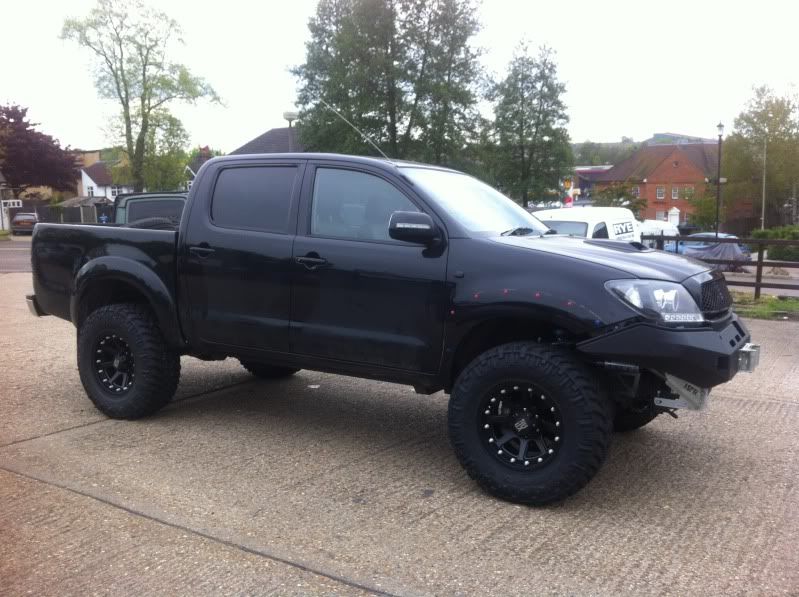
Finally had a chance to fit my new LED wing mirror covers yesterday after having them colour coded a couple of weeks ago. The covers literally fit over the existing mirrors with 3M tape - all I had to do was work out how to get the 3 wires into my mirror housing and through to the truck. I couldn't see any obvious gaps for squeezing the wires through so I ended up drilling a hole through my original chrome cover and into the folding mirror joint section where the electric mirror cables run. Then it was just a case of unbolting the mirrors from the truck body and feeding them through. I didn't have time to wire them up - I do that in a month or so when I do my stereo install. I've got a pair of tweeter mouldings to replace the standard mouldings, so for now I just let the wires bundled up inside the pillar.
The replacement covers fit well over 85% of the original wing mirror but one end (on both sides) was a bit crap - the 3M tape was a good 5mm off even touch the mirror housing - what I'll probably do is squirt a load of black silicone inside and around the gap to hold it in place, seal it up and finish it off.

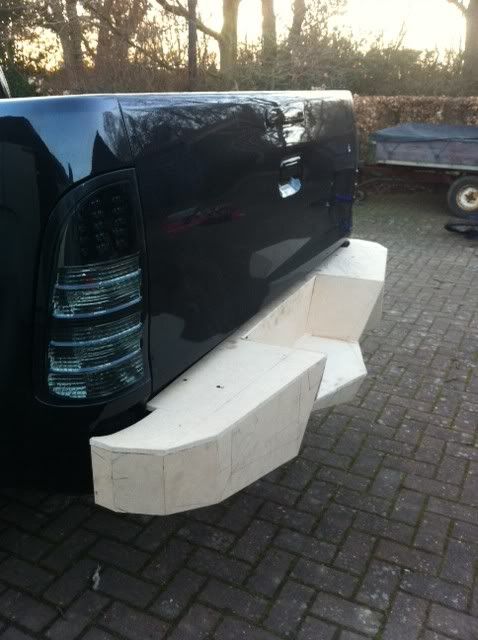
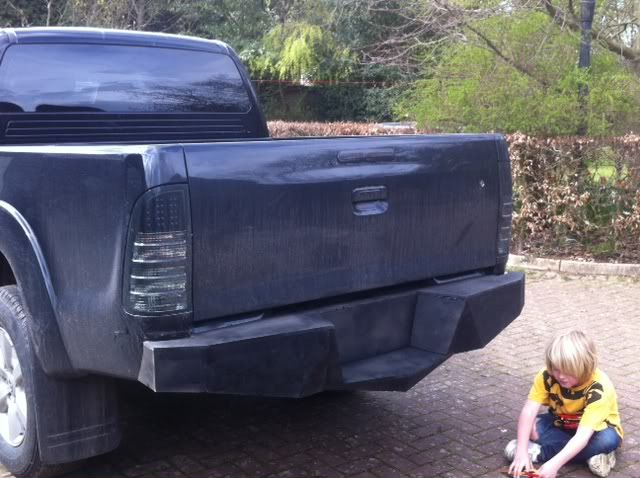
Next job was to dry fit my MDF 'MK2' rear bumper model. I was pleased with the shape and design but I think its a bit too fat - so this week I'll either knock another one together of see if I can cut a 2" sliver out of the whole thing.
The fact that its MDF does make it stand out even more - the real bumper will be black and will blend in a lot more, at the moment it kind of stands out like shit on a snooker table.
BREAK
I have made a new MDF model of a rear bumper - its VERY similar to the last one I made just slightly less pointy and not as deep. I felt it looked too big for the back of a MK6.
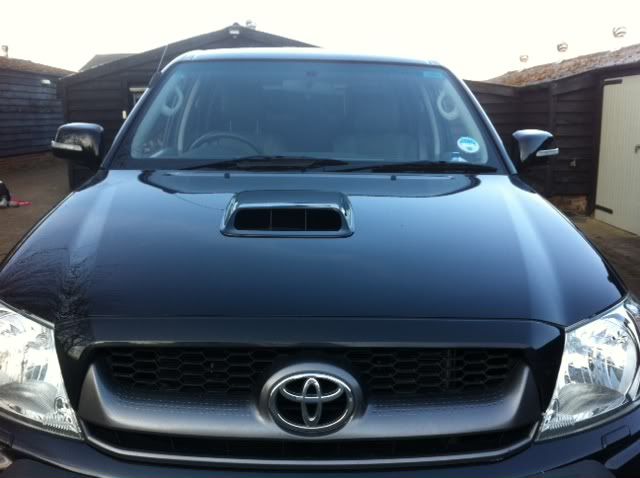
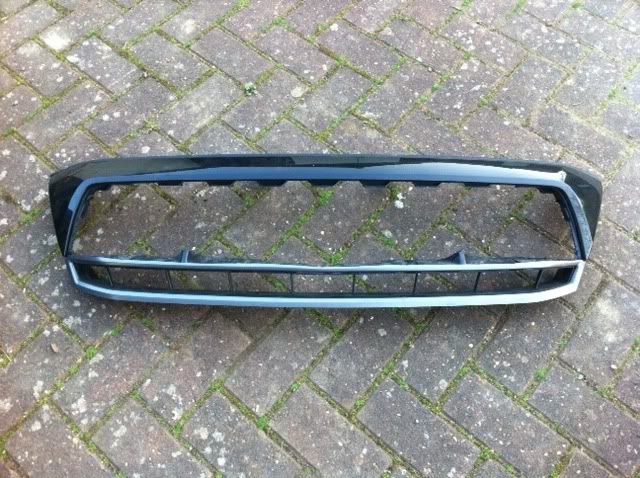
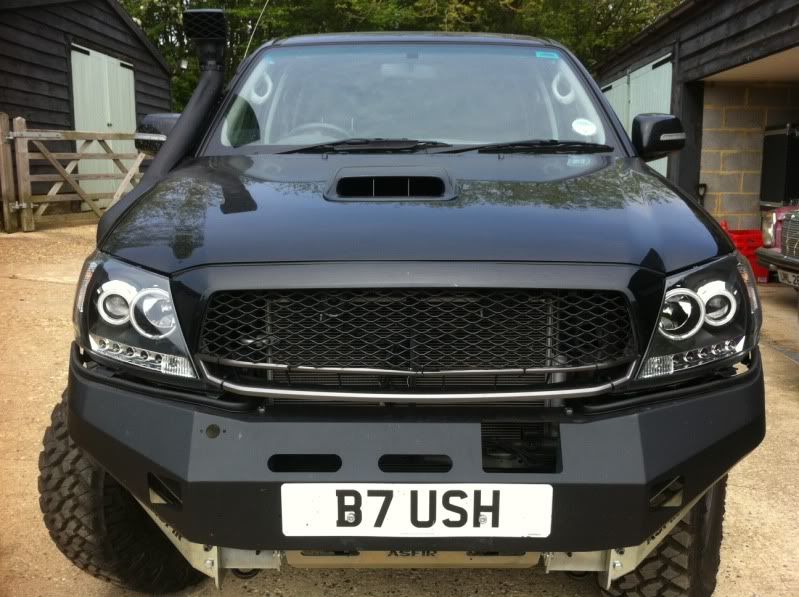
Hacked up my OEM grill,

leaving me with this:
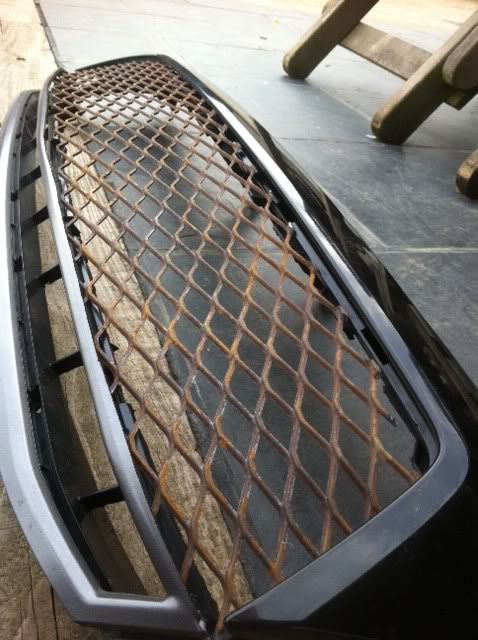
Cut up some expanded metal and made a new grill
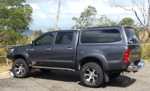
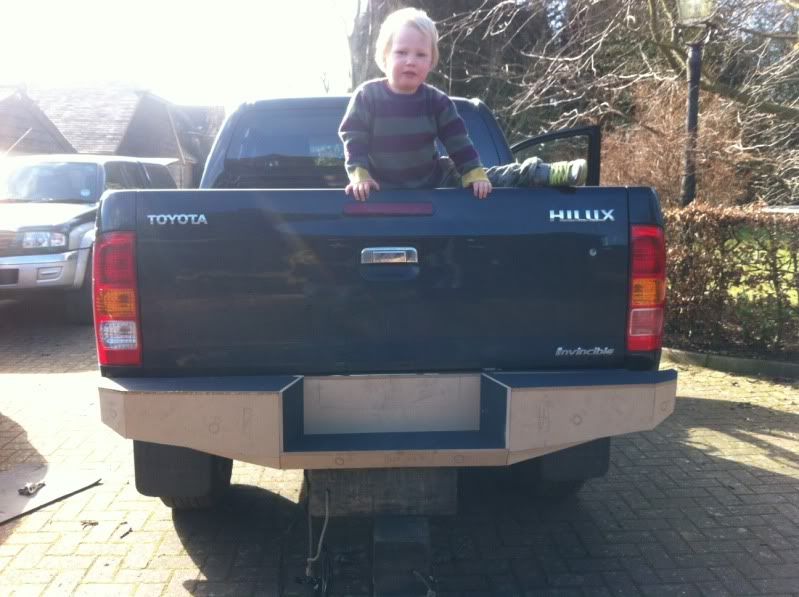
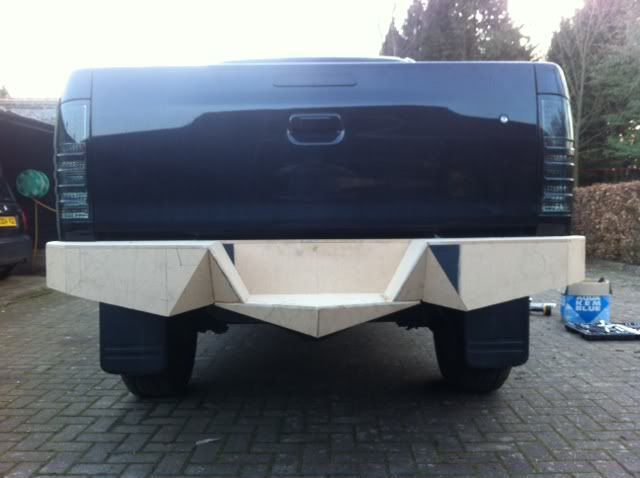
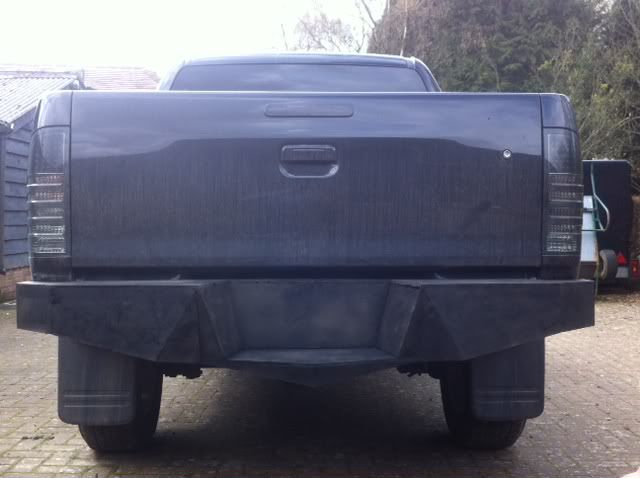
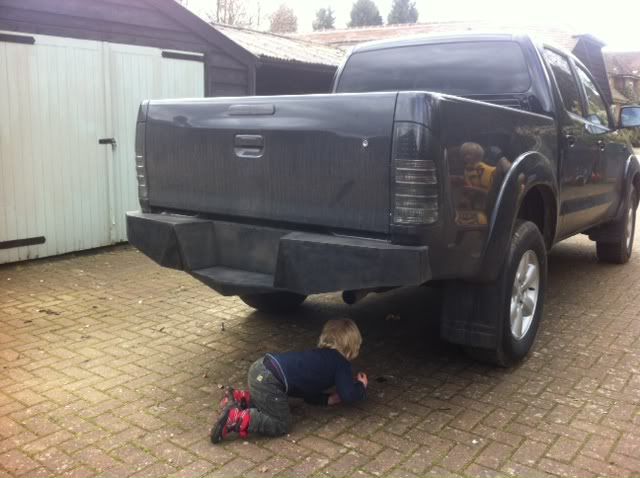
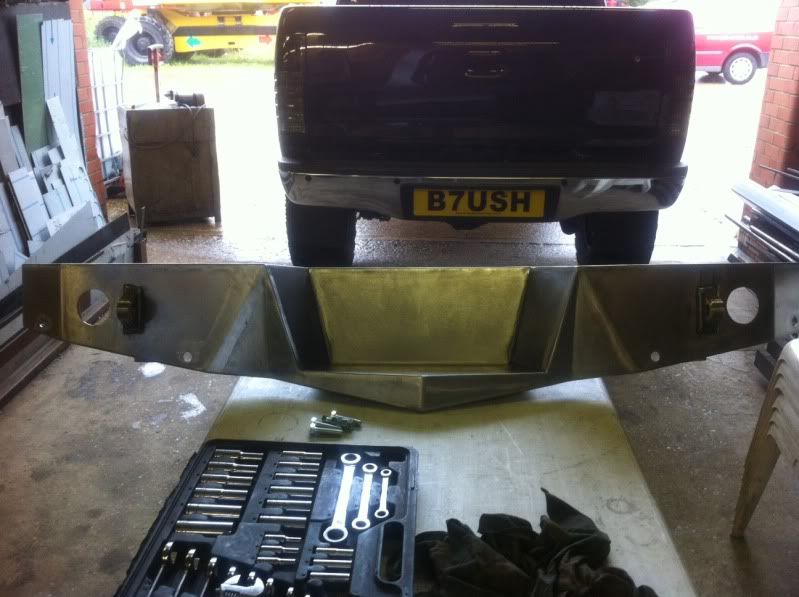
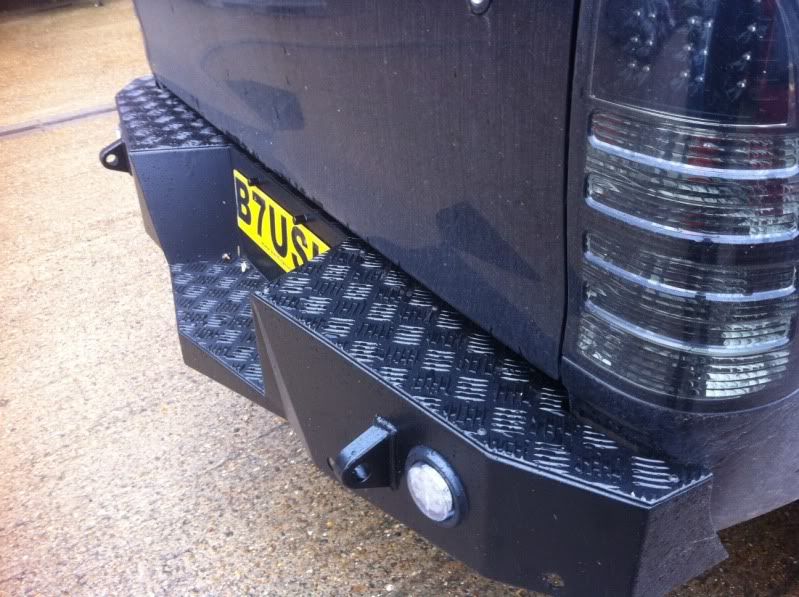
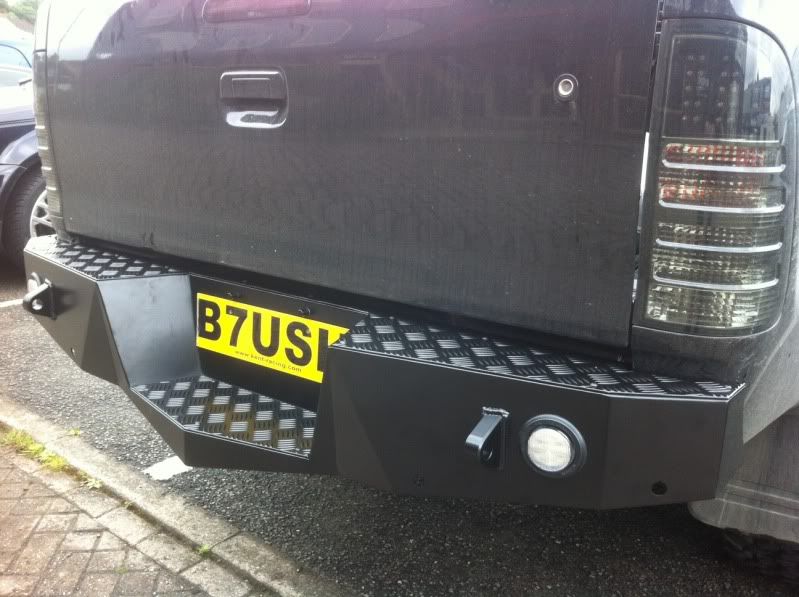
So finally got round to fitting my MK 3 model rear bumper today - and found an old can of black spray paint to make it look a bit more like the finish of the real thing rather than a piece of Ikea flat pack glued to the back of a Hilux.
Really happy with what it looks like, the previous version was a very similar design but slightly deeper and as some of you will remember a bit more 'pointy'.
BREAK
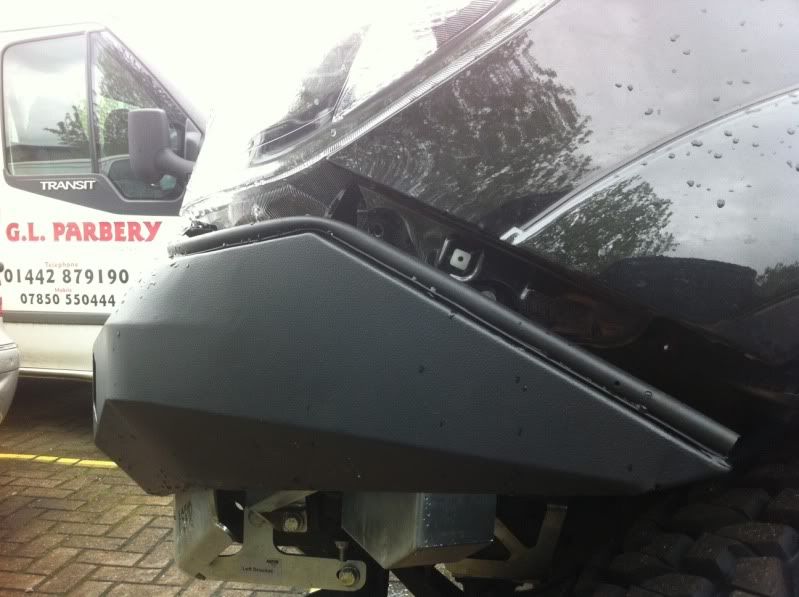
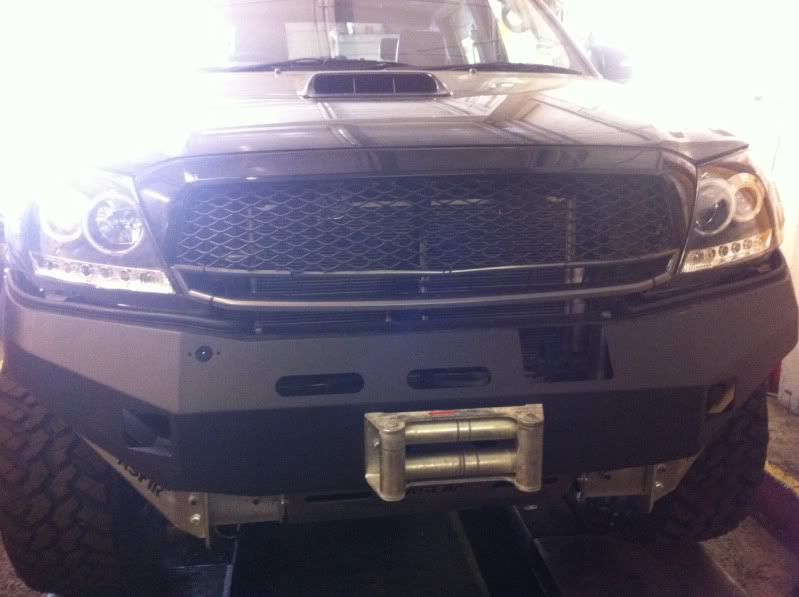
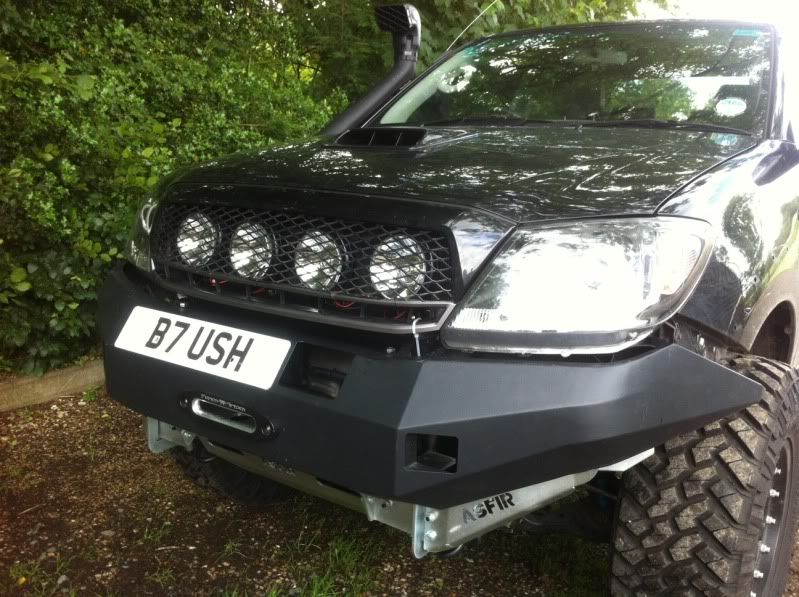
I bought an ASFIR front winch bumper ages ago direct from the manufacturers in Israel. It arrived in their standard hammerite grey - as you're probably learning now I have a penchant for 'black'. Rude jokes aside the bumper went off for a coat of matte black.
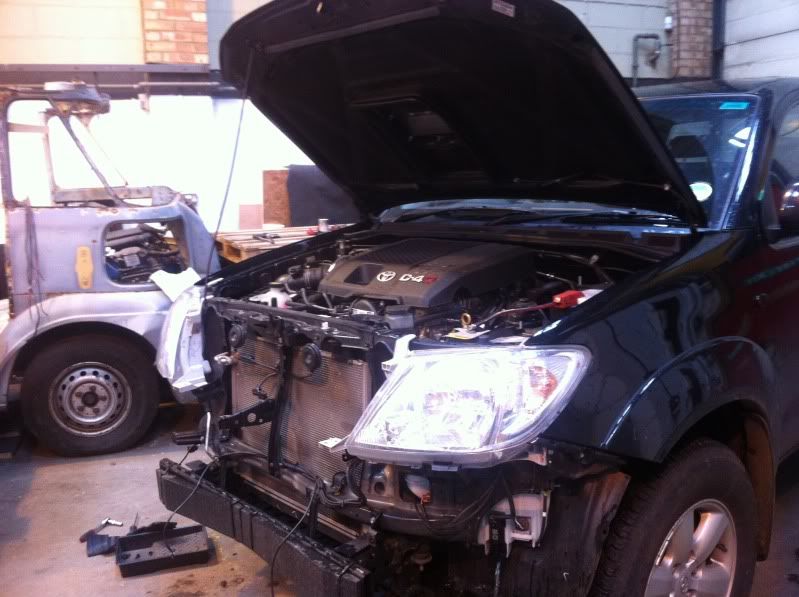
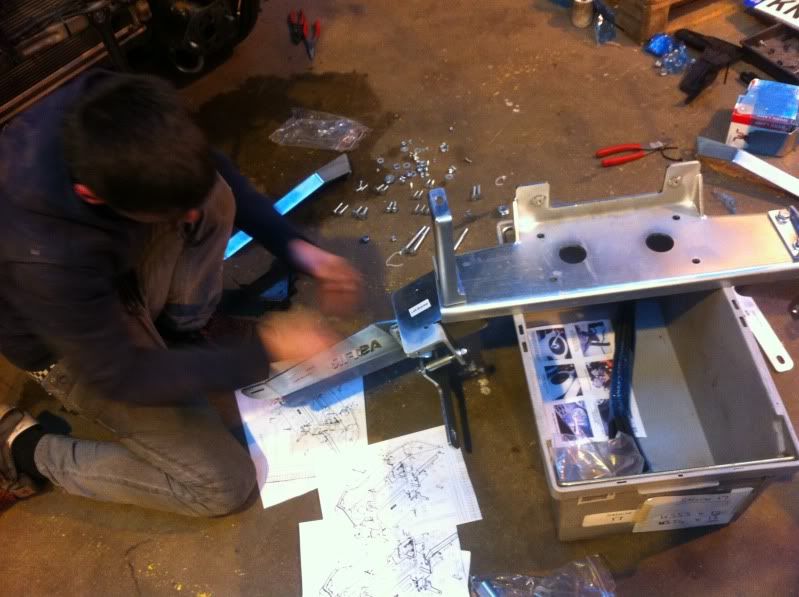
Finished work at about 6 last night, moved a few pallets around and got the truck inside our factory and set about the removal process.
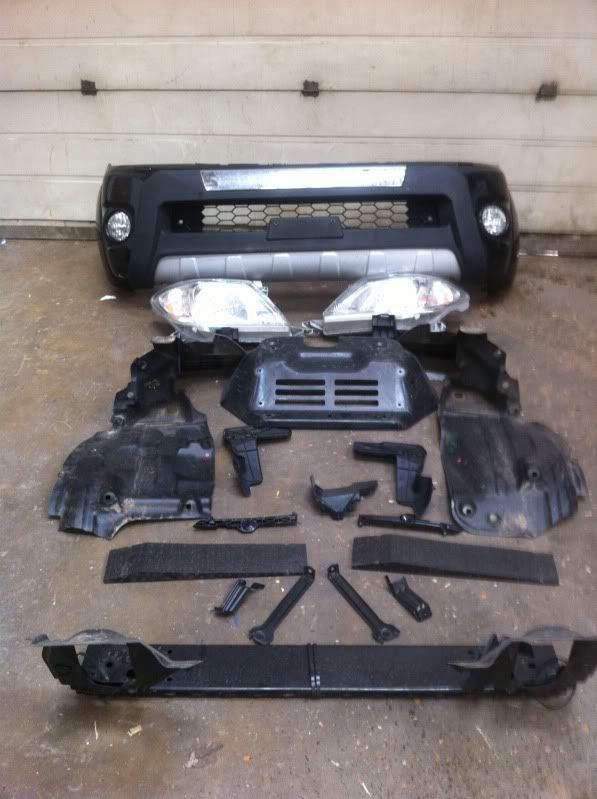
The de-structions that ASFIR send you are kind of non-existant. An exploded diagram and that's it. Quick trip to the photocopier to blow up the important parts and we were on our way.
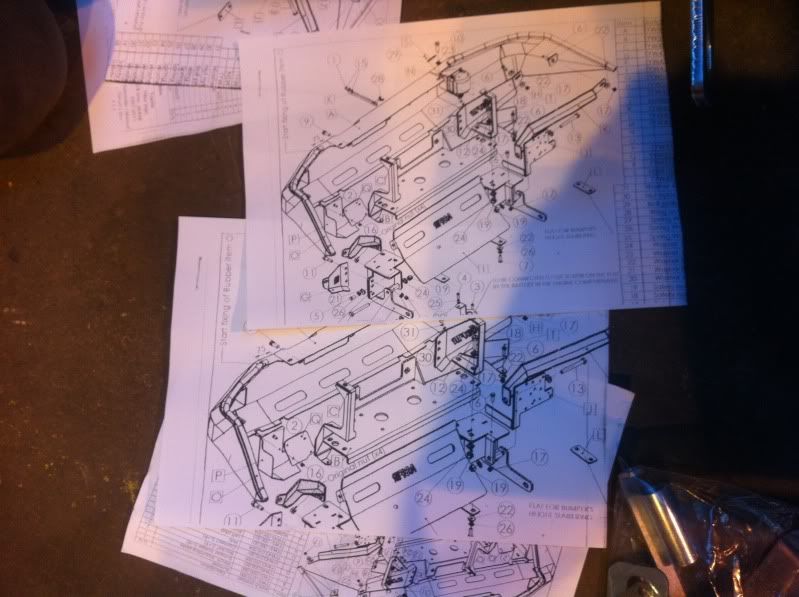
I must say undoing pretty much brand new bolts, clips and screws was almost a pleasure - that said a few clips that we couldn't work out were just snapped off
The whole task was a 'suck it and see' effort. There was no information about what goes and what stays and no information about where to start from, so from the off it was evident that it was going to take quite a long time.
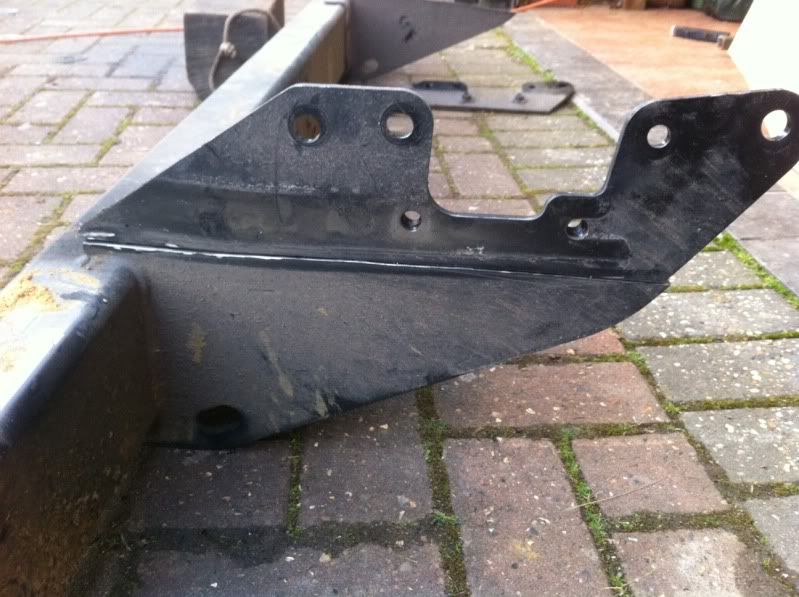
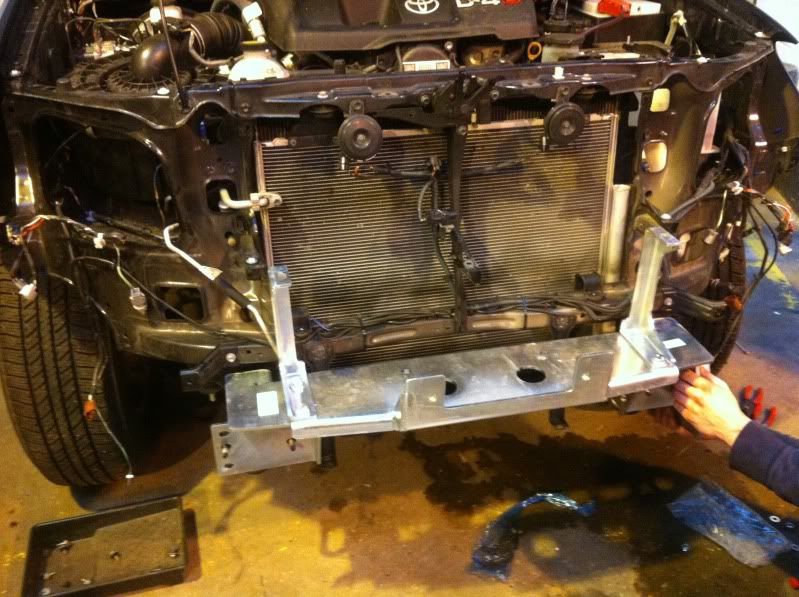
For anyone attempting to fit the same bumper - THIS is your starting piece!
Once we had established that we dropped in the new headlights - nothing worst than getting to a point only to realise you have to undo everything just to put something back.
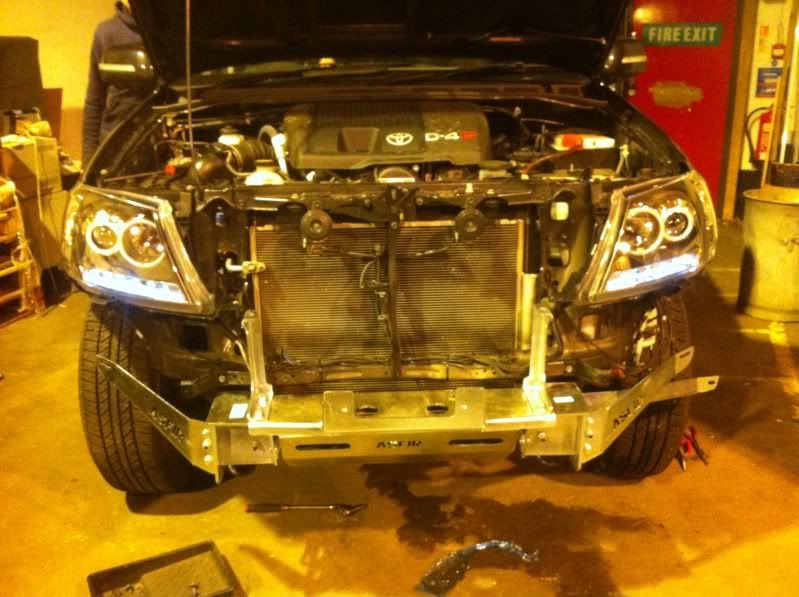
These new lights have a black box with sticky tape on hanging off the backs - I'm guessing they are to control the angel eye halo rings and the indicators as neither of these worked once all the other plugs were connected - I didn't have any electrical fittings with me so we left them for another day.
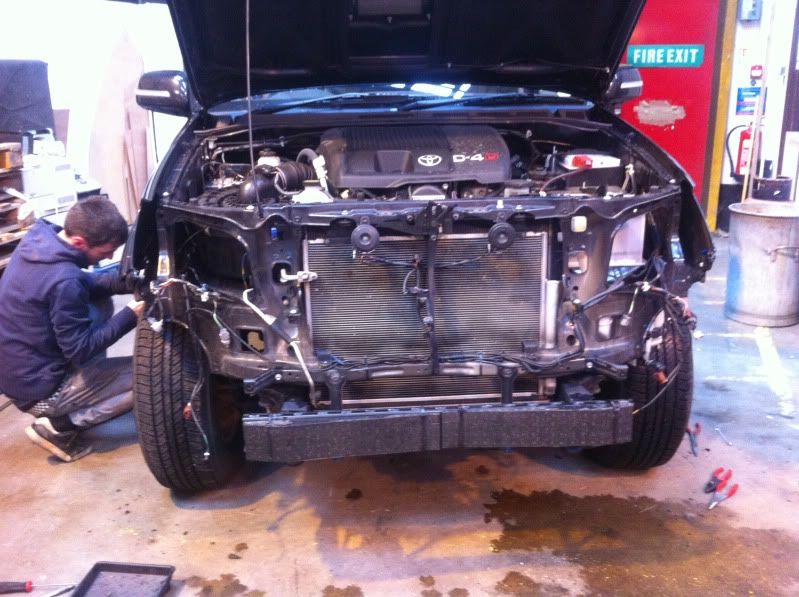
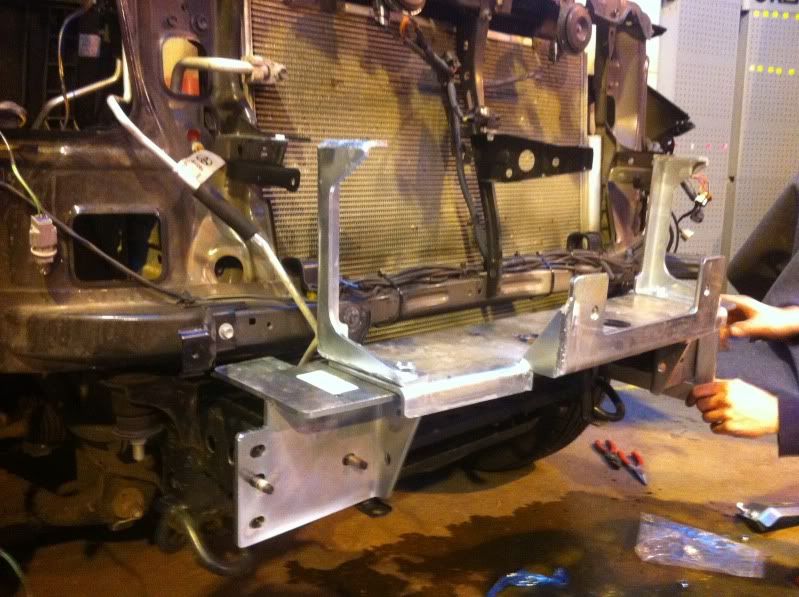
Again it wasn't explained or detailed anywhere but you have to basically cut the front arch lining in half (with scissors) to allow the ASFIR outriggers to be positioned. The pile of redundant Toyota parts was growing!
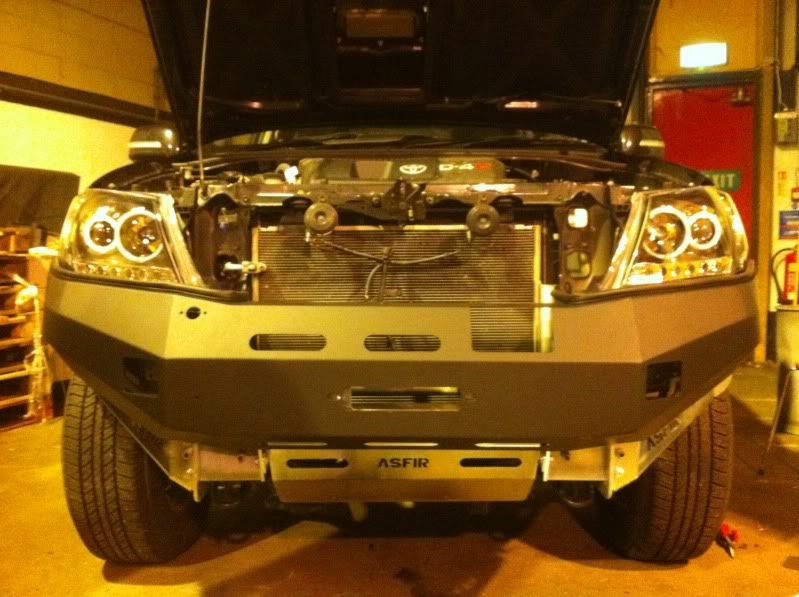
It's weird looking at the front of the truck and being able to see a good portion of the front tyres tread. You immediately know the truck will need big tyres to make up for this loss of bodywork, fixtures and fittings - reminded me of when you see cars driving around with their space saver spare wheel fitted!
That said I am loving the look!
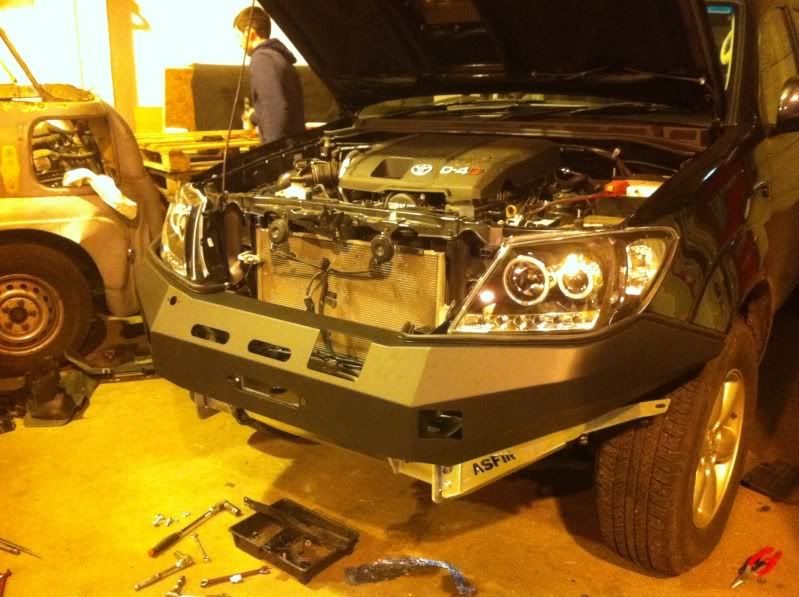
Getting the bumper to fit under the headlights and meet nicely with the start of the arch was a complete pain in the arse - you'd get one side perfect and then the otherside would be miles out.There was A LOT of undo of bolts, jiggling, hitting, swearing, tightening and loosening. We also referred to google and looked at other Hiluxes fitted with the same bumper and to our relief (sort of) we couldn't find one picture of any bumper that was fitted perfectly. By this stage it was about 11pm so we did the best we could - It will be coming off soon anyway to fit the winch, fit the lights and possibly have the ASFIR outriggers painted.... yes, black.
Also ran out of time to fit the huge ally plate under the engine - will probably do that when I have access to a ramp.
BREAK
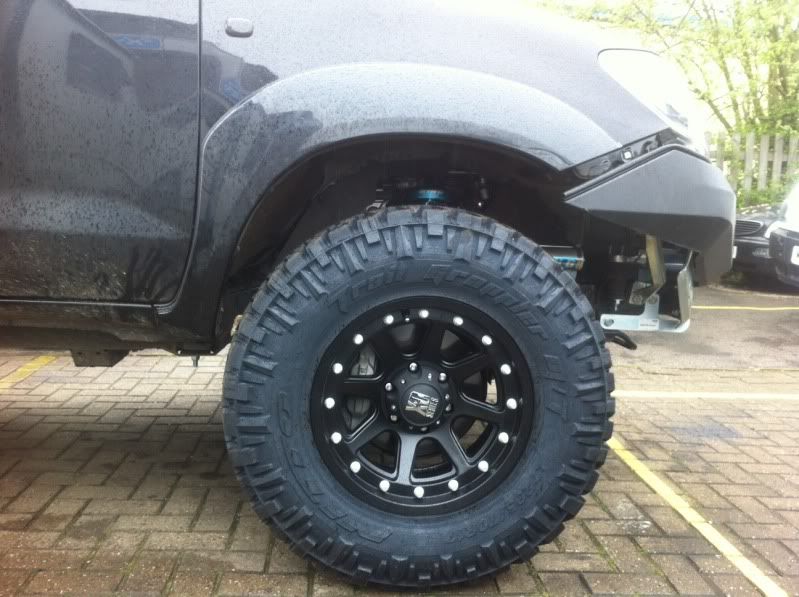
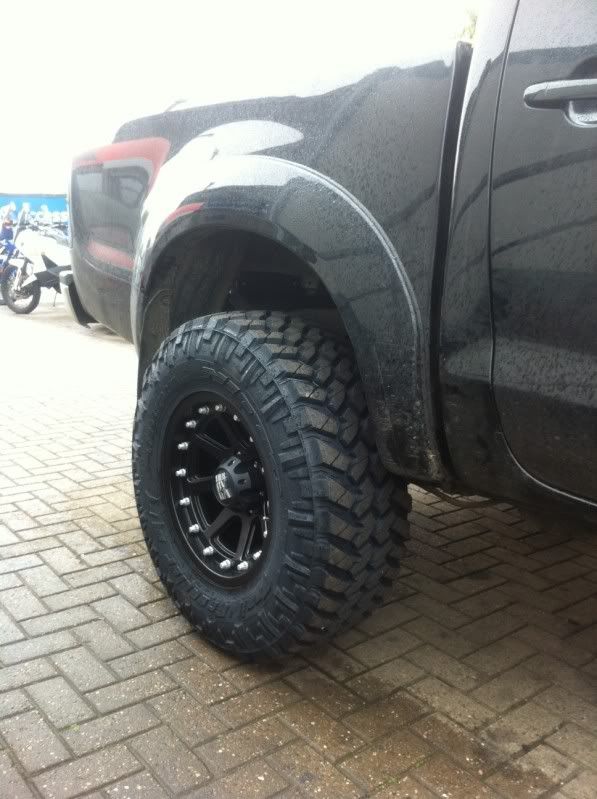
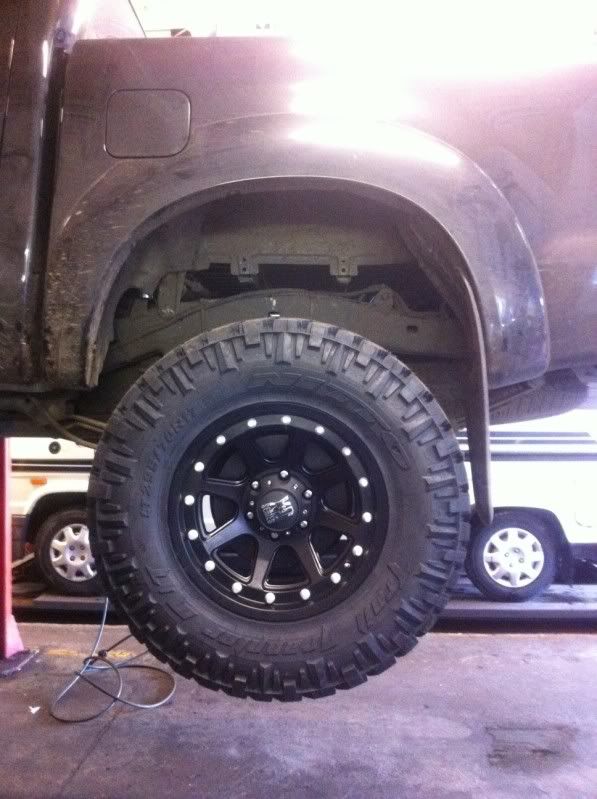
Finally my new wheels and tyres arrived from America:
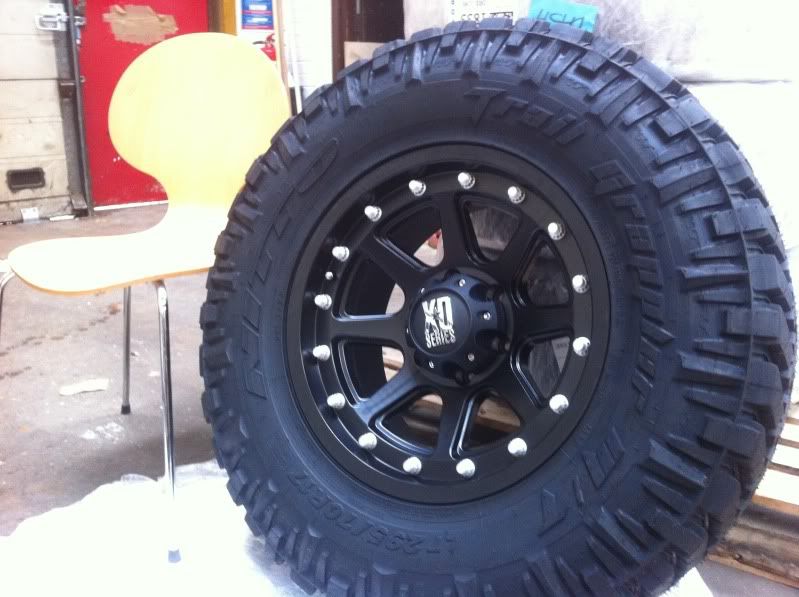
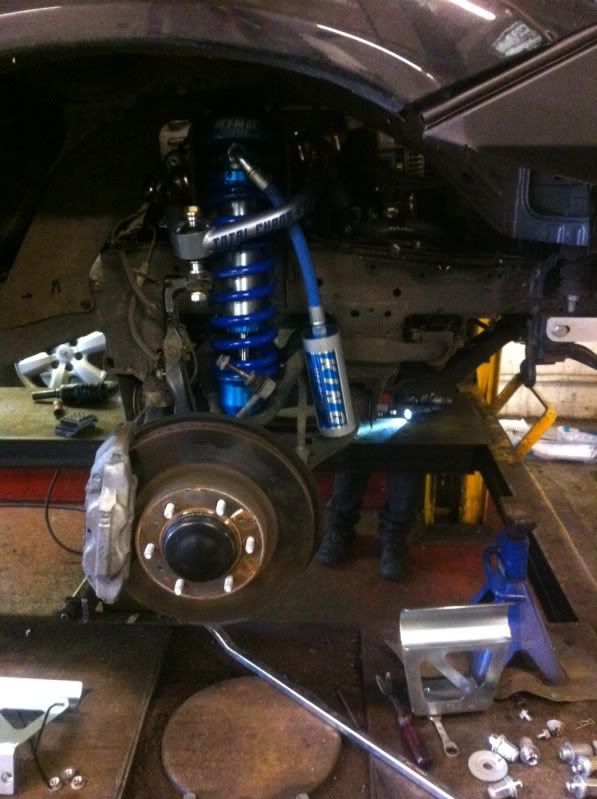
So next stage is getting the King coil overs and the Total Chaos arms fitted plus the rear shocks and the 1.5" bodylift AND the flared arches. I got these wheels with a -12 offset so they stick out so fitting the arches will have to happen at the same time so we are nice and legal.
BREAK
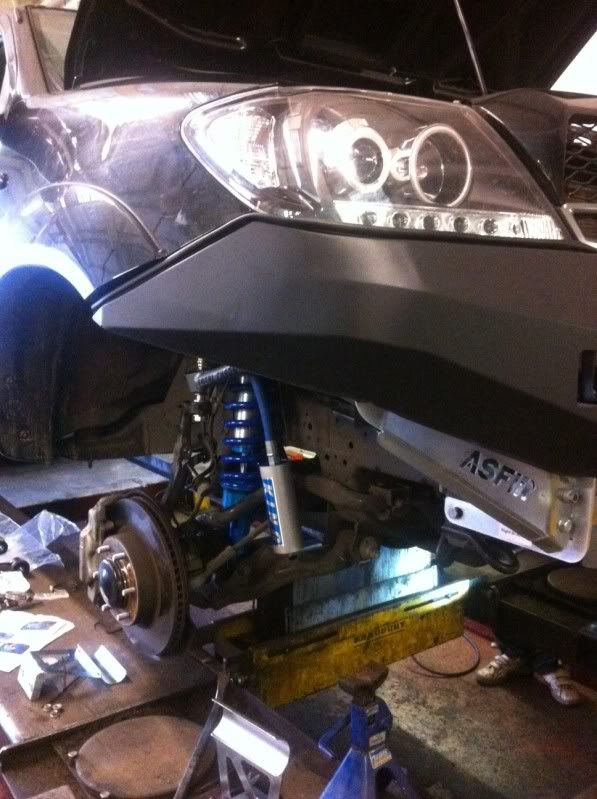
Sorry for the extended radio silence. I started work on the suspension and the body lift and then all of a sudden a bank holiday came along and I had to 'down tools' and do family things, then I had to go to Germany for work so my truck just sat there gathering dust Talk about frustrating.
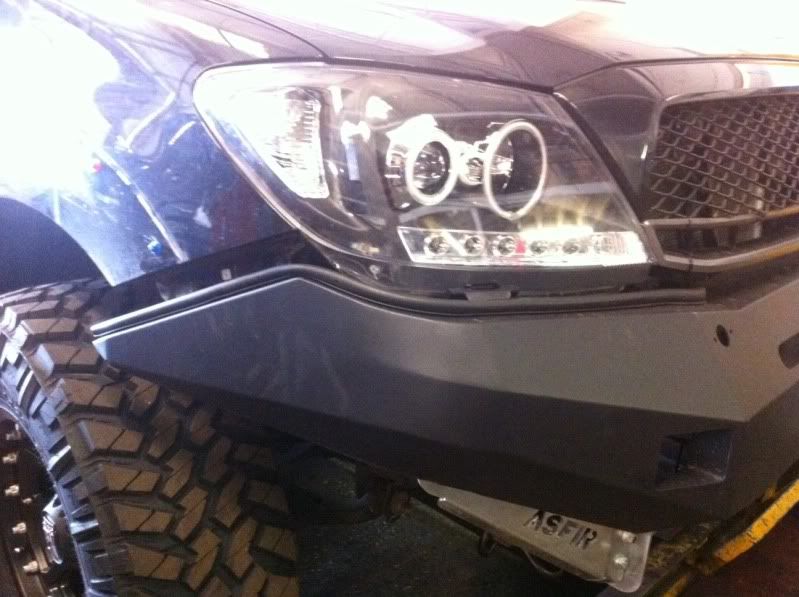
Anyway managed to get most of it done over the weekend but have run into a few issues. The first one I had already thought about and 'thought' I had addressed. My front bumper is obviously mounted to the chassis and when you do a body lift the chassis stays put and the body goes up (obviously). I emailed ASFIR to ask what people do to close that gap that will appear once the body lift blocks are in place. They emailed back to say that the rubber gusset that runs between the bottom of the headlights and the bumper is fat enough to fill the gap. At this stage I hadn't even unboxed the bumper so I just went along with what they were saying - although in my heart-of-hearts I wasn't convinced
The second issue was the reservoir on the passenger side for the King Shock. Tim AKA Squeezemetim (2 posts above) had mentioned that is was an extremely tight fit. Well without a body lift I cannot see how the reservoir carrier would fit to the chassis on a 2011 AUTO Hilux. I 'suspect' they have changed the size/shape/position of the washer bottle on mine as even ASFIR had to give me a special plate to reach round the bottle so a section of the bumper could be mounted properly. When I ordered the bumper they told me they HAD to know if it was an Auto or a manual because of something about the washer bottle?!
Anyway, lift kit fitted and sure enough the reservoir 'sort' of went on but 'sure enough' a 1.5" gap between the headlights and bumper had also turned up to ruin my party. 'Fat rubber gusset' my arse It's not too much of a problem though as I 'think' I can just install some 40mm spacers into the bumper mounts which will put it back in the right place.
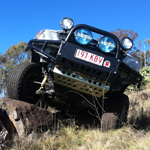
FINALLY I got to slide the new shoes on - all the time praying I had ordered the correct PCD and the correct off set!
They fit
......................however................... on full lock the back of the front tyres hit the outriggers. When researching whether or not you could get 33's on without doing a proper suspension lift MOST people said it wasn't possible but a couple said it could be done but I may have to lop the corners off the front outriggers and reweld a plate across them. I found a thread on an FJ Crusier site that gave step-by-step photo instructions on how to do it neatly so that it my next mini-project which hopefully I'll attempt tomorrow I was hoping to get away with it but as soon as my wheels/tyres turned up I knew I would run into some sort of a problem.
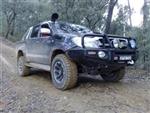
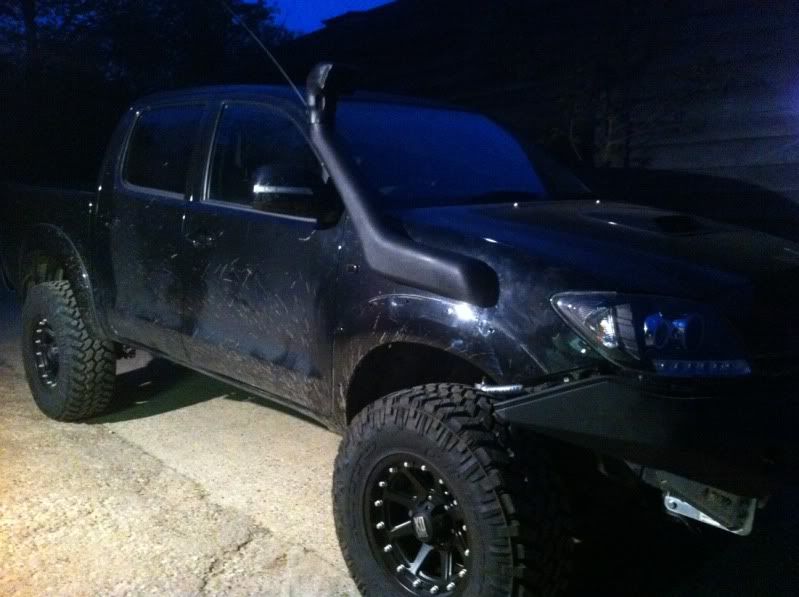
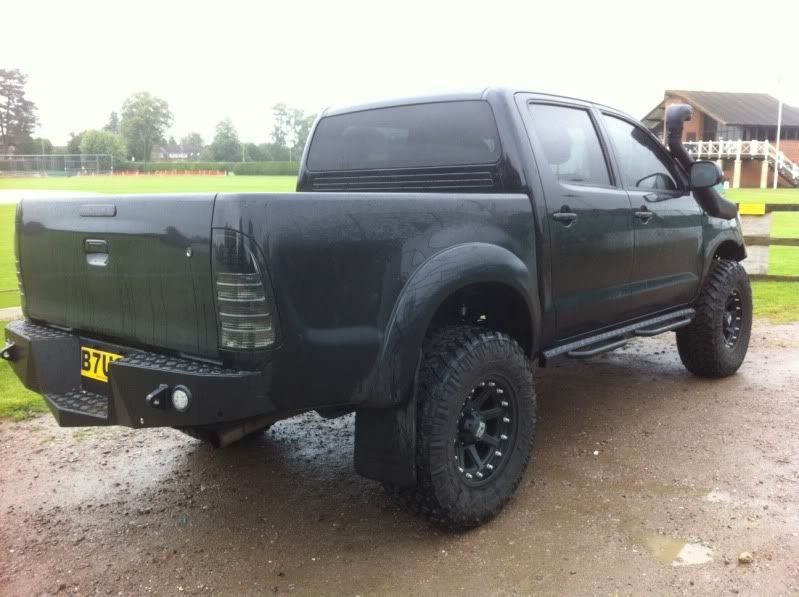
I wanted to get everything all finished and looking right before posting pictures but as we all know waiting completely sucks - so here are a few tasters.....

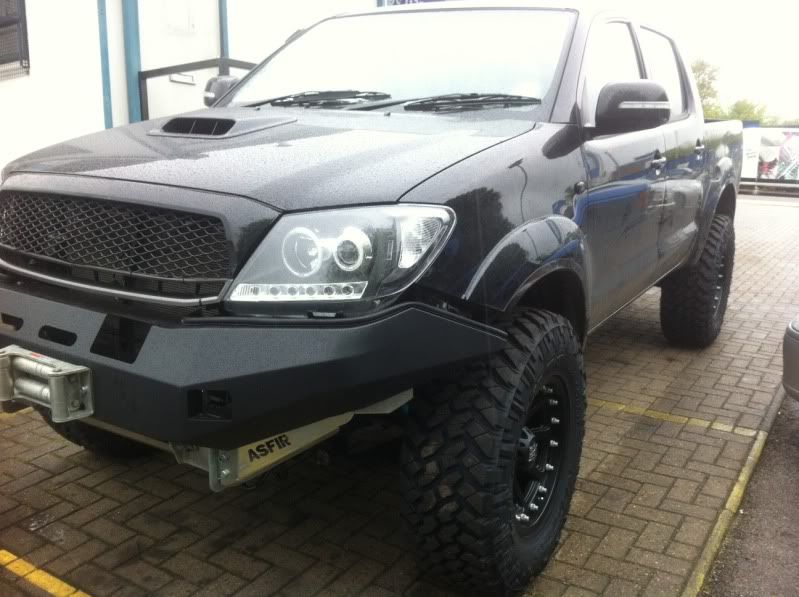
And yes, I'll probably remove the rear mud flaps before the tyres do it for me!
Really really happy with how they look and the offset is just perfect, the outside of the tyre should fall in line perfectly with my new fender flares (when I fit them).
BREAK
Spent my lunch hour trying to work out how to lift the bumper without having to cut or fab too much and I have come to the conclusion that I can't it will be a massive ball ache. So what I have decided to do is to make 2 infill pieces to fill the gap between the bumper and the lights.
I'll probably add in slots or vents or even laser cut symbols and mesh back them. I think it will look cool and might even look like some kind of extra cooling duct. The Asfir bumper fits so well and has SO MANY galvanised pieces all hidden away that it would be a shame to attempt to modify any of it.
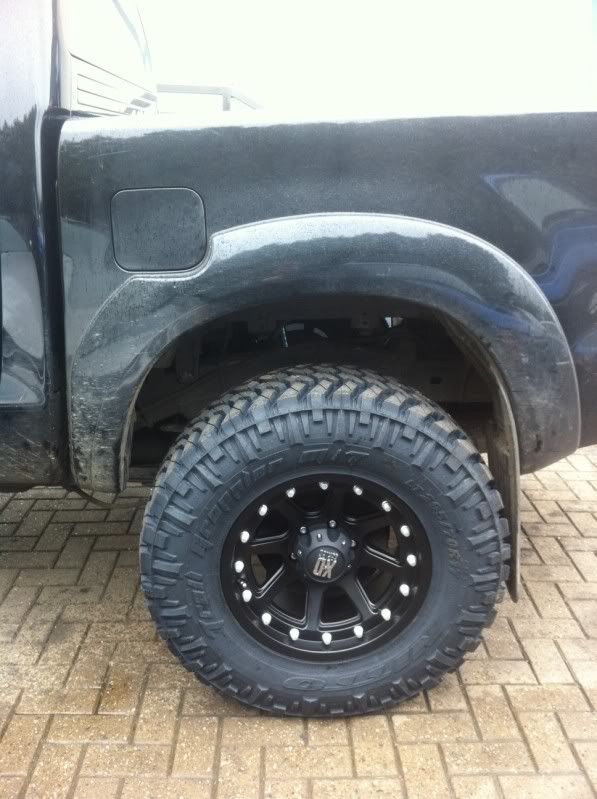
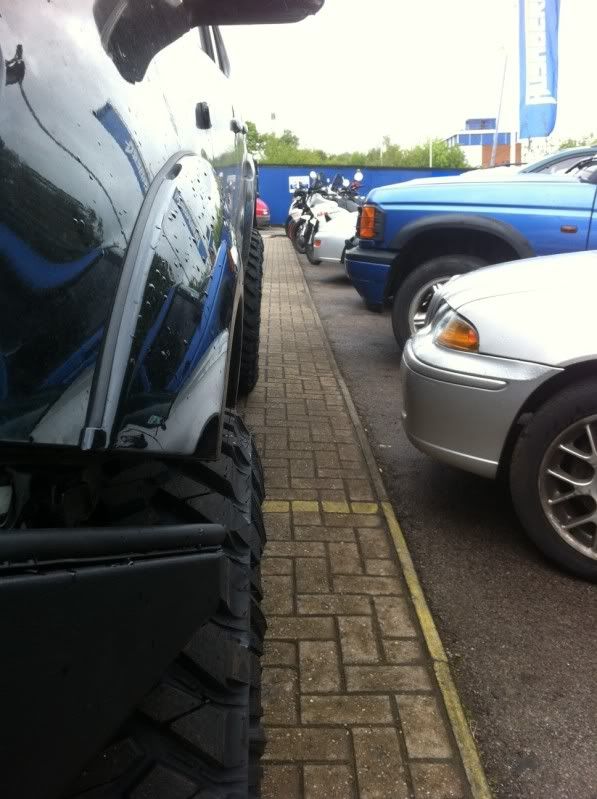
Passenger side:
For peoples future reference, this is how much a 17 x 9 295/70/17 wheel/tyre with a -12 offset sticks out by on a 2011 Invincible:
I still haven't finished messing about with the whole bodylift/suspension/wheels project! "Should" be finished this afternoon. Done some major trimming to the body outriggers behind the front wheels!
Using a friends garage so the job has dragged on as he's been fitting it in between 'normal' jobs!
I'll drive it home tonight without putting the new flared arches on - that's hopefully a weekend job
You can see in this picture the gap that has appeared between the bumper and the body/headlights/grill. I'm making a metal in-fill piece that will run from one side to the other. In the areas over each wing/arch/fender I'll cut slots to look like air cooling ducts - they obviously won't actually do anything. I'm then thinking of carbon wrapping the whole piece. A guy that does large format printing for us at work uses a brilliant wrapping film that is very dark and actually textured like raw carbon fiber weave - I think this will blend in quite well and make for a nice feature.
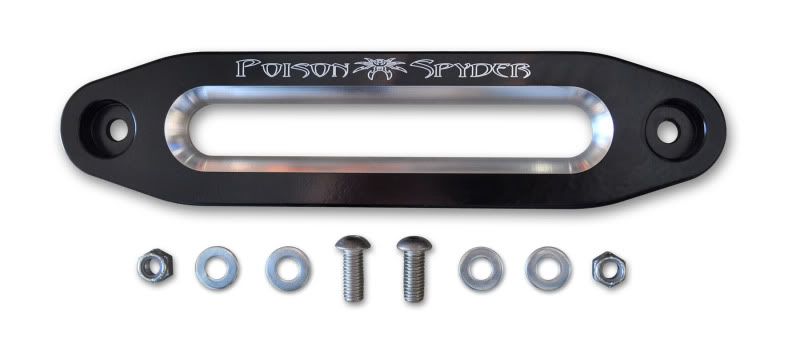
I've also ordered from Poison Spyder in the States one of their alloy fairleads so I can dump this clunky old roller version. Also got to paint the ASFIR outriggers black
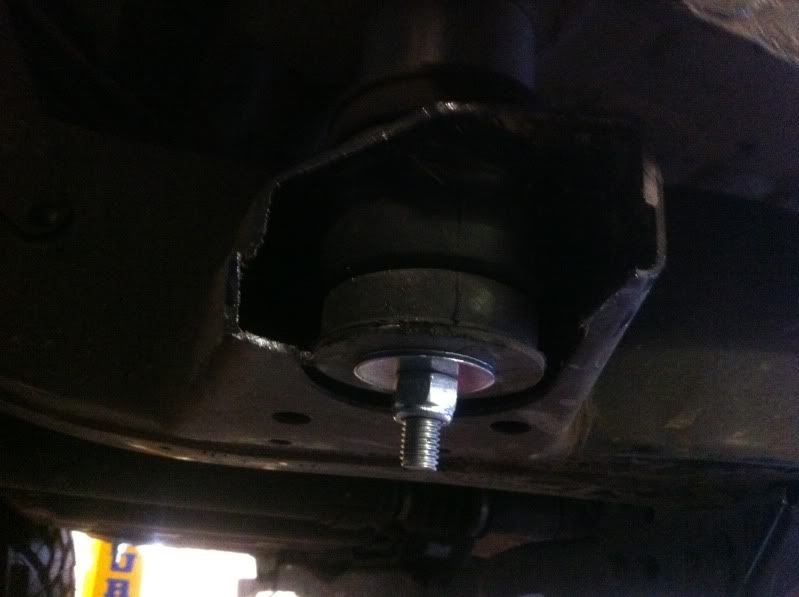
Few shots of the rear sus hanging:
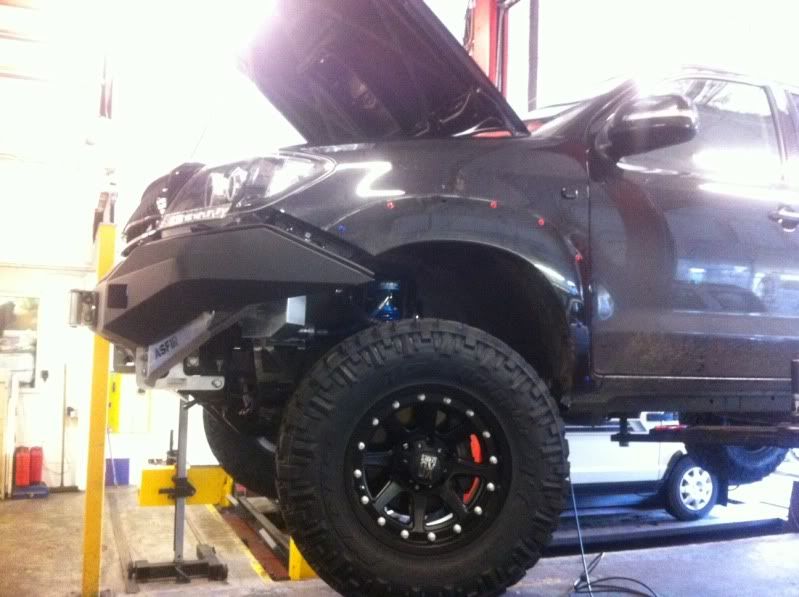
Just dropped the truck off with Chris at Apsley Tyres (literally over the road from work) - luckily he's a mud plugger and rolls around in a VERY jacked up pre-face lift Disco and had a ridiculous Suzuki SJ before that. He's going to set up the alignment and camber angles for me. On full lock the tyres are still catching but I'm hoping that once he has set it up properly this will be rectified If not then I'm open to suggestions!!
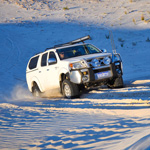
I've only driven the truck about 1/4 mile so far and that was up the high street in traffic so I can't comment on how it drives yet - but boy-o-boy does it feel higher?!! LOVE the driving position, talk about feeling 'King of the road'!
Took this quick snap as I left the truck with Chris:
BREAK
So after a pretty rough few days I'm back. My youngest son aged 3 was rushed into hospital with suspected meningitis. 4 days later he's (seemingly) fine thank god The hospital think (?!) it was a viral strain of meningitis AKA they don't really know.
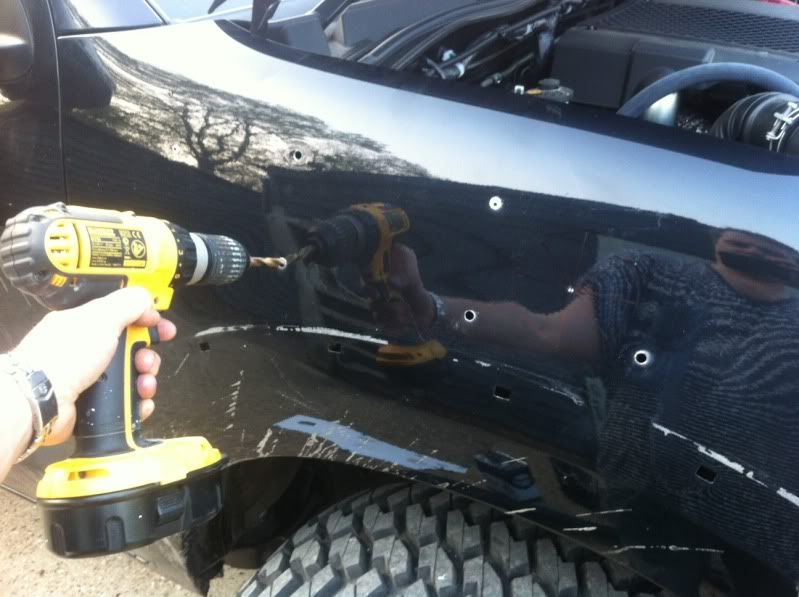
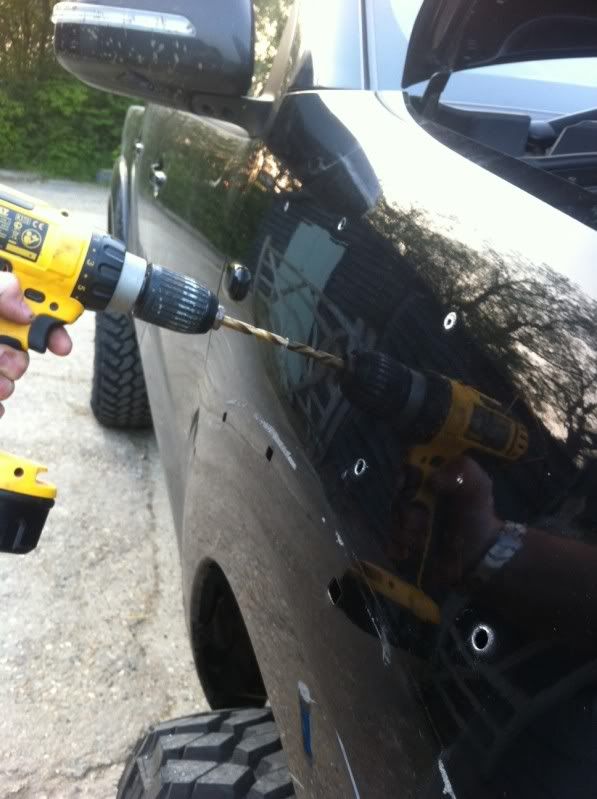
Anyway, managed to get some truck time in last night now everything is back to normal and I actually got round to fitting my snorkel. A job if I'm honest I was not looking forward to doing - cutting a huge hole in a brand new truck and drilling a bunch of holes that all had to be pretty spot-on in their placement was quite scary
After laying up the template that came with the kit I spray-marked all the areas that needed drilling and cutting and set to it....
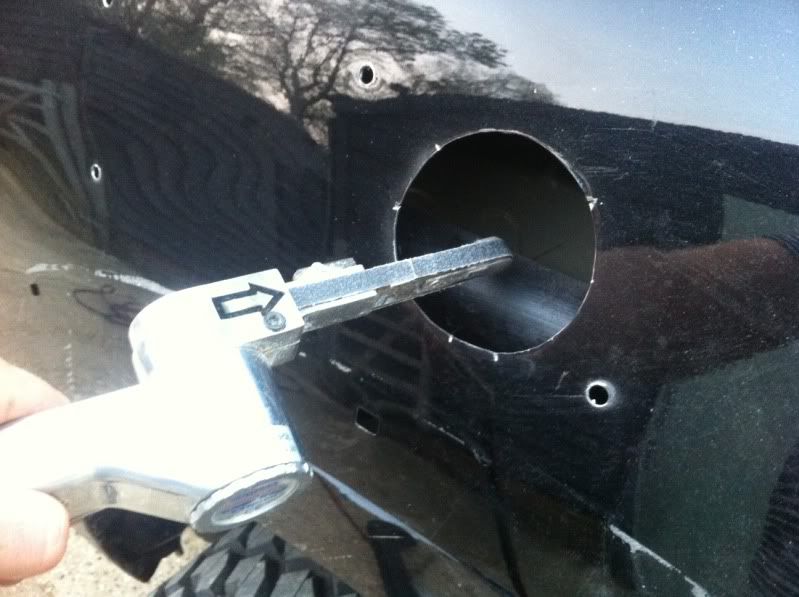
After a few attempts at slipping the snorkel on and bit more enlarging of the main hole it slipped on perfectly. Few bolts and washers through the back, jobs a good 'un.
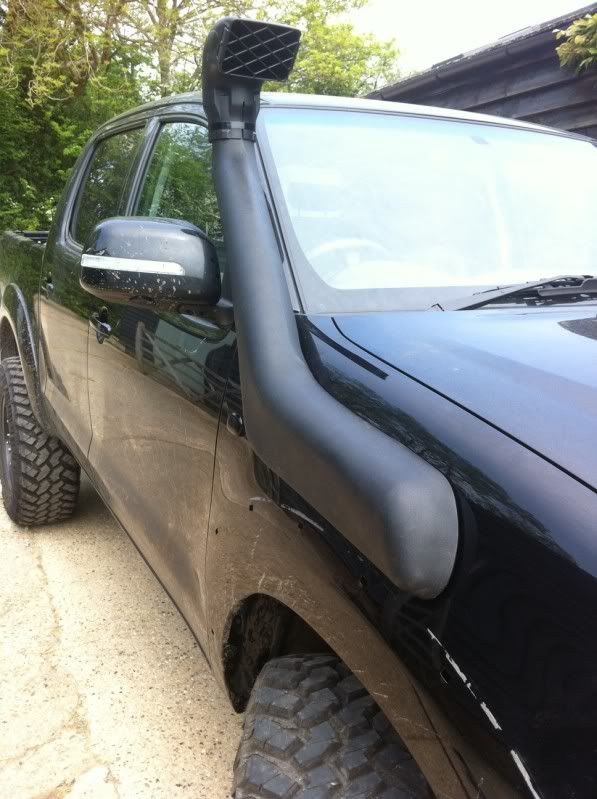
I think it looks great and the quality of the snorkel seems fantastic, good ABS plastic that feels like it could take a good pounding. I swear its made the truck feel more responsive?? Could this be true? I guess having more air rammed into the motor can only be a good thing? After fitting my new tyres the truck naturally felt a bit sluggish but the engine response now seems to be back to normal??
BREAK
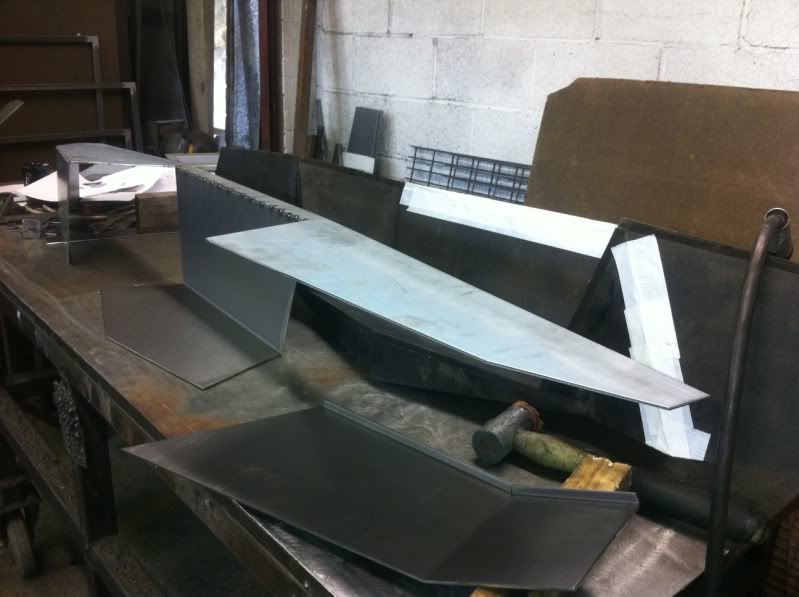
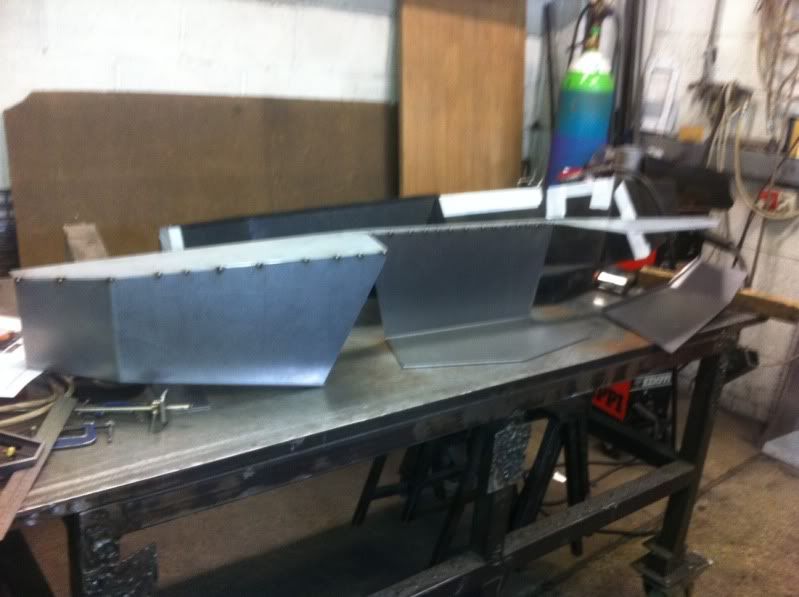
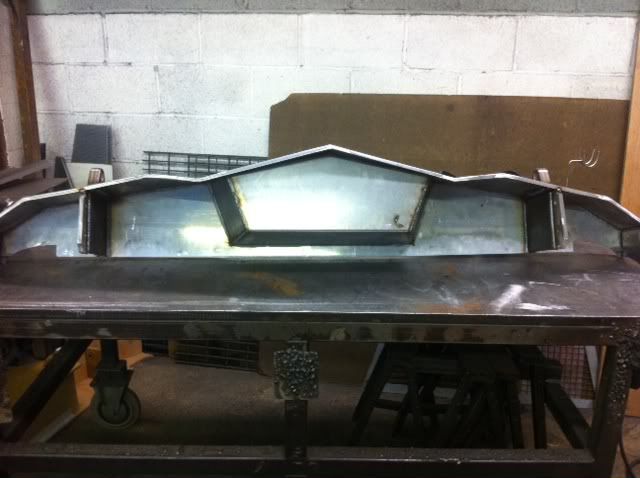
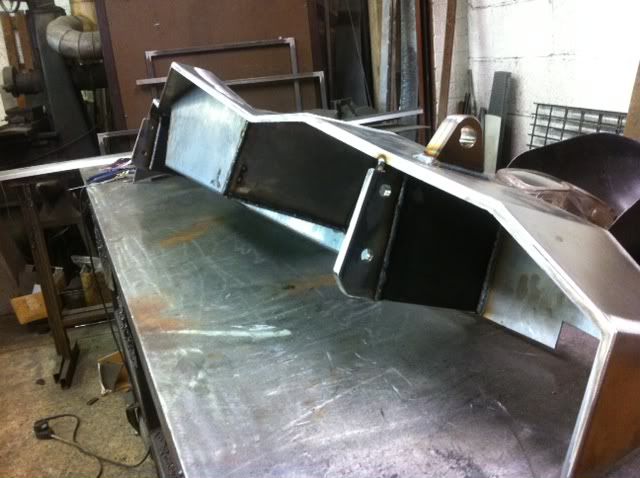
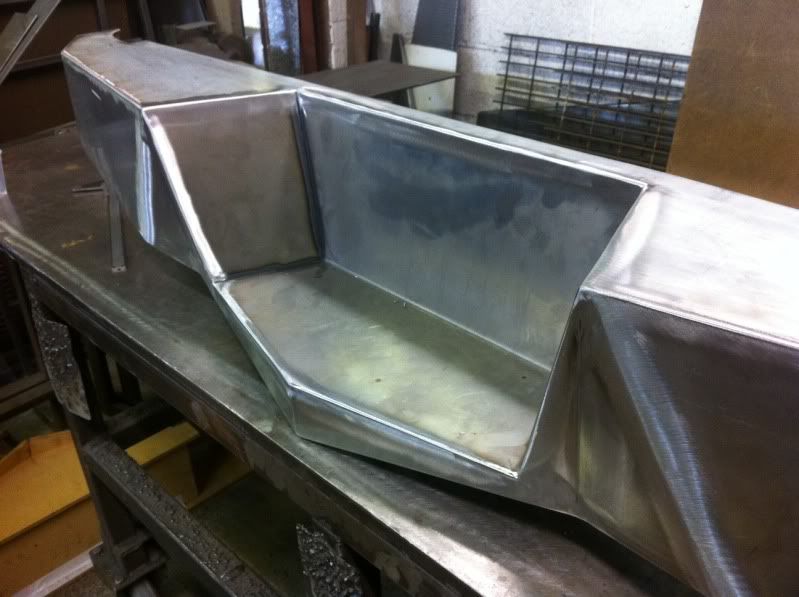
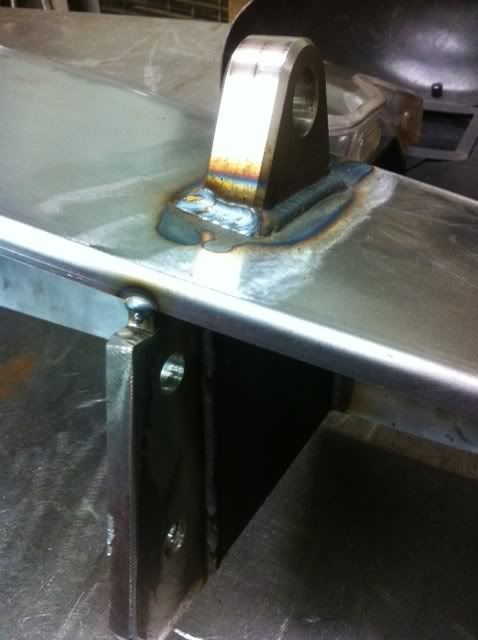
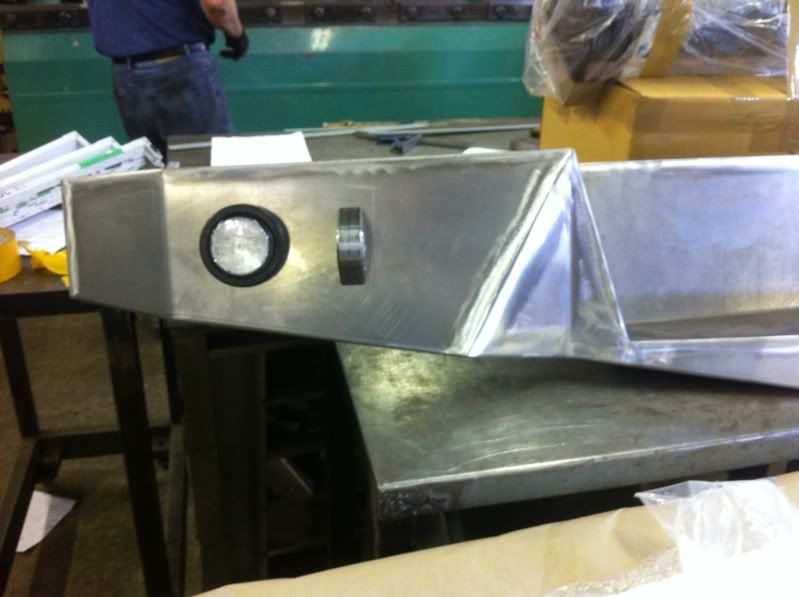
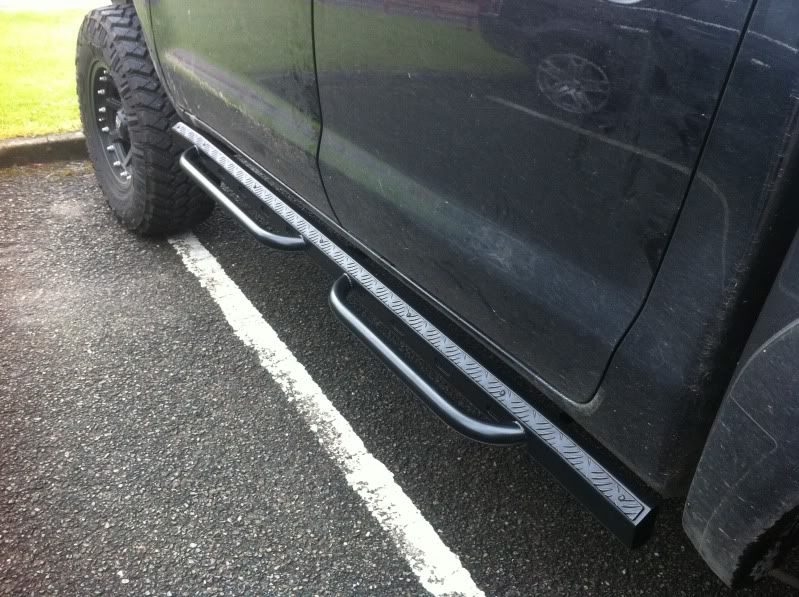
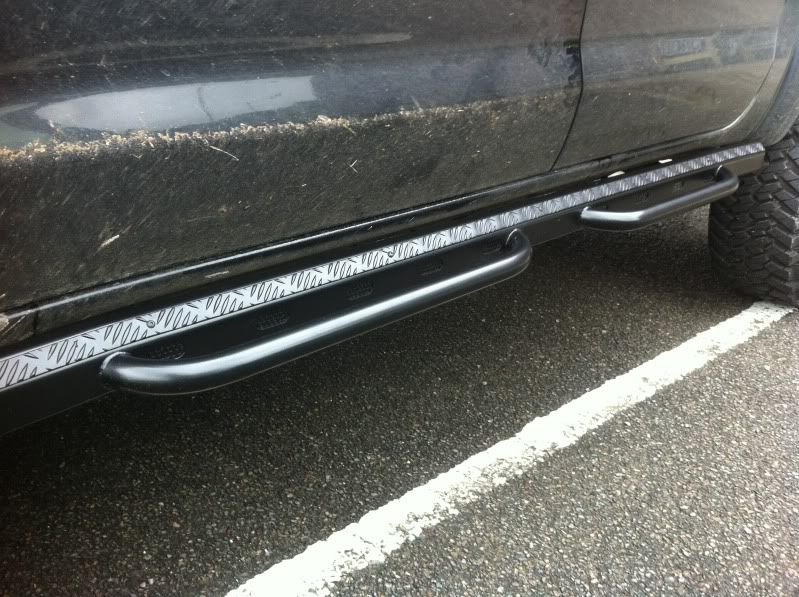
fabrication on a few other bits has started. The rear bumper and the rock sliders/side steps that I designed are now being crafted from 3mm Zintec (zinc plated steel). I have some chunky 1" thick shackle tabs to be welded onto the bumper and a pair of 2.5" LED reverse lights, plus the 4 reverse park sensors from the OEM bumper. I wasn't overly bothered about having these but it seems like I'd have more hassle chasing the sensors and removing them than I would if I just fit them to the new bumper. As it is at the moment they are disconnected as I've been pulling the bumper on and off and on start up a solid beep sounds for about 20 seconds (telling me the sensors are disconnected) after that it's silent, but it's annoying anyway!

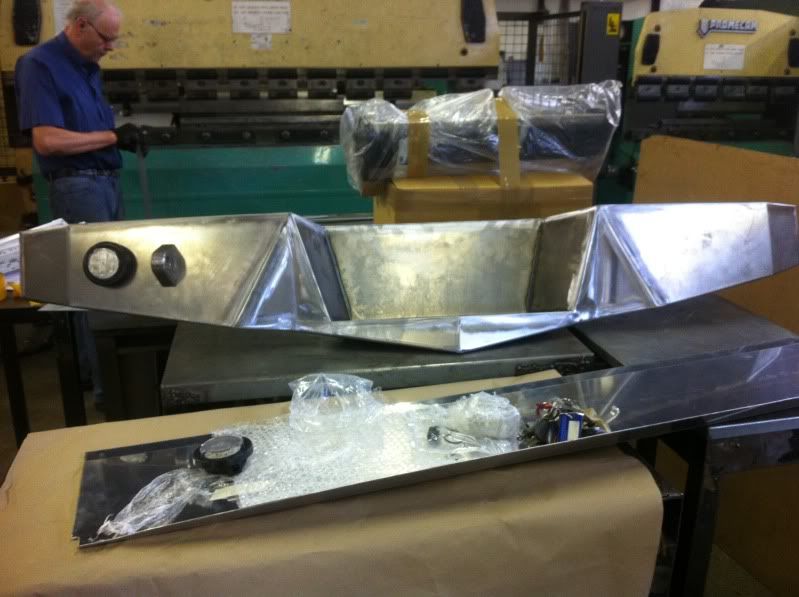
PAINT
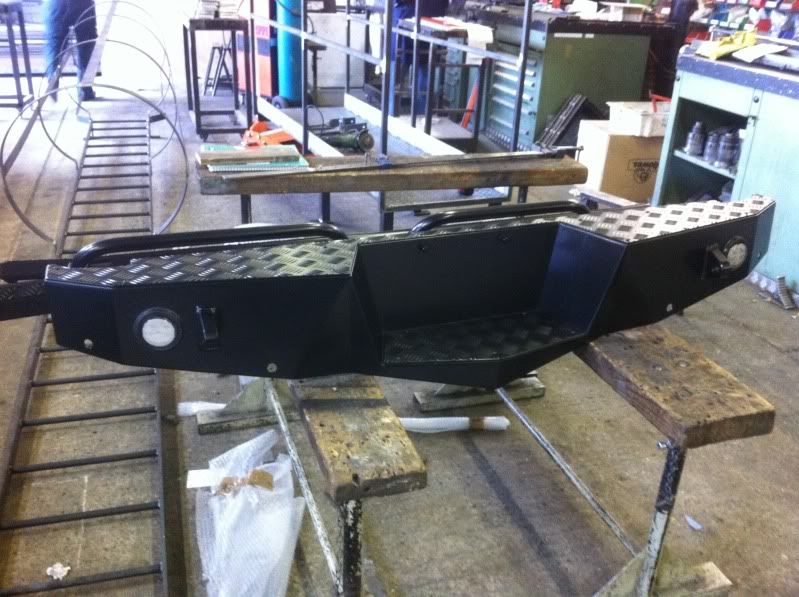
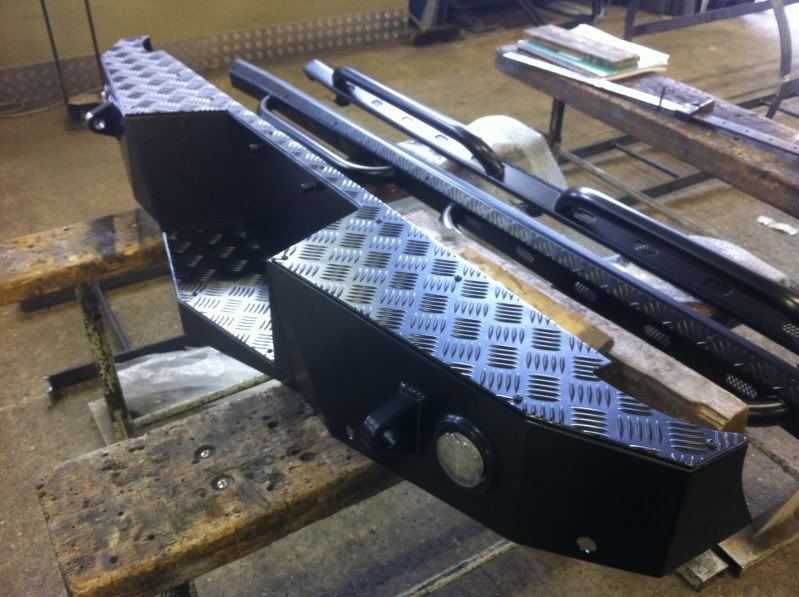
Side steps - I've designed these with mesh cut outs behind the tubes. Behind the mesh I'll be fitting waterproof LEDs that will work of the courtesy door lights to throw some light onto the tubes.

These are the exhaust tips that I have ordered:
Finally made up a bracket to take the 4 HID spots:
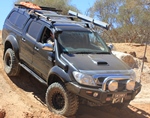
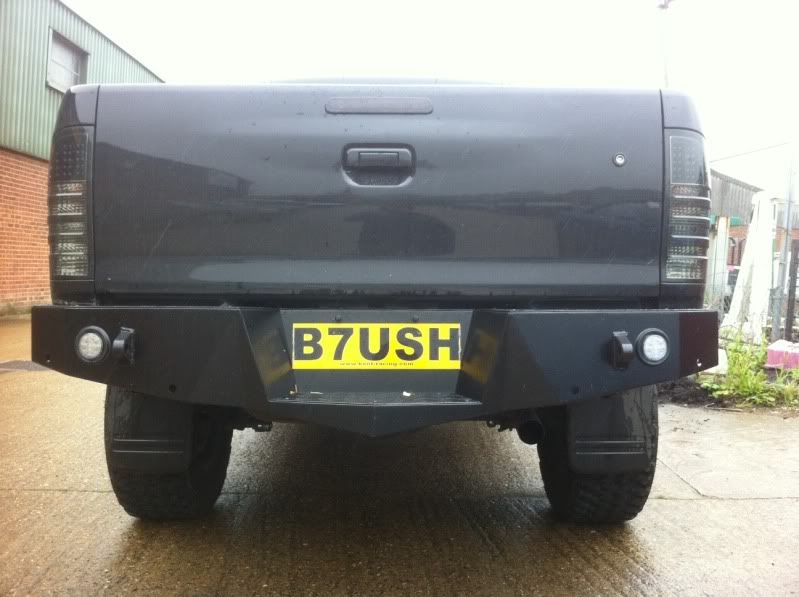
So this is where I am pretty much up to now:
Oh, fitted some gas bonnet struts as well:
Remaining jobs:
1. Sort suspension (there is a valving problem with the shocks
2. Fit fender flares
3. Make infill piece above front bumper (the one I posted pictures of was a bit of a fail, so its back to the drawing board).
4. Have handmade exhaust built and fitted
5. Dynamat the cabin
6. Fit stereo. 2 x 12" subs, 2 x 7" subs, front and rear door speakers and 4 x tweeters, 2 amps, Pioneer 7" touch screen headunit
7. Make roof rack fitted with 3 x LED light bars and reverse camera.
8. Fit rear load liner which I had made ages ago but as it has lights in it I need to fit it at the same time as doing the other aux lights
9. Remove and powder coat the ASFIR outriggers on the front bumper and fit red LEDs behind the ASFIR logos
10. Fit LED lights to the side steps
11. Wire in the indicators in my wing mirrors
12. Build a roof console to house all the switches for the aux lights
13. Fit and wire in the winch
14. Wrap it
THE END - For now