DIY Transfer case guard

Want to show off what you've done to your rig? or have a custom project to show? Post it up here!

DIY Transfer case guard

Postby rodw on Sun, 04 Jan 2009 6:37 +0000

Well, I got to blame Mmaaxx again! He keeps picking my brains about mods for his truck and I decided I better tackle a more ambitious (for me) fabrication job just in case I take on one of the really big jobs he has in mind, but we might save that for another thread. So anyway, I decided to tackle making a more robust transfer case protector using some 100mm x 5mm flat iron that I had lying around. Armed with my 4" angle grinder, some cutting wheels, a drill press and my carefuly calibrated eyeometer to do all of the measurements and make sure I cut everything square, I got under way. Anyway, I started by removing the factory guard and using it as a template to drill a couple of holes in a piece of plate and folding it so it would angle down a bit. I also had to cut out a bit to make room for the front drive shaft. Folding it was hard work, I had to cut a groove on the back side as it would not budge. As I bent it, I ran the cut off wheel over the groove a couple more times to keep making clearance for the bend. Anyway, this is what I ended up with:

Image

Image

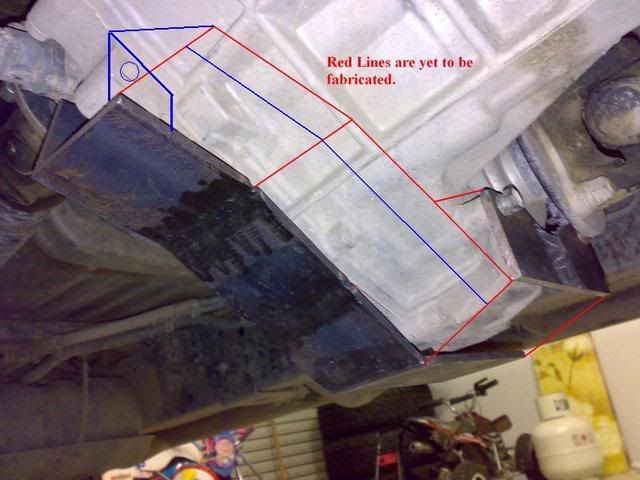
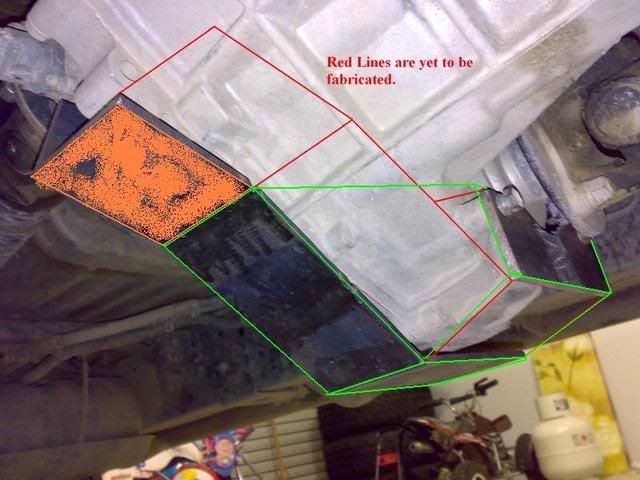
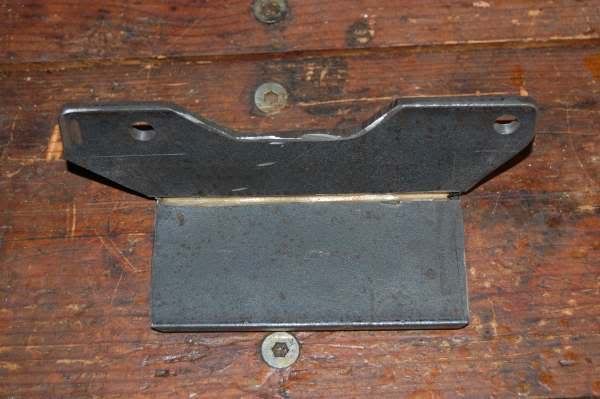
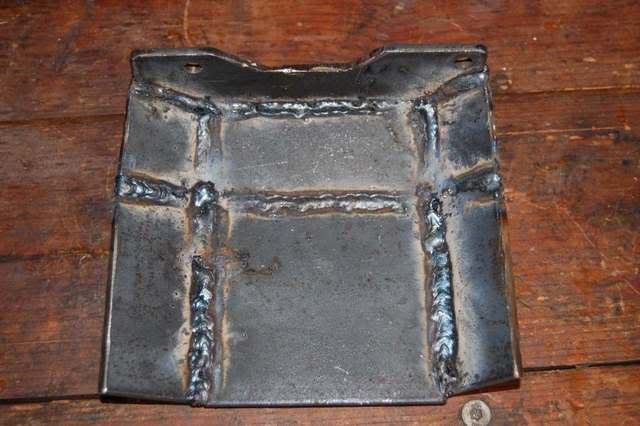
I fitted this bit a couple of times to check the bend was right. You can see I beveled off the sides so I could weld plates up the side.

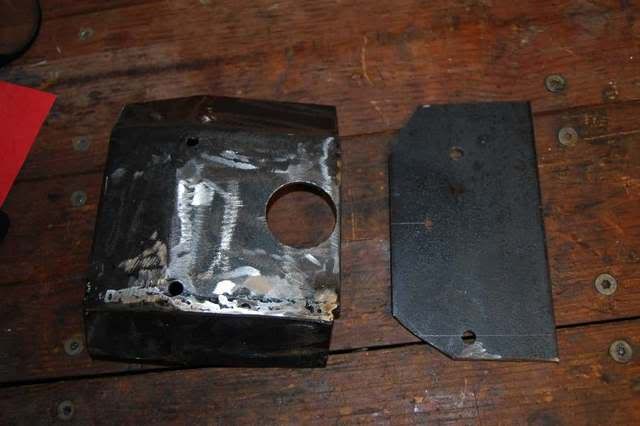
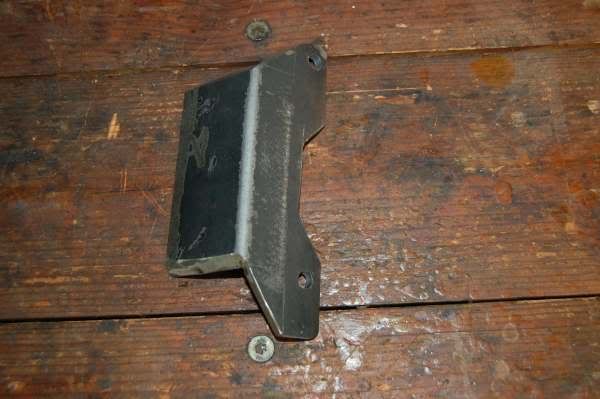
The next step was to cut another piece of 100mm wide plate which I tack welded on and carefully bent it into position so it went under the Transfer case to form the bottom plate. Once, again I fitted it a couple of times to make sure I got this up close to the transfer case. Ok, time to weld it all up and add the side pieces. This time, the eyeometer let me down a bit and I spent a bit of time compensating for error with the angle grinder. I needed 2 pieces on each side because of the angles. I welded it both sides (including the groove I cut) and ground off the outside welds. I tacked the front side bits into position before cutting off excess to make it all look neat rather than trying to measure up an odd shaped piece and cut it down. I might add I am a rank amateur welder, but I am sure this is plenty strong enough. This is as far as I have got today.

Image

Image

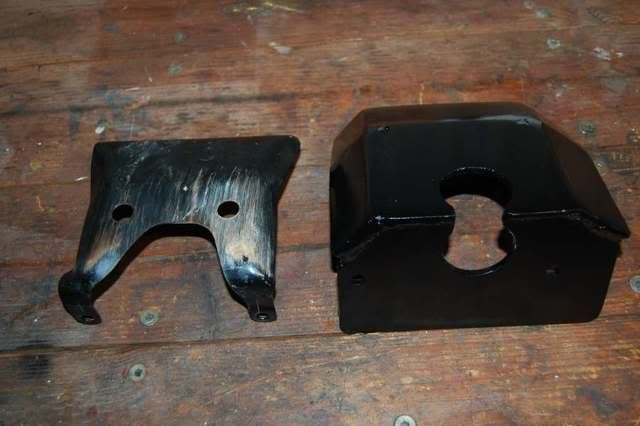
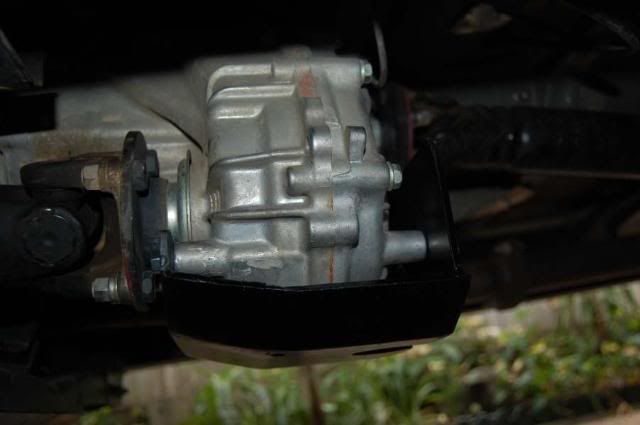
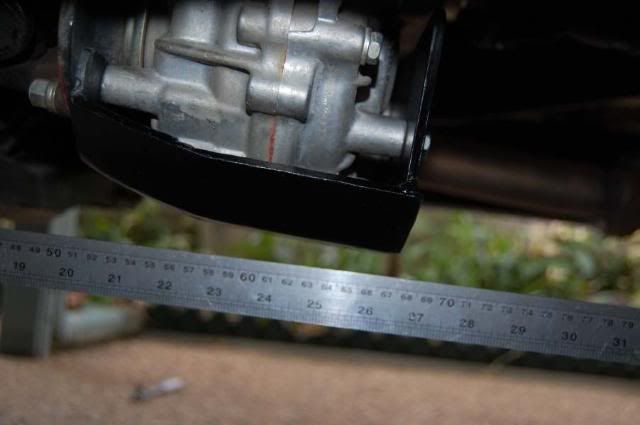
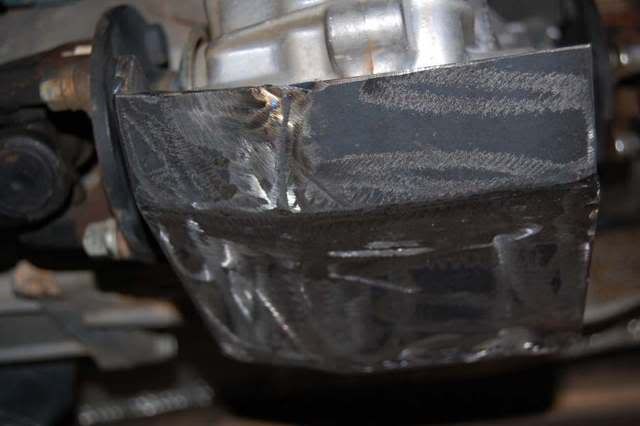
I still have to make up a plate to mount the rear of the guard but anyway, here is as far as I got today mounted in position. First the left hand side:

Image

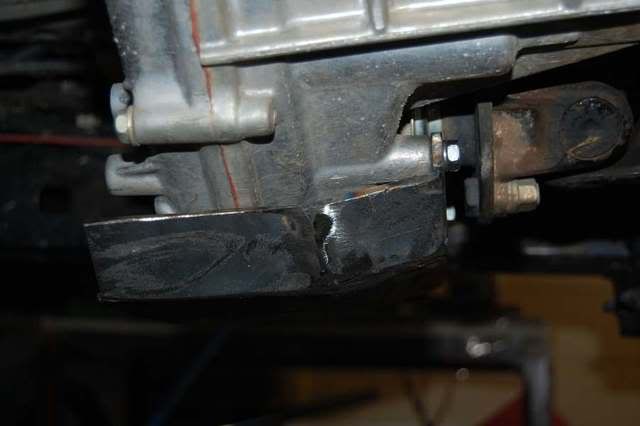
And the right hand side:

Image

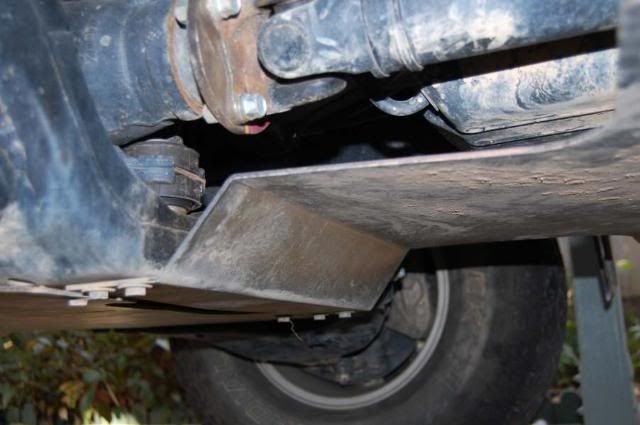
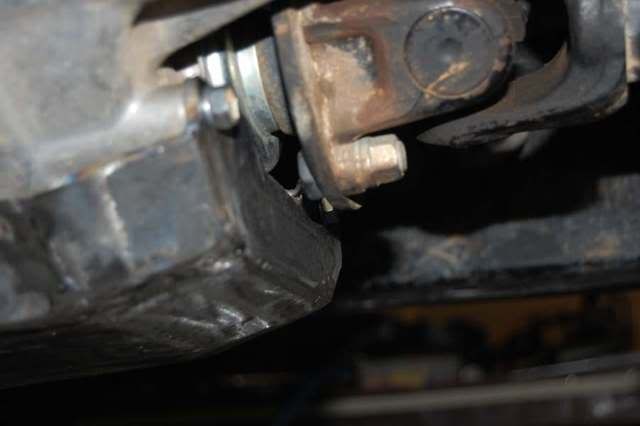
You can see that the bottom plate extends just back behind the mounting hole on the transfer case which will make it easy to butt weld the rear plate to it.
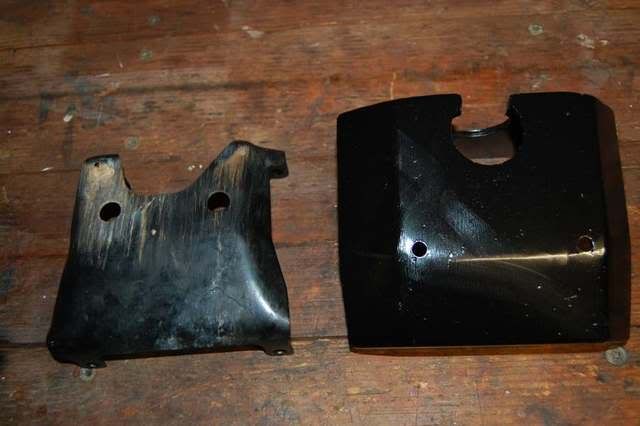
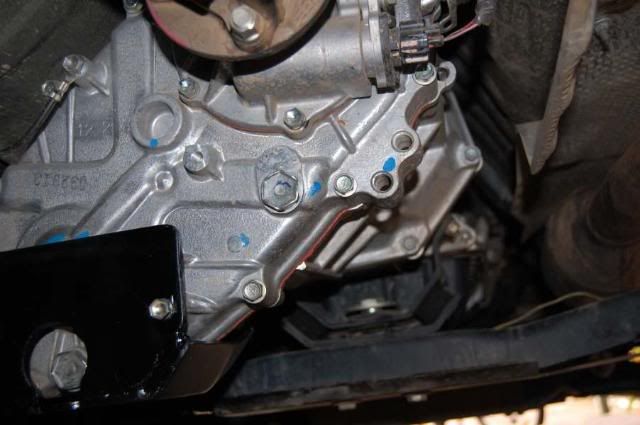
The back view:

Image

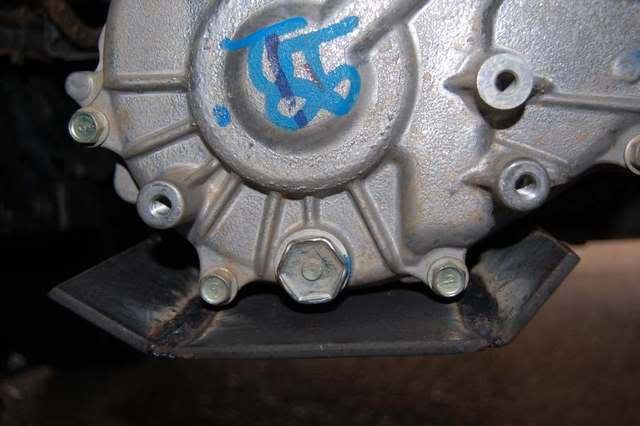
You can see that there will be some stuffing around to make clearance around the drain plug, but that should not be too hard and there is nothing to bend. Basically I will fashion the back plate, bolt it into position and tack it on while bolted on under the car, then take it off and weld it up fully.

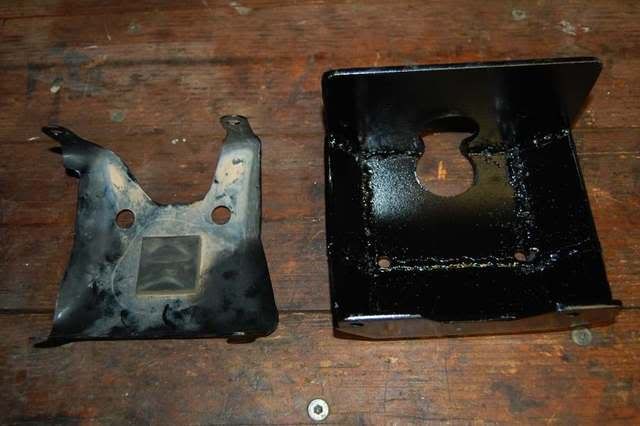
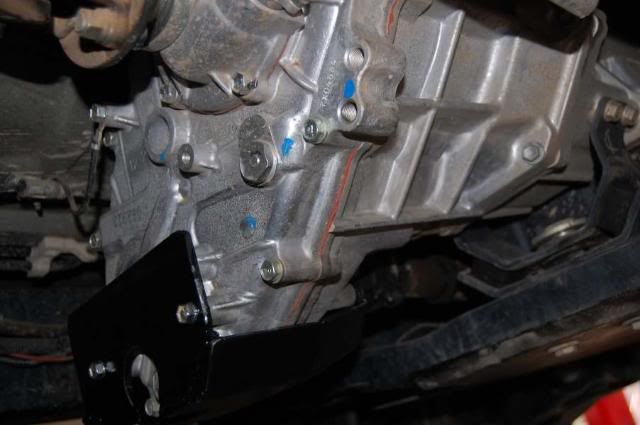
Here is a look at the front side which shows the cutout around the front drive shaft.

Image

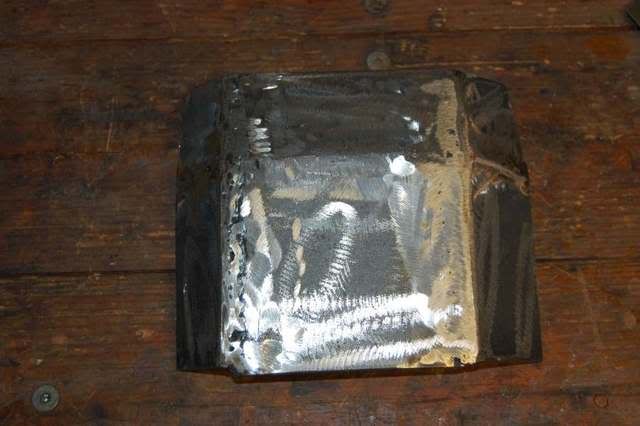
I might add, this is the most complex bit of metal fabrication I think I have ever attempted and I think it has gone very well so far given that everything was cut out freehand without a propper cut off wheel to get the angles right.

Any comments or ideas about this work in progress will be appreciated. I might not finish this until next weekend.
User avatar
rodw
 
Posts: 3195
Joined: Tue, 19 Feb 2008 2:00 +0000
Location: Brisbane, QLD


Re: DIY Transfer case guard

Postby Skog07 on Sun, 04 Jan 2009 6:49 +0000

Rod, I would look at putting some sort of hole around 20mm at the base of the of the guard to stop water and mud pooling and getting between the transfer case and the guard could make it easier to blast it out wih a hose when cleaning as well.
Looks good.
Cheers
Skog
User avatar
Skog07
Moderator
 
Posts: 4940
Joined: Tue, 08 Jan 2008 2:00 +0000
Location: Baulkham Hills, NSW

Re: DIY Transfer case guard

Postby rodw on Sun, 04 Jan 2009 7:03 +0000

Mark, sounds like a good idea, the factory one is cut away quite a lot to stop oil dripping and has a couple of drain holes in it. I'll see what I come up with.
User avatar
rodw
 
Posts: 3195
Joined: Tue, 19 Feb 2008 2:00 +0000
Location: Brisbane, QLD

Re: DIY Transfer case guard

Postby Hilux Max on Sun, 04 Jan 2009 7:15 +0000

Great stuff mate.....do I have permission to hijack this thread, I mean add to this thread when I do mine rather than start a new one?

Could be a 1 thread resource for those interested and inspire them to try something out too?

Any word of a group buy Rod on these yet?........ :lol: sorry, couldnt help myself mate.
User avatar
Hilux Max
Valued Contributor
 
Posts: 12434
Joined: Sun, 07 Jan 2007 12:00 +0000

Re: DIY Transfer case guard

Postby rodw on Sun, 04 Jan 2009 7:32 +0000

No worries mate, hijack as much as you like, but you couldn't afford my rates for the group buy mate.
User avatar
rodw
 
Posts: 3195
Joined: Tue, 19 Feb 2008 2:00 +0000
Location: Brisbane, QLD

Re: DIY Transfer case guard

Postby Skog07 on Sun, 04 Jan 2009 8:56 +0000

Rod, will give you a bit of a tip on how to fabricate the back plate.
A bit of a hint on how to make a template
If you get some card stockabout twice as thick as paper, your in printing so it shouldnt be a problem. Cut it out to mirror your required shape on the bottom to replicate your desired shape its a bit fiddly but you will get it pretty spot on. Much easier than an cutting the solid blank and grinding it to suit.
To get the mounting hole placement right, fit the cardboard into position on the transfer case. With the guard fitted at the moment in its current position. Then if available get say a 12mm ball bearing and push it into the mounting bolt hole. Buy doing this, it cuts a wad out of your template in the exact correct position for the hole. It saves alot of the guesstimation of trying to measure.
Also be really careful if you decide to tack the plate into position on the car. Make sure you disconnect BOTH battery terminals, on your second battery as well. And any wires that go to or between the battery. You can fry the electrics in the car.
Also wouldnt do large welds finishing the guard up. Id do short runs inside and out to minimise distortion as the guard could close making it a bitch to try and put back on after welding.
Cheers
Mark
User avatar
Skog07
Moderator
 
Posts: 4940
Joined: Tue, 08 Jan 2008 2:00 +0000
Location: Baulkham Hills, NSW

Re: DIY Transfer case guard

Postby Lately Lux on Mon, 05 Jan 2009 7:18 +0000

That looks bloody good Rod, I'll be havinf more time to myself in the future so will 'borrow' this idea and make up my own. :D
Keep up the good work.

Brett
User avatar
Lately Lux
 
Posts: 223
Joined: Thu, 25 Oct 2007 1:00 +0000
Location: Bonogin, QLD

Re: DIY Transfer case guard

Postby Hilux Max on Mon, 05 Jan 2009 10:21 +0000

Yeah, got started this morning, not gonna post any pics till it starts looking like something. LOL :lol:

will work on it bit more tonight and tomorrow, may post some pics tomorrow arvo.
User avatar
Hilux Max
Valued Contributor
 
Posts: 12434
Joined: Sun, 07 Jan 2007 12:00 +0000

Re: DIY Transfer case guard

Postby Hilux Max on Mon, 05 Jan 2009 7:45 +0000

Ok, Just like Rod was blaming me for him starting this, Im blaming him now for doing the same thing....LOL :lol:

Well I started this morning with finding what scrap metal I had lying around. As you can see, I had heaps of 5mm angled steel brackets which I used for this project.

Image

Looking at the transfer case protector, you can see that it is bent forwards...Must have been when I was recovered in reverse at some stage....possibly my "little puddle incident"-

Image

The pic below is just from the rear of the transfer case and what I have done so far. You can see that it probably gives you a little bit more clearance than the standard protector.

Image

The pic below just shows another angle. There is a threaded bolthole where the red dot is in the pic. I'll be drilling a hole and trying to find a bolt that fits. Got bloody hundreds of botls at home and would you beleive it not one of them has the right thread!!!

Image

And finally, Is a pic from the front showing in red what I plan to end up doing. Slightly different than Rod, in that Im planning to cover the transfer case abit further up, but both design a good if you ask me. Anything over the standrad one is a benefit.

Image

Just takes abit of time and effort.
User avatar
Hilux Max
Valued Contributor
 
Posts: 12434
Joined: Sun, 07 Jan 2007 12:00 +0000

Re: DIY Transfer case guard

Postby Skog07 on Mon, 05 Jan 2009 8:25 +0000

Looks great Mmaaxx.
Fair bit of fabrication work involved there. Can I offer you an idea as well to increase the frontal strength of you final drawing?
User avatar
Skog07
Moderator
 
Posts: 4940
Joined: Tue, 08 Jan 2008 2:00 +0000
Location: Baulkham Hills, NSW

Re: DIY Transfer case guard

Postby Hilux Max on Tue, 06 Jan 2009 1:09 +0000

Im all ears mate. any help or advice will be appreciated. :D
User avatar
Hilux Max
Valued Contributor
 
Posts: 12434
Joined: Sun, 07 Jan 2007 12:00 +0000

Re: DIY Transfer case guard

Postby rodw on Tue, 06 Jan 2009 4:52 +0000

Good work Max, I got the rear plate cut out last night and started to make the drain holes. put 2 small drain holes in at the front and cut a 44 mm hole with a hole saw for the drain holle on the under side and will do the same on the rear plate where the pilot hole is drilled for the hole saw now. I wil cut out the steel between the holes and the edge of the plates so there will be clearance around the drain similar to the factory one.

Image

Now I was walking back to my rig to test ft it all at one stage and wondered why I was tapdancing while I walked. I found out that I had actully done a md on my trusty work boot.

Image

I saw a piece I cut off drop down near me feet and now I know why I could not find it to pick it up. Just goes to show how important good footware is when doing this sort of stuff. I never even felt a thing under my feet. Glad me boots are nearing the end of their life as you can see.

Max, I have not checked, but I am pretty sure that that bolt will be 12mm x 1.25mm metric fine thread. I have a tap her that size, so I will check it for you. Mark, don't giv eup on your technical advisory role that we have appointed you to on this thread, you don't need to ask permision to help out!
User avatar
rodw
 
Posts: 3195
Joined: Tue, 19 Feb 2008 2:00 +0000
Location: Brisbane, QLD

Re: DIY Transfer case guard

Postby Hilux Max on Tue, 06 Jan 2009 5:51 +0000

Rod,

Would love to see you tapping dancing around your hilux mate :lol:

I know where your coming from thou, I was in thongs in the garage and thought Id be right till some welding splatter fell on me foot.......I dont think you could describe it as tap dancing.....probably looked more like these drugged out ravers the way my feet were moving!

:shock: :o

LMAO :lol:
User avatar
Hilux Max
Valued Contributor
 
Posts: 12434
Joined: Sun, 07 Jan 2007 12:00 +0000

Re: DIY Transfer case guard

Postby rodw on Tue, 06 Jan 2009 6:19 +0000

Maax, sorry I was not there to watch your dancing display as I am sure would have :lol: :lol: :lol: laughed a lot! Pissed myself reading your post!
User avatar
rodw
 
Posts: 3195
Joined: Tue, 19 Feb 2008 2:00 +0000
Location: Brisbane, QLD

Re: DIY Transfer case guard

Postby Skog07 on Tue, 06 Jan 2009 4:06 +0000

Here is the drawing if you can add some welded tabs shown in blue and figure out a way to utilise the bored hole to retain a bolt. Its a kind of hard to get idea of clearances with photos and drawing.
Image
There is a slight weak point that is unsupported Underneath your red text there is an aluminium web close to the corner of your plate. ( Underneath your red text) This corner could be pushed up into the webbing creating a high point load an Could push a hole into the case. You could reinforce it with some flat bar like shown in the drawing and it would not compromise any clearance.
Cheers
Mark
User avatar
Skog07
Moderator
 
Posts: 4940
Joined: Tue, 08 Jan 2008 2:00 +0000
Location: Baulkham Hills, NSW

Re: DIY Transfer case guard

Postby rodw on Tue, 06 Jan 2009 7:22 +0000

Wel guys, look slike I might have got the drop on Max. :D I think mine is finished, just waiting for the paint to dry before refitting it.

Here is what I ended up with beside the factory skid plate for comparison:

Back View
Image

Front view
Image

Inside view
Image

As Skog said, it will warp from being welded. I bolted it together, tacked it lightly, checked for fit and it was tight, then bent it out so it would fit with a mm or so and then welded the back plate of the vehicle using lots of little welds diagonally opposite each other and then had to tap it into position with a hammer to get it back on. Now it's painted, it probably won't fit! If I did this again, I'd place some thin card as a spacer on the bolts to give just alittle bit of play. Anyway, the factory plate in the photos makes an interesting comparison. Pretty pleased with the final result. Will post some pics of it fitted tomorrow all going well.

I think this is a good first up fabrcation project to tackle so get the confidence to do something more elaborate. I learnt a lot. Thanks Skog for the ideas and tips as resident technical expert. I did disconnect both batteries, just hope the rig starts in the morning!

Cost me nothing as I had all the materials on hand. Planning something more ambitious later in the year.
User avatar
rodw
 
Posts: 3195
Joined: Tue, 19 Feb 2008 2:00 +0000
Location: Brisbane, QLD

Re: DIY Transfer case guard

Postby Skog07 on Tue, 06 Jan 2009 8:27 +0000

Hey Mmaaxx.
Have another look at the proposed design over your existing photo in Green now. I reckon this one would give a fair bit of strength as well.
You could shed the orange painted section.
Reckon if you bash this mother she will tear the D4D out. And would have more metal in it than a Patrol diff.
Image
User avatar
Skog07
Moderator
 
Posts: 4940
Joined: Tue, 08 Jan 2008 2:00 +0000
Location: Baulkham Hills, NSW

Re: DIY Transfer case guard

Postby Hilux Max on Tue, 06 Jan 2009 9:15 +0000

Skog,

Thanks for the feedback and technical input. The first pic was a little confusing but the second pics above you did I like what I saw.

Kind of glad I only did a couple hours of work on it today and didnt continue on.

Image

Now just to confuse, I mean add to the pic above, the areas that you drew in green, that I have put spots on I already have.

I did the bottom section today to join it together and ran into the same problems that Rod did.

I tacked it on the vehicle and when I removed it a tacked it some more on the inside. Anyway, went to refit and it would fit on.

Pulled it off and gave a light tap with hammer and hit it too hard and the front piece came off. wasnt bloody happy. Had to clean it up with the grinder again, refit it on the vehicle and tack weld it again.

anyway, got it done in the end and cleaned her up.

Looking into the picture you modified and the above pic Im including here, I will seriously consider removing the orange shaded portion tomorrow, and lookminto the possibility of the green area you drew that I have put stripes on.

I think I may need to do it in two parts to get around the transfer housing from the edge of the front plate, which is the oink line going through the middle.

all in all it looks to be a stronger design with slightly less metal. and supporting itself better.

cheers mate, will have to shout ya a beer one day ;)
User avatar
Hilux Max
Valued Contributor
 
Posts: 12434
Joined: Sun, 07 Jan 2007 12:00 +0000

Re: DIY Transfer case guard

Postby Skog07 on Wed, 07 Jan 2009 6:47 +0000

mmaaxx wrote:Skog,

cheers mate, will have to shout ya a beer one day ;)


Tell you what mate, how bout I shout you a beer after you have finished my transfer case protection plate. :P :P

Your design with the two plates would be stronger again with the pink line through it on the cross hatched section. Than a flat broad piece of metal like I orginally draw. Make you you post plenty of pics up of the completed project. A contrasting shot from the other side would be great as well.

Anyway mate, it looks good and Im pretty sure if you were to drive over a landmine or something your transfer case would be perfectly intact... hahaha

Well Done.
Cheers
Skog
User avatar
Skog07
Moderator
 
Posts: 4940
Joined: Tue, 08 Jan 2008 2:00 +0000
Location: Baulkham Hills, NSW

Re: DIY Transfer case guard

Postby rodw on Wed, 07 Jan 2009 7:20 +0000

Well here's the one that started this thread off. I have it finished and fitted to my truck now so here are some pictures. Max is on holidays so he has got a bit more time to waste than me at the moment. It is good to see he ran with the idea.

Image

Image

Image

I spent a fair bit of time looking at it all again now it is fitted and considered extending it like Max ia doing. I was concerned about what will happen on a big knock as the Tcase looks like it has a pretty weak case. I decided I can do what Max is doing at any time and felt that a big enough knock will probably still wreck the T/case anyway the way we have got it mounted. But I concluded that if you got that big a knock without our guards in place, the case would break anyway. I am not convinced that it needs protection right up the sides when you see how high it is in relation to the rest of the underbody guards. Here is the step up to more clearance from the TJM FUG to the TJM transmission guard.

Image

You can see the lowpoint is the front guard by a long way. The T/case is another 25mm higher again than the TJM Tranny guard. In this pic, I tried to hold the straight edge up against the tranny guard but it was hard one handed while taking a pic at the same time, but you can see the extra clearance.

Image

Rather than going to Max's solution, I was thinking of how to protect the tranny guard by extending the TJM FUG's further back. But here is nothing to mount to. However, Max showed me a pic of a similar set up to what I wa slooking at where the guy bolted in a new cross member to mount the guard to. I realised that when I eventually get sliders, one of the mounts will be on the chassis rail pretty well under the t/case as can be seen in the white marks in this pic where the guard is likely to be fitted but it could be moved back a bit further. At this point, there would be a nice 8mm x 75mm slider mount on the inside of the chassis rail that you could weld a bracket onto that would allow you to mount an extra crossmember accross the truck to mount the that the third FUG. I have not got as far as looking on the other side to see what has to be done to get round the exhaust.

Image
User avatar
rodw
 
Posts: 3195
Joined: Tue, 19 Feb 2008 2:00 +0000
Location: Brisbane, QLD

Next

Return to Member Build Ups

Who is online

Users browsing this forum: No registered users and 150 guests