In the beginning:
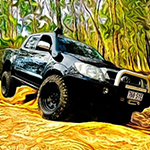
About a year ago... Newcastle Toyota... this caught my eye and I thought, That'll do!!

Came with the hard cover, 32" MT ATZ's and an alloy bullbar.
Figured I wanted a car that could securely hold all my gear, get me and the missus out onto the beach or up the scrub and tow a few dirt bikes out for a good weekends ride. Not a bad looking rig either...
Then, I got onto the New Hilux forum and the mod bug bit me...
Started with simple things like the RM Williams mud mats but the more I read the more I had to have.
After a few near misses with the standard brakes an upgrade was looking mandatory and having the 17" Prado wheels the 120 series Prado brake upgrade seemed the best choice. Check out this thread for how that turned out:
Big brakes meant i may as well have some more power and a ChipIt computer came up for for sale in the forum classifieds. I jumped on it and soon had a great little unit making the most out of the D4-D. (thanks rob!!) I fitted that in the driveway and it was straight forward to do. Took about 2 hours to install and link up to the lappy. I also bought a Scan Gauge II on ebay to reset any codes that were thrown up by the chip and help keep an eye on what was going on under the bonnet.


Having the chip led to exhaust upgrades...
Ebay was my friend there as well and before long i had a Scott's Rods 3" mandrel bent, turbo back exhaust delivered to my door for 900 bucks. My golden tip for doing this job is to get some spray on penetrant, spray it on the dump pipe nuts at the back of the turbo and leave them sit for at least a day. I've read about guys having to remove turbos and things to replace studs after trying to take exhausts off and mine came off nice and easy with the help of the penetrant. Again, the replacement was done in the driveway in just over an hour. pieceahpiss!!
I looked around at canopies for a while and found these guys in Melbourne selling SJS Canopies. It's not bad and pretty good value. Not without its issues though. Any fast dirt work tends to make the canopy migrate rearwards so I think I'll replace the 6 clamps that were supplied and just bolt it straight into the tray. Refer to this thread for the canopy: viewtopic.php?f=41&t=12300
While I was in Melbourne I stopped into an Autobahn store to see if they had any UniFilter air cleaners in stock. They didn't have any but I found a K&N filter on their clearance table so I snapped that up put it straight in. The return trip showed a very minor performance increase... I like the fact that I can clean it whenever I like. That's it's main advantage.
More eBay trolling uncovered a full set of custom Rough Country seat covers. They're neat, comfy, look pretty good and should keep the stock SR5 seats in good condition.


After using my magna to get some long lengths of steel home from work instead of the lux one day I figured I better sort out some roof racks. I went down to the local ARB store and ordered a set of HD Rhino racks. 2 for the roof of the cab and a 3rd for the top of the canopy.
I installed them myself and simply followed the rhino-rack installation guide. There's a couple of threads floating around where we talked about how to put them on. I'll find a link later (reminder)
A special that someone mentioned here on the forum led to purchasing an LED light bar. I went with a 22" 40LED unit (8000 lumens) to fit between the uprights on the alloy bullbar. I drilled 4 holes in the bar and wired up to the existing driving light wiring. Cheating I know but it was so simple


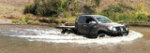
A recent camping and 4x4 trip really showed me how... 'urban' my lux really was. Tracks were wet and muddy and with a slight uphill on some clay and mud our convoy came to a halt. Half worn MT ATZ's and no winch meant we weren't going any further and while there were other cars with us with even more of a handicap, I was inspired to improve the car.
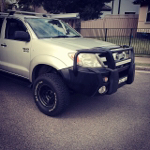
Another trip to Melbourne to return with another eBay purchase... A near new ARB Sahara bar which came with all new mounts, plates, bolts and wiring. It already had the optional ARB metallic black paint but the colour wasn't quite right and I managed to do a deal with a local spray painting shop to have it colour coded at short notice if I did the prep work. Too easy

While that was being done I ordered a Runva 12000lb winch with dyneema rope to be fitted when I got the bar back. Wolf4x4 are a forum sponsor and they do a good deal through their website and I was impressed with their speedy delivery.

As you can see in the pic, the orientation of the gear handle just wasn't right and my first mission was to take the winch apart to get it right. Easy enough job too, just unto the two cross beams behind the drum and she splits in three. Undo the 10 or so (3-4mm) bolts on the gear-set case, reposition the gasket and bulkhead and put it all back together. (Hot tip: don't forget to put the drive shaft back in and put some quality grease on the drive gear - mine didn't have any)

My mate that helped my install the bar picked up an issue with the location of the drain hole/earth point and also set about fixing it.
The winch motor isn't sealed from factory and comes out of the box with the drain port in the horizontal (half full) position. To rectify we undid the two bolts at the end of the motor, took the end cover off and repositioned the motor in a similar fashion to the gear set end. A good slather of RTV sealant during re-assembly should help keep the dirt, dust and water out of the motor. Having the drain port at the bottom will enable good drainage too. Hopefully our improvements don't adversely affect my warranty...


A quiet but windy Saturday afternoon in the hangar saw the fitting of the bar completed... We glanced at the ARB installation guide a few times to check on a few things and fitting it was fairly straight forward. Having a crane to hold the weight of the bar is the best thing to help get the bar lined up. By the end of the day we had it spot on and I was pretty chuffed with our efforts. I've seen worse jobs straight out of professional workshops.


During the week I wired it up and made it look good. Well, as good as I could.. I still need to sort out an isolator switch and finish off the custom hawse brackets I've knocked up.
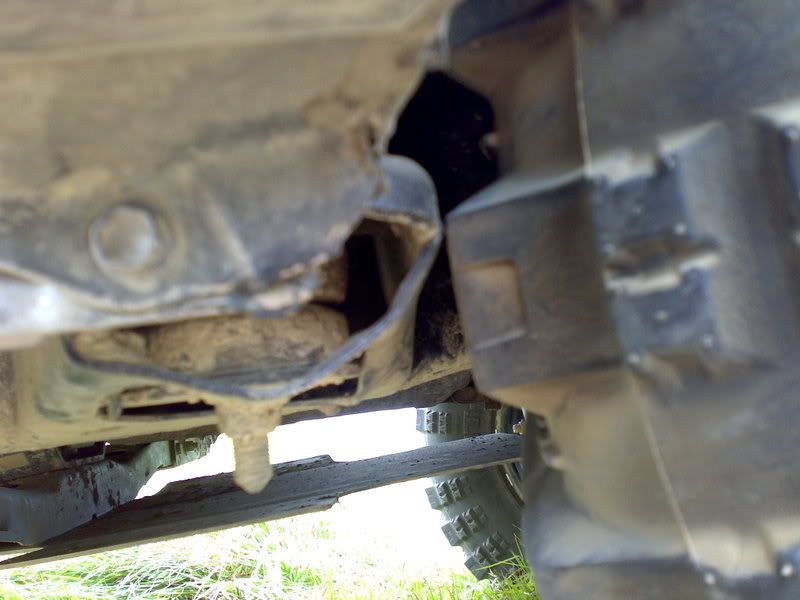
With the winch bolted in and at its highest possible mounting point, the cable opening still encroaches on the hawse opening. I figured the best way around this problem was to bring the hawse forward on a custom bracket. This also ensured the rope would never rub on the bullbar when winching on more acute angles.


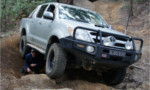
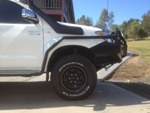
Enter the realm of 33's...
Many weeks of research and asking lots of people questions about what works on these cars paid off last weekend.
Max at monster rides sourced a set of 17x8 +10 Dynamic steel wheels. And I sourced a set of 285x70x17 BFG KM2's
A carton of coldies to a mate and I had them assembled and ready to go.


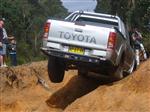
Saturday finally arrived and I set to work, cutting and trimming and beating the inner guard into the shape it needed to be to fit these things in. Everything I did can be found on the 'fitting 33" tyres" thread.
Many thanks to Josh, Mick, Max and everyone else that helped me get this sorted.
To say I'm stoked about how good this thing looks now is an understatement.


I think that's about it...
Cheers
Dan.