You need a total of 8 LED bulbs, 3xT3 neo wedge, 2xT4 neo wedge, 2xT5 wide angle wedge and one T4 neo wedge with the plastic housing removed. This will do the 2 HVAC, 1 a/c, 1 ash tray, 1 cig socket, 1 de-mister, 1 power heat and the auto gear selecter light.
I got all my LED's from eBay as no one local sold any smaller than a T5 and the T5 I did try was too much of a spot light and not enough spread. I also tried using the silicone covers but they were no good the end result was more of a white light than blue.
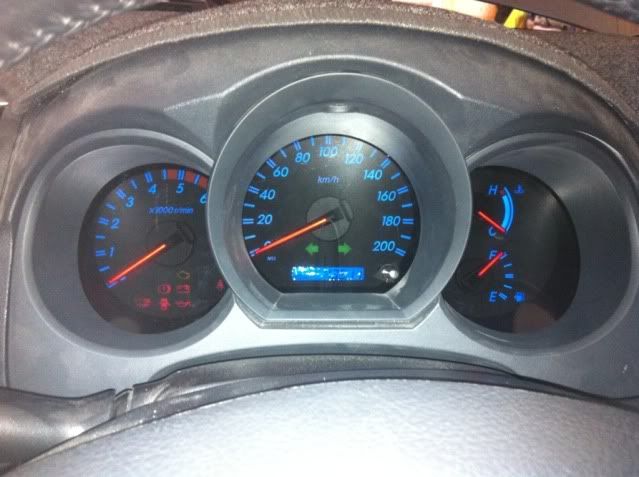
To change the instrument cluster to another colour you will need cellophane or a similar translucent plastic in the colour of your choice.
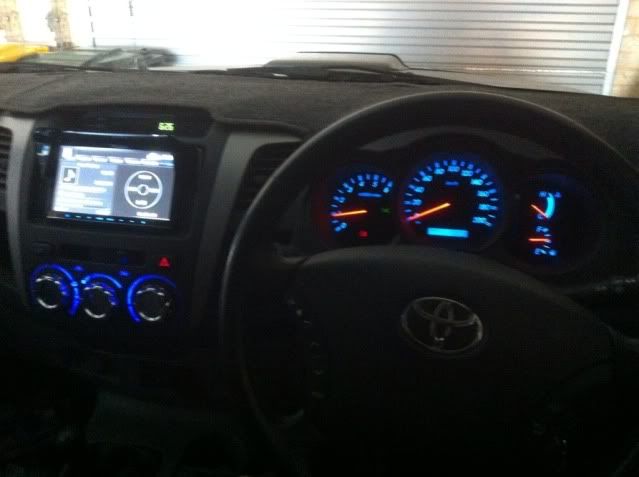
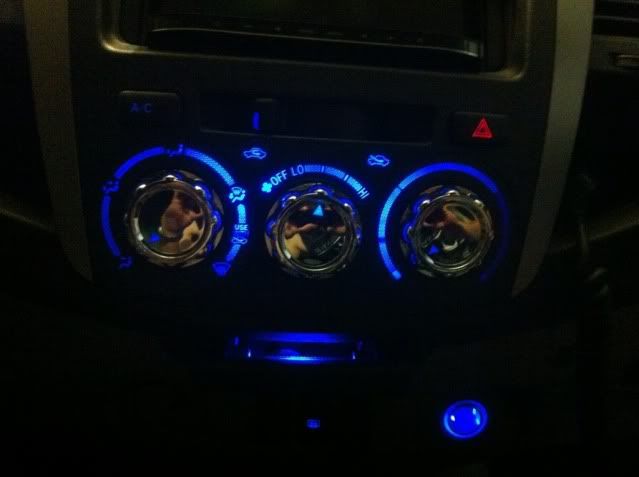
- Start by pulling off the HVAC knobs and remove the screw from behind the middle one, then pull the stereo/HVAC surround off, and unclip all the wires .
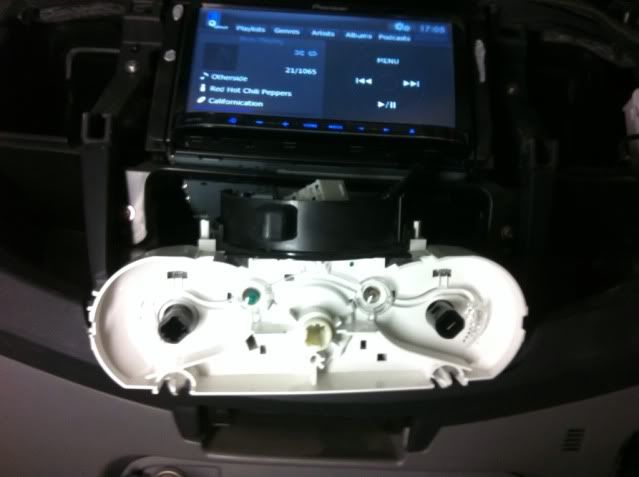
- Remove the white HVAC control board by pressing down on the tabs on either side of it.
- To make it easier I then removed the "fresh/recirc" slider by pushing in on the tabs on either side, you can get to the other one by changing it from fresh to recirc etc.
- You can then remove the 2 bulbs and swap them for the T4 LED's.
- While you have the surround off remove the A/C switch and swap over that bulb.
You may need to drill out the hole a bit deeper like I did if your bulbs are a bit longer than the originals like mine were.
Don't try and force it as they are quite fragile and will break the internal soldering.
The LED's are also polarity sensitive so test if you have it in the right way round before you put everthing back together.
But whatever you do, DO NOT try and change the bulb around while the lights are on as you WILL do serious damage to your switches, as stupid me found out
- Reach in above the ash tray and pull out the light and swap this for a T5 wide angle bulb you can also remove the green lens, it just pops out.
- Put your A/C switch back in, clip on the fresh/recirc and put the HVAC back in place and put the stereo surround on.
- To change the cig socket light and the rear demister, reach behind and push the whole panel out, it's only held in by clips.
- Change the demister bulb the same way as the A/C switch
- Remove the bulb holder from the cig socket and push the bulb up and out of the holder
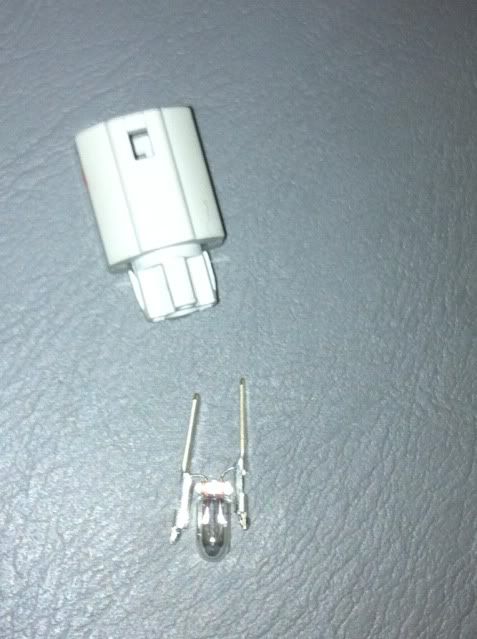
- De-solder the bulb from the pins, remove the T4 LED bulb from its holder and solder in your T4 LED bulb to the pins and place back in the holder and reassemble everthing
- The power heat can be accessed by reaching behind and pushing the whole switch panel forward and out, you can then use the last T3 bulb in the same way as for the A/C switch.
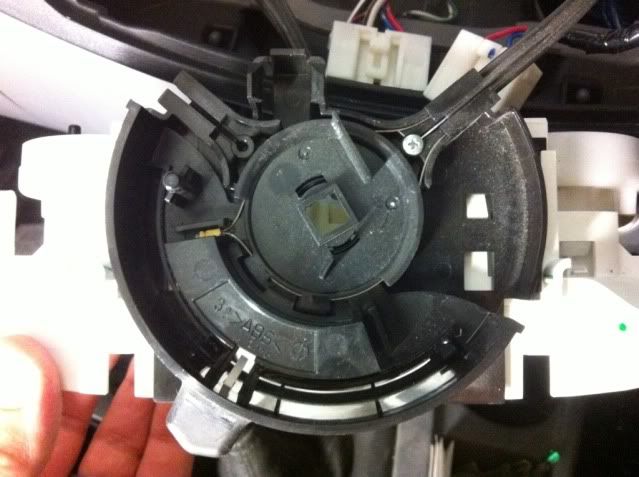
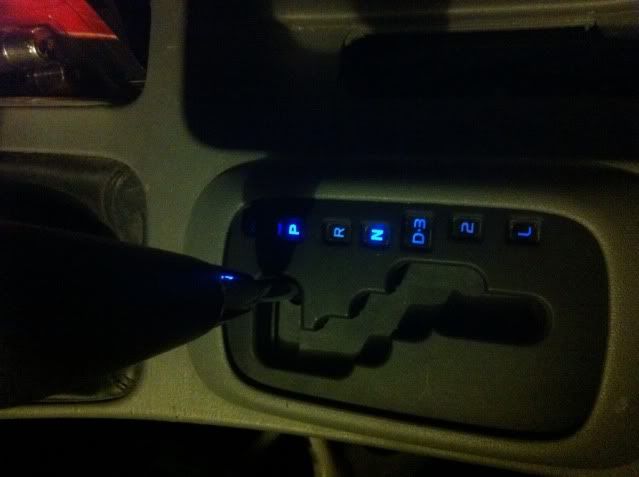
- Now for the Auto gear light (if you have an auto that is) remove the small cover under the handbrake by pulling it up, unscrew the gear knobs, remove the centre consol by pulling it up from just in front of the lid for the centre box thingy and it should pop out. Gently pry off the cover from around the auto stick and remove the bulb holder and swap the bulb over for a T5 wide angle, then put it all back together.
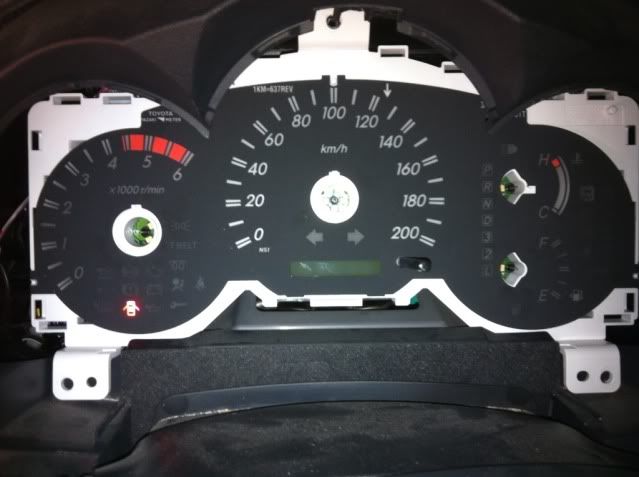
- Now for the instrument cluster, it's probably a good idea to disconnect the battery before starting this bit to protect the ECU, there is one screw in the middle at the top to remove then the whole thing can be pulled out exposing the console.
- Remove the screws and pull the console out and unplug the wires. Take off the tinted cover by gently prying at the tabs.
- Remove the covers from the instrument gauges by lifting from the tip being carefull to only lift the cover not the needle.
- Remove the needles from the black dials by prying the tabs.
- Gently pry the dial straight up off the console.
- Take the face off the console and cover the console with your cellophane I used 3 layers of blue but will probably switch back to 2 layers as it is a bit dark during the day. Make sure it is tight and smooth over the odometer, the rest is not so important
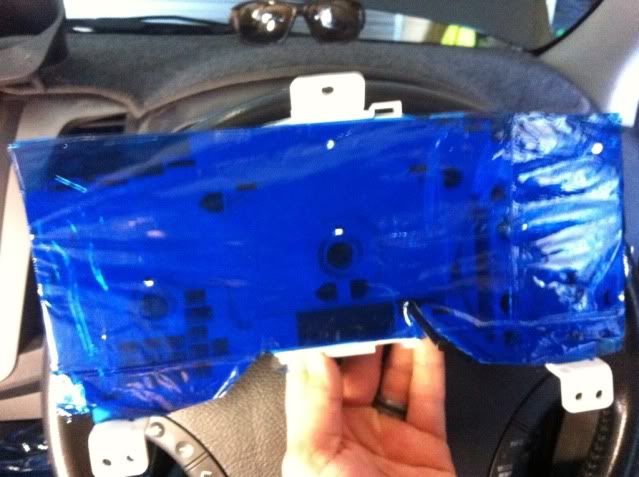
- Use tape to hold it in place as you go
- Put the face back on and trim the cellophane from the edges and the holes in the middle using the face as a guide for the holes.
- Put the dials back on making sure the needles are pointing the right way by aiming them slightly above the "zero" mark and turning them to back to zero.
- Reassemble the console and put your dash back together and enjoy the blue glow
Obviously this takes some level of skill so attempt this is all at your own risk.
If you need more pics or more info I'm happy to help