Micks Blulux

Want to show off what you've done to your rig? or have a custom project to show? Post it up here!

Re: Micks Blulux

Postby 2010Blulux on Wed, 04 May 2011 6:15 +0000

D4D luxy wrote:Did u have to fit new control arms or diff drop kit or anything like that wen fitting the big gear?


Yeah I would definitely recommend at least the diff drop brackets as well, I just paid for mine today, My CV's are on a pretty feral angle I'm getting a bit of a vibration through the front end and I'm assuming they are the cause. I'll pick up the UCA's in the next month or so I think to make full use of the down travel available. Matty has some extended ball joints but your nearly half way to the cost of the UCA's anyways so I'll just hold off for a few more weeks and go the whole hog.
User avatar
2010Blulux
 
Posts: 120
Joined: Sat, 07 Aug 2010 4:50 +0000
Location: Sunshine Coast. QLD


Re: Micks Blulux

Postby danmcccc on Wed, 04 May 2011 6:20 +0000

extra down travel means even worse angle...i should get them but i think ide rather buy a front locker and not have huge downtravel and blow cv's
old enough to know better...young enough to not give a f**k

MY KILLER BUILD THREAD
viewtopic.php?t=9235
User avatar
danmcccc
 
Posts: 2522
Joined: Mon, 10 Jan 2011 5:16 +0000
Location: Brisbane, westside

Re: Micks Blulux

Postby Jack S on Wed, 04 May 2011 6:52 +0000

Extra down travel = awesome!!!
More the reason the get monsters upgraded cvs than....
User avatar
Jack S
 
Posts: 3424
Joined: Thu, 17 Sep 2009 4:29 +0000
Location: Bathurst, NSW

Re: Micks Blulux

Postby bill_i_am on Wed, 04 May 2011 7:40 +0000

Diff drop makes a huge difference Mick, I certainly recommend getting one.

Jack - is English your first language? :lol: :lol:

Jack S wrote:More the reason the get monsters upgraded cvs than....
I might be slow, but I'm rough.......
User avatar
bill_i_am
 
Posts: 546
Joined: Thu, 10 Jun 2010 9:52 +0000
Location: Kingaroy

Re: Micks Blulux

Postby 2010Blulux on Thu, 05 May 2011 6:47 +0000

bill_i_am wrote:Diff drop makes a huge difference Mick, I certainly recommend getting one.

Jack - is English your first language? :lol: :lol:

Jack S wrote:More the reason the get monsters upgraded cvs than....


His Ingrish seems fine to me.


Taking one look under the truck its a no brainer really. Shouldn't have been such a tight a$s. :lol:
User avatar
2010Blulux
 
Posts: 120
Joined: Sat, 07 Aug 2010 4:50 +0000
Location: Sunshine Coast. QLD

Re: Micks Blulux

Postby 2010Blulux on Thu, 05 May 2011 7:09 +0000

So I've been having a look under one of the lux's we have out at work here and I thin I've come up with a plan of attack for the rear end of my ute. I have attacked my old LN46 in a very similar way.

My plan is to get hold of a couple of new spring hangers and weld these in position on the bottom of the chassis, slightly forward of the centre line of the original tubed hole to make for a better shackle angle. Knock up a couple of new shackles with some greasable pins maybe a little longer than stock. I havn't taken any exact measurements yet, but there should nearly be a gain of a good inch, not to mention the improved shackle angle.

I am sure there will be a downside to this, I will probably need to use some caster wedges or something to keep the pinion angle within reasonable geometry. I'm also thinking about adding another leaf to the pack to stop the leaves wanting to invert so much, (the pack on the old ute used to site inverted nearly all the time.. was a great ride but no god for carrying ft chicks) and there's the obvious legal issues which I'll have a chat to my engineer about this week while sorting out cutting the Bundy in half.

Advantages I can see will be the improved shackle angle I mentioned already which will allow a little more down travel and a nice ride, a little bit of lift, with everything painted black it should look fairly stock to the untrained eye, and hopefully with some experimenting and an extra leaf or to I can carry all the camping gear without dragging the as$ along the ground like a staffy with worms.

Thoughts?
User avatar
2010Blulux
 
Posts: 120
Joined: Sat, 07 Aug 2010 4:50 +0000
Location: Sunshine Coast. QLD

Finally updating

Postby 2010Blulux on Sun, 29 Jan 2012 10:30 +0000

It's been ages since I've updated this so I'll have a bit of a go at catching up.

The big one completed before the trip was the duel battery setup and sorting out out to get power to everything.

Last new years my Mig kicked the bucket and being the lazy kind of bloke I am I didn't really do much about getting it fixed, so when the time came to knock up the battery tray I ended up having to borrow a mates arc welder. I didn't really get any photos of putting alot of this stuff together cause some filthy little junkies decided to find a way into our house and pinch anything that they could fit in a suitcase they found in our wardrobe, this included camera's phones, savings jars, jewellery...etc. I hope the little pricks OD..... umm anyway. I mounted the battery in the normal spot, and hung the redarc isolator from the standard battery clamp.

Image
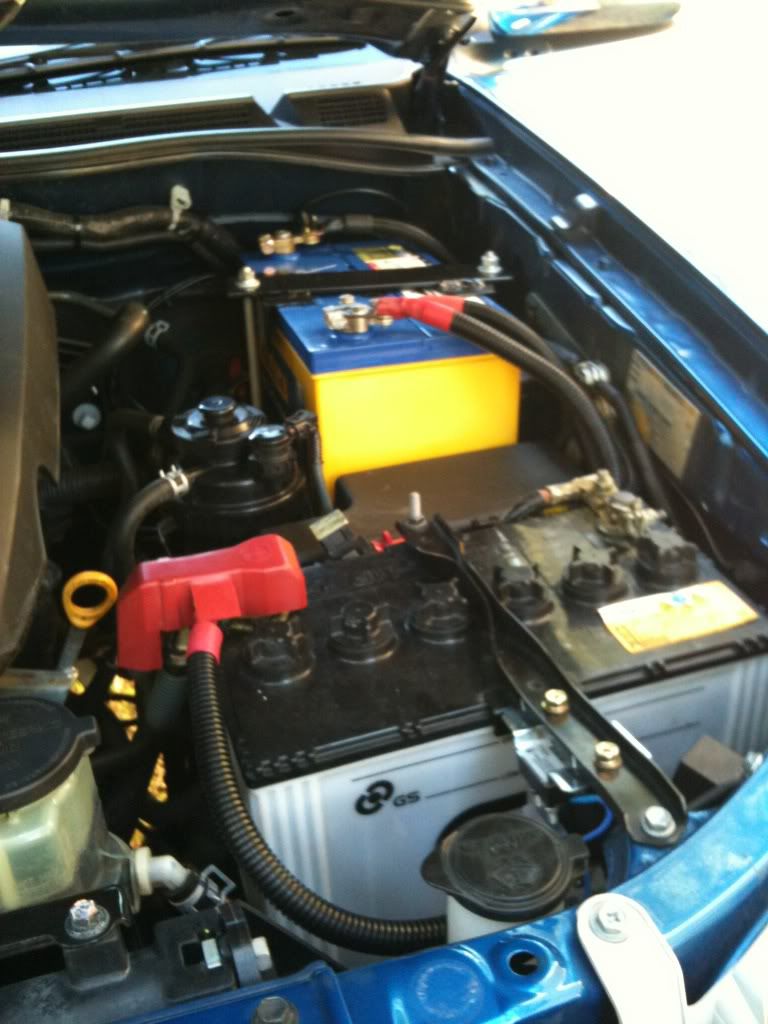
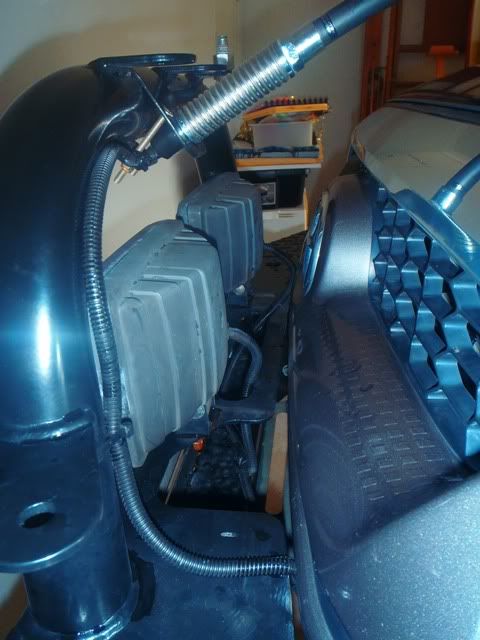
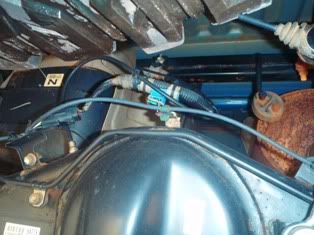
You can also see the tubing for the rear diff curled up on the firewall just behind the second battery.
I pinched a 100amp main fuse from surf wiring loom I had in the shed in wired it into the cable I have running to the rear. I could do some more work tidying that up I'm just waiting to find the right bits at the right price.

Image
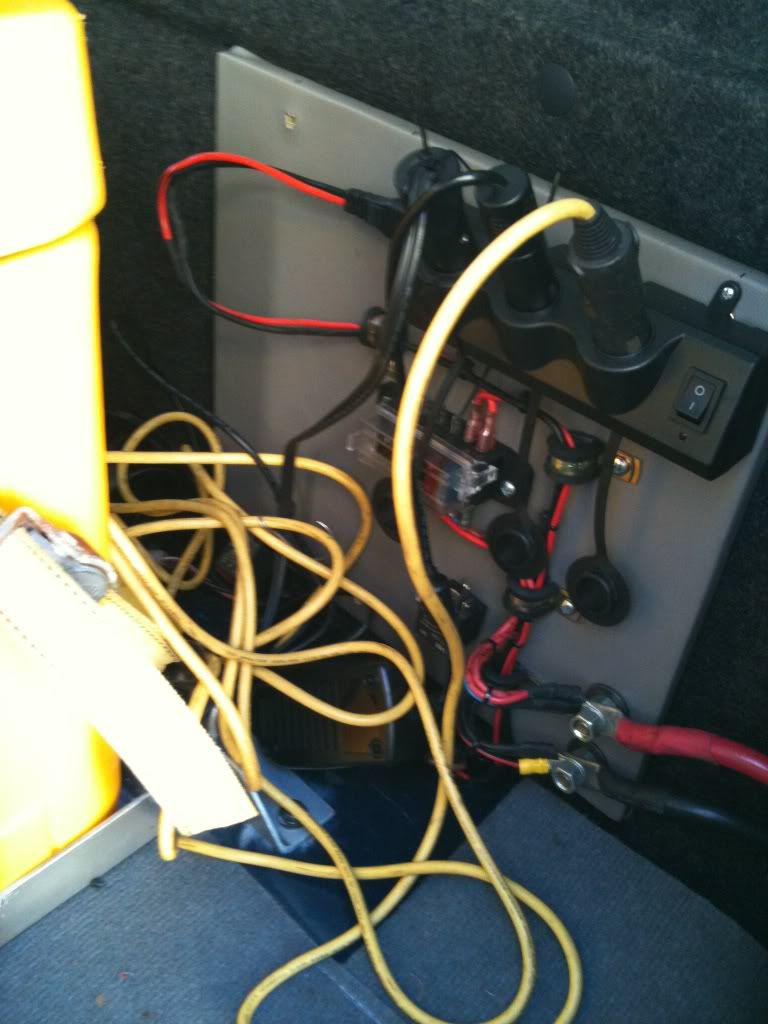
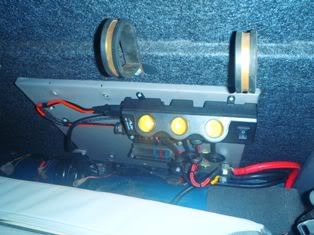
I cut out a bit of 16mm MDF and trimmed it with some left over vinyl I had from the Bundy. I have a few relays mounted on there for future goodies, one for the ARB compressor, a fuse block and a 3 outlet ciggie socket thingo I picked up from ABR Sidewinder for about $30. I wasn't overly impressed with the ciggie socket gizmo. The sockets aren't quite deep enough the plugs pop out on the road every now and then. You can see in the pic I've ziptied the one for the fridge to the board but this just destroyed the plug. I ended up hard wiring the lead for the firdge into the fuse block on an overnight stop over in Boulia because it just wouldn't stay in any more. So from the back here we run our 70L EvaKool, our EvaKool tough light, and the 12V adapter for the Laptop. You can also just see one of the mounts for the fridge, these pick up on the seat mount and seatbelt bolt holes. They locate it really well and give something to strap it down to.
The cable that runs to the battery is a bit of overkill but I had it laying around and I definitely wont need to upgrade it any time soon.
User avatar
2010Blulux
 
Posts: 120
Joined: Sat, 07 Aug 2010 4:50 +0000
Location: Sunshine Coast. QLD

More duel batt setup pics and UHF

Postby 2010Blulux on Sun, 29 Jan 2012 10:54 +0000

This is a later pic electrical gear behind the back seat. Just before the trip I threw on a couple of big rubber lined P clips to keep the cables for the Tough light and the laptop charger.

Image
You can also the the compressor mount down to the left. I spent hours squeezing an old ARB compressor from the old Bundy and wiring it up only to find once I was finished that it had a stuffed valve, so I stripped it, found the offending valve and headed off to our local ARB dealer. They had some great news. The parts for these older compressors aren't made anymore, so already running out of money I just ended up borrowing the in-laws Bushranger compressor. It ended up working great but was just another thing to try and find space for. I've also fitted a cover to the power cable since this was taken

I scored an ex display GME TX3420 on Flea-Bay for 250 bucks with a new remote face. The main box which houses the speaker is mounted just below the glove box. I wasn't sure if it would be loud enough that far away but it works great and is super neat. The face is mounted with some really heavy duty Gel tape. I used the same stuff for the GPS on the dash and after 2 years in the sun its still holding up great.

Image
I experimented with different spots for the mic clip but just keeping it in that little pocket next to the head unit seems to work the best. I also fitted a relay to behind the left hand ciggie socket that switches the socket and the UHF to the AUX battery when the ignition is turned off. Not really sure why I didn't just wire them both up the the Aux battery permanently but it seemed like a good idea at the time.
User avatar
2010Blulux
 
Posts: 120
Joined: Sat, 07 Aug 2010 4:50 +0000
Location: Sunshine Coast. QLD

UHF and Antenna

Postby 2010Blulux on Sun, 29 Jan 2012 11:19 +0000

I paid $66 for this 1.5m long antenna from another bloke on Flea-Bay. Fitting the car into the garage didn't even cross my mind when I bought it.

Image

Image

So I could park the thing inside I fitted it on a GME clamp on style Bullbar mount. This allowed us to loosen off the bracket and roll it back. There are a few different makes of pivoting mounts available but most of them are cheaper than a smaller antenna. Once all this rain stops and we get back to work I'll pick up something a bit shorter and throw this one on something else. The worst part about rolling it back is not being able to open the bonnet. So for now I have to keep a 1/4" ratchet and screwdriver in the car in case we need to get in there in a hurry.

Image

Another good auction score was this suction cup camera mount for something like $20 delivered. Its really strong and has never came of the windscreen. We hang our Olympus tough camera from it. The downside is having to rotate all the video.

I finally got around to fitting the MR diff drop brackets, The change was instantly obvious. It levelled out the CV's as expected and got rid of that annoying little vibration I had in the front.

Image

Image
This shot shows the diff breather fitting and 6mm plastic line. I ran the line to the front and for now it's just coiled up and zip tied up high on the firewall. I'll eventually knock up a little breather box and run everything to that.

About a week before the trip we decided some seat covers were a good idea, The other half picked up these WetSeat jobbies online. She found the add in a 4x4 Action mag. They weren't too expensive from memory but we had to pay extra for the headrest covers. They leave the outside open to allow for the side airbags. These come as a universal cover so you have to cut out the holes in the top for the head rest. The material is pretty stretchy though so I just fitted up the cover nice and straight, speared the headrest posts through them to make the holes and opened them up a tiny bit with scissors.

Image
User avatar
2010Blulux
 
Posts: 120
Joined: Sat, 07 Aug 2010 4:50 +0000
Location: Sunshine Coast. QLD

Previous

Return to Member Build Ups

Who is online

Users browsing this forum: No registered users and 115 guests