D4D's new slide on camper- Now for sale!!
I wanted to build a camper for my new hilux. I had a canvas canopy on my old rig that was great for trips away but I thought the new ute should be something a little better that could be set up at home then just dropped on the tray with a minimum of fuss. We're planning a cape york trip next june so I had to organise something. I'm pretty happy with the out come (so is the wife fortunately) so much so that I thought I'd share it with you all. Thanks should go to Quinny for organising the 13-15 NewVember trip that was the inspiration to get it finished, even if in the end I couldn't go. Still shitty 'bout that.
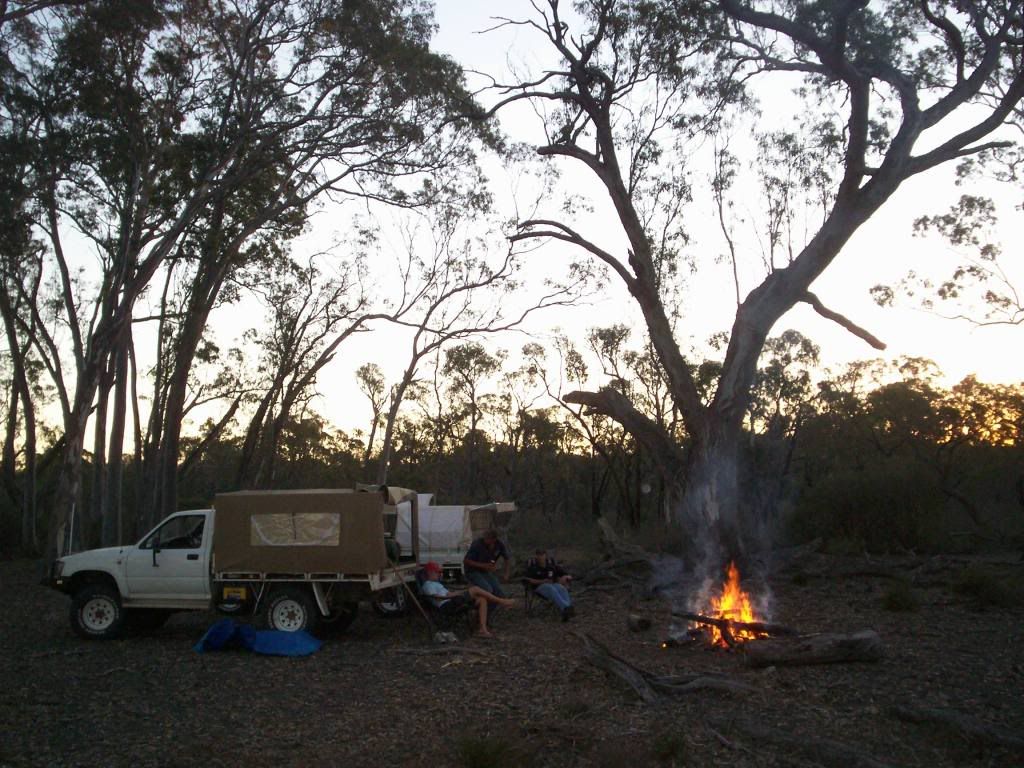
Any how this is what I had with the old ute. Worked well but took an hour or more to set up and unpack at home.
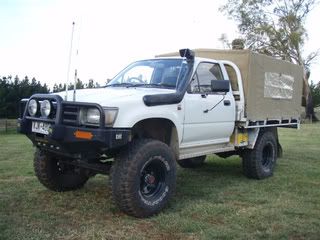
After scanning some magazines I saw this. Basically what I'd wanted but I didn't like the price tag.
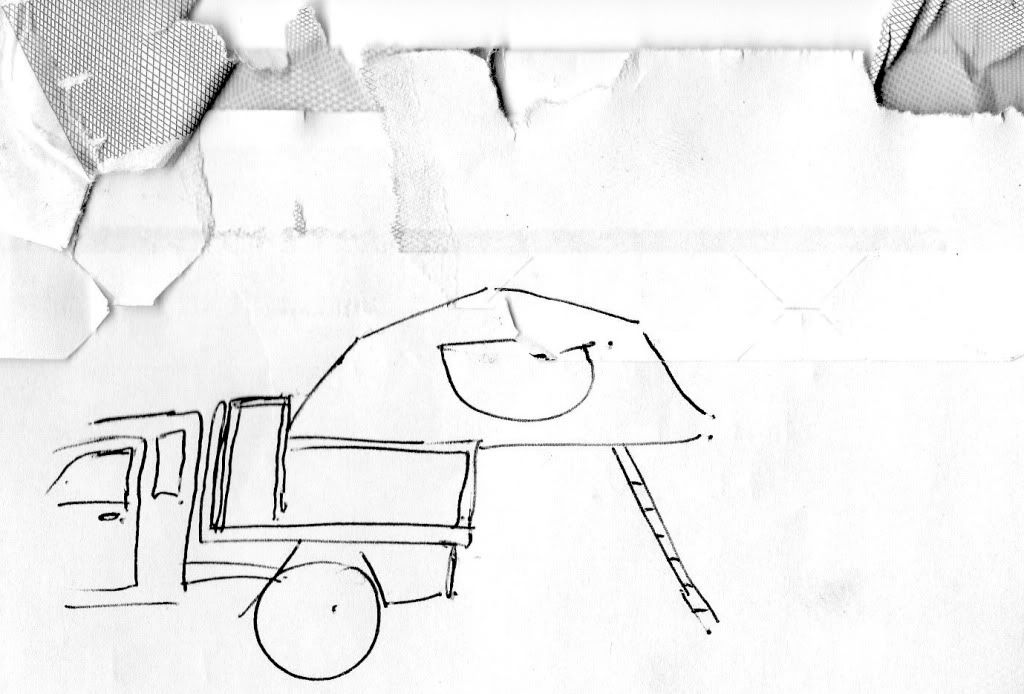
I was doodling on the back of an envelope and drew this when the wife saw it she said 'why don't you build it?'. So it started.
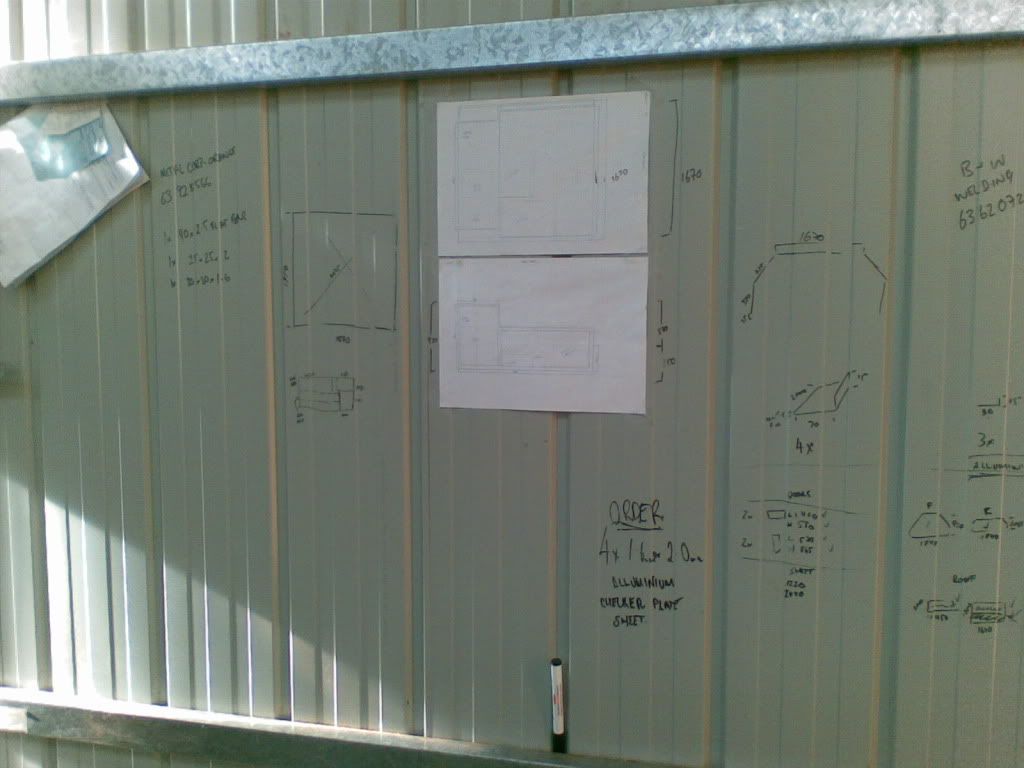
Planning began in ernest with a white board marker on the inside of the shed, works well!
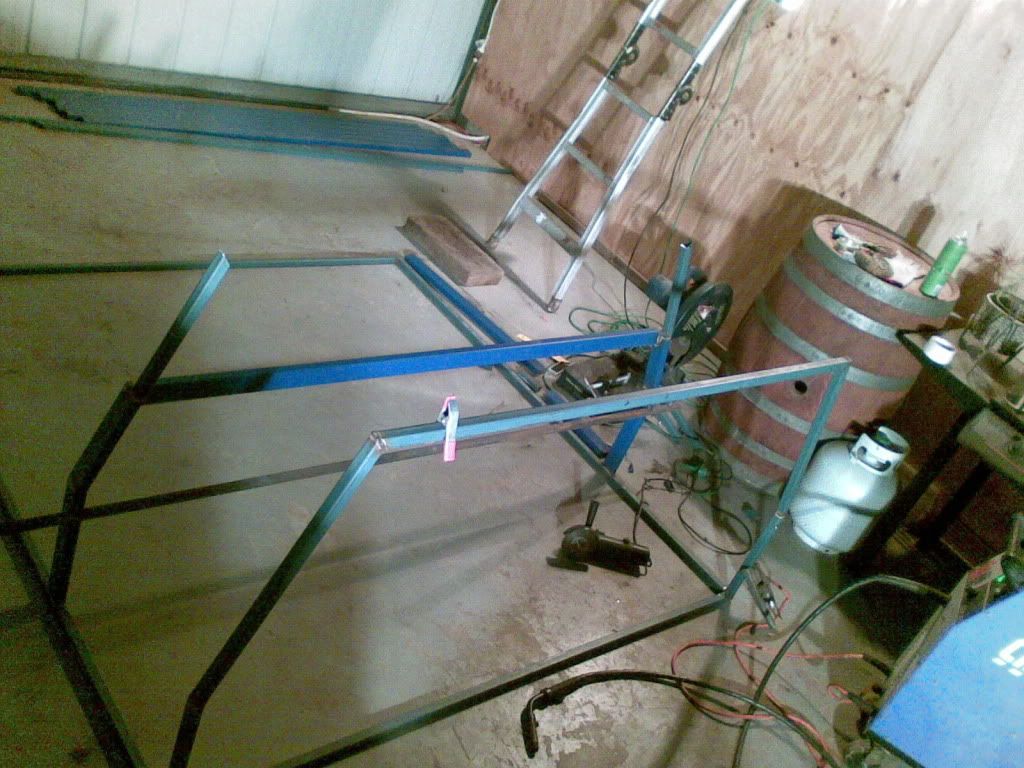
Then the work began. Obvious place to start was the frame.
I had local metal mob, B&W Welding in Orange (great guys) bend some 1.6 sheet steel for my door surrounds which I then mitred and welded into place. Then ground and flapdisc'd all the welds to smooth them. Long slow job!
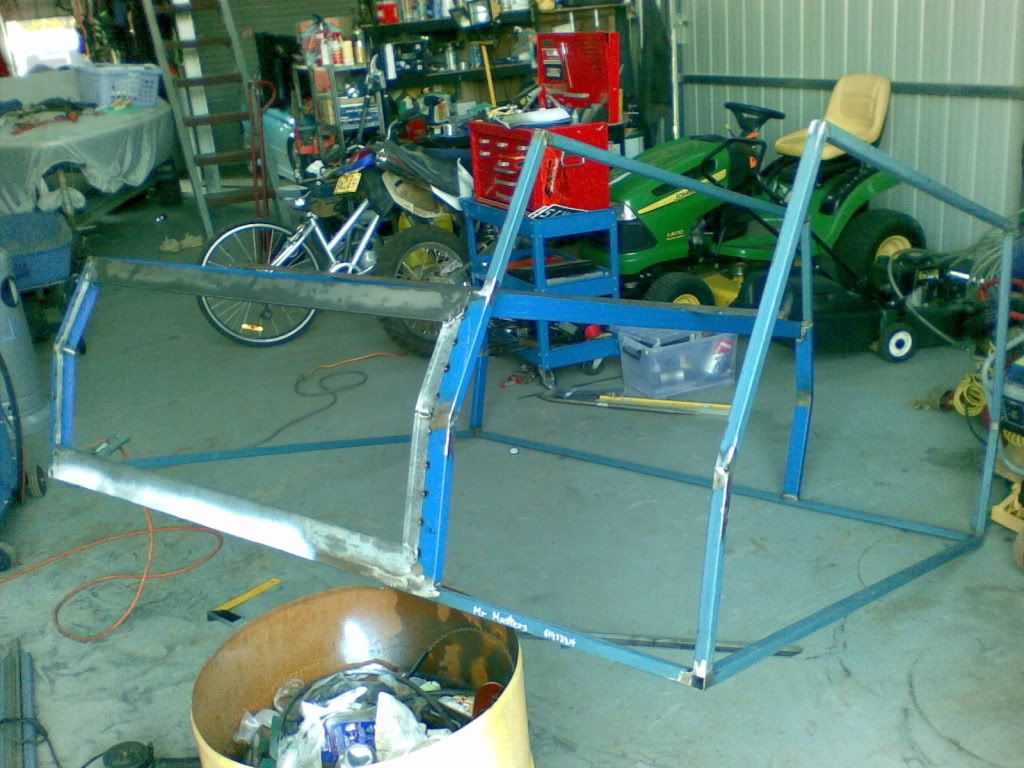
Test fitting the frame.
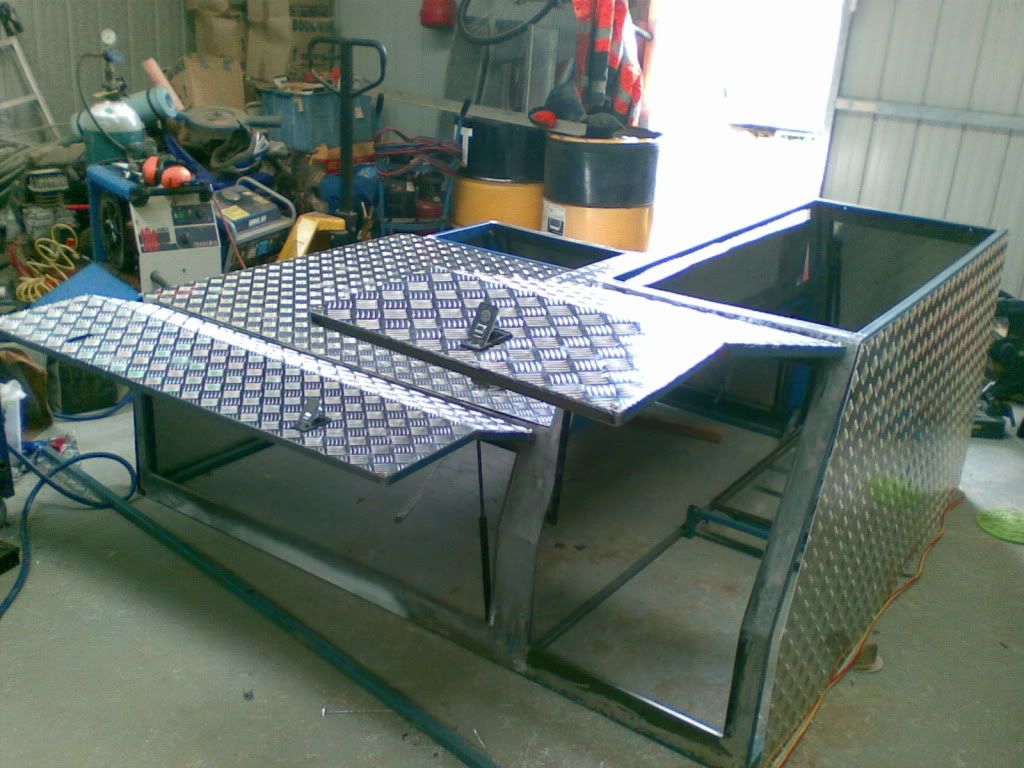
Next all the ally sheet was ordered and cut. Careful planning was required because this stuff is expensive and I didn't want to buy any more than I had to. Gas struts came from the local wreckers and are EF/EL Falcon bonnet jobbies. Only $28 cheaper each than through Blackwoods!!
Test fitting again with ARB tent on top. Starting to come together.
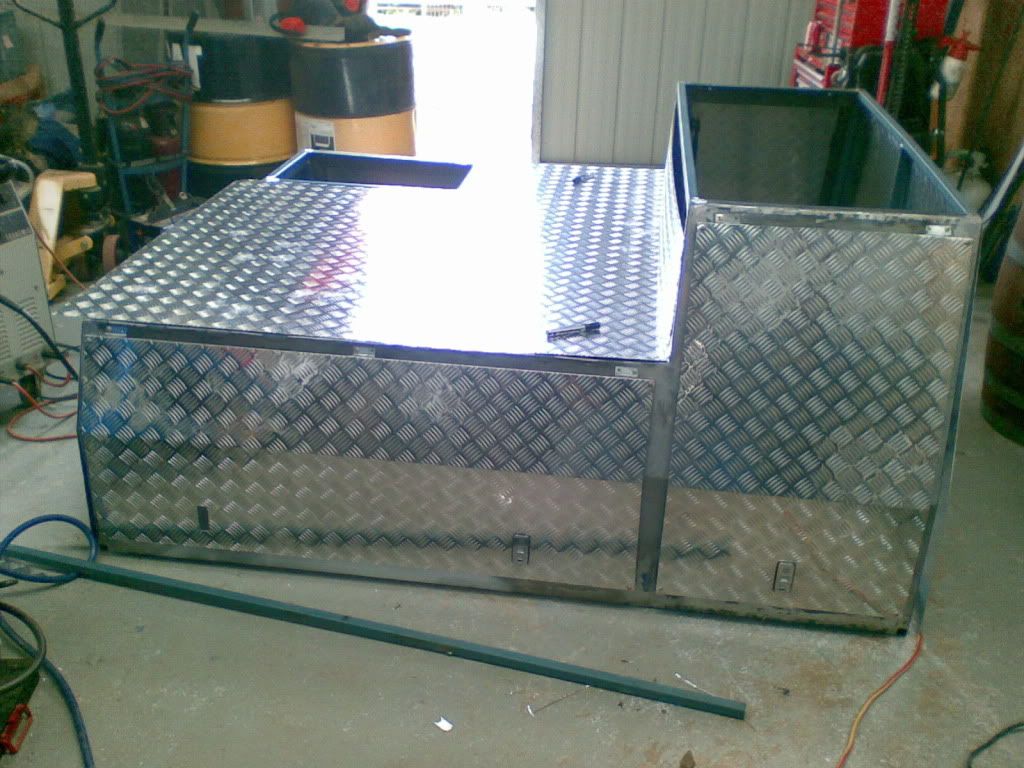
All the ally was then removed and the frame painted with a hammer tone charcoal grey to match the tent.
The ally then was refitted but this time I used sika flex and over 350 pop rivets. Word of warning: if any one else is gonna build one like this dont be a tight ass like me. Go and buy an air rivet gun off ebay. Your fore arms will thank you for it!!
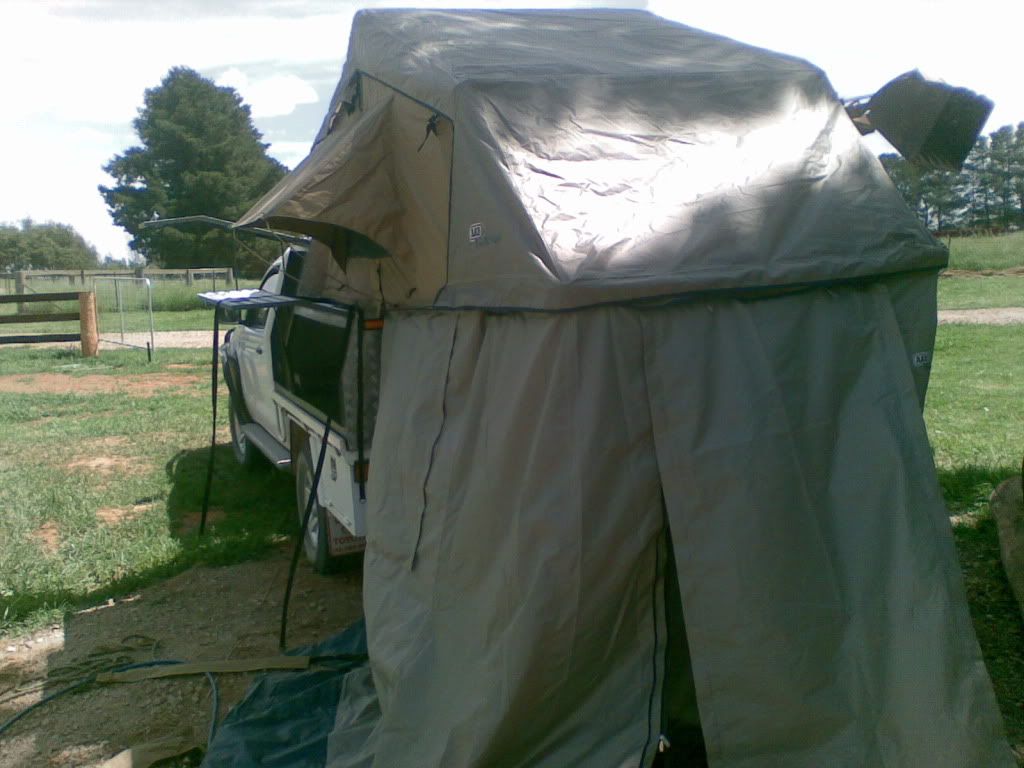
Then to fit the tent.

Tent annex is a bit too long for my application but we will get some velcro sewn into it so it can be tucked up then lowered again for use on the wifes prado (she wants one for when the rug rats come along in a coupla years).
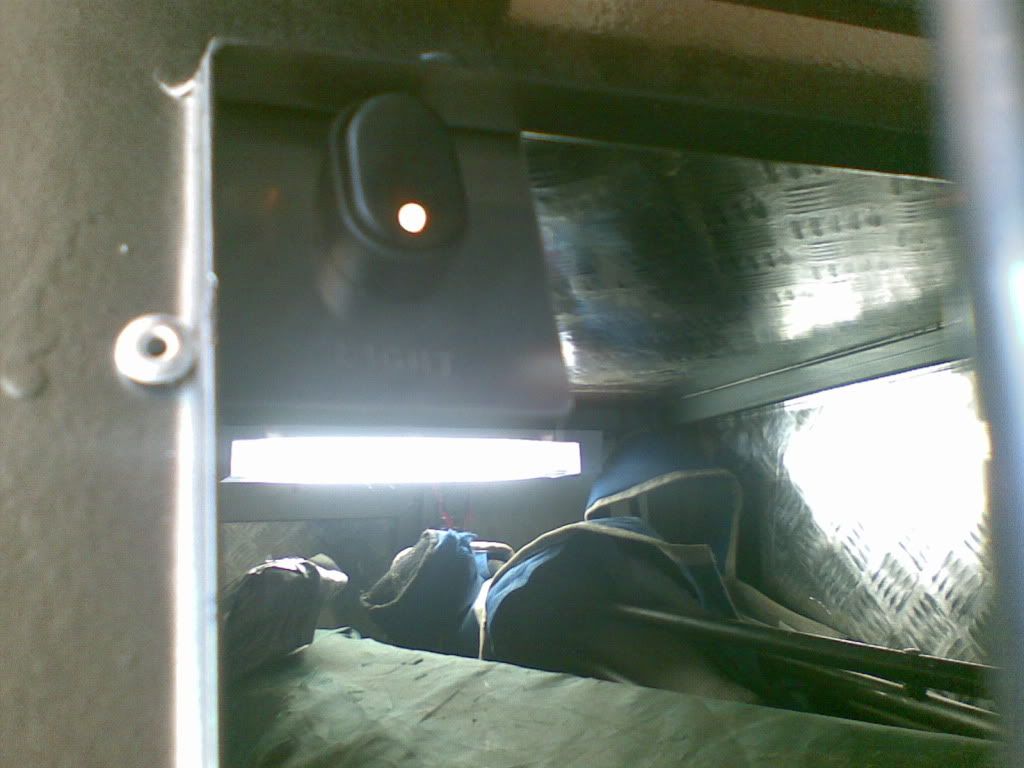
Next step was the wiring. Done with three 12v fluros and a 12v water pump off ebay. Gotta love ebay! It came to the rescue with a 1000w inverter and some LED strip lights for inside the tent too!

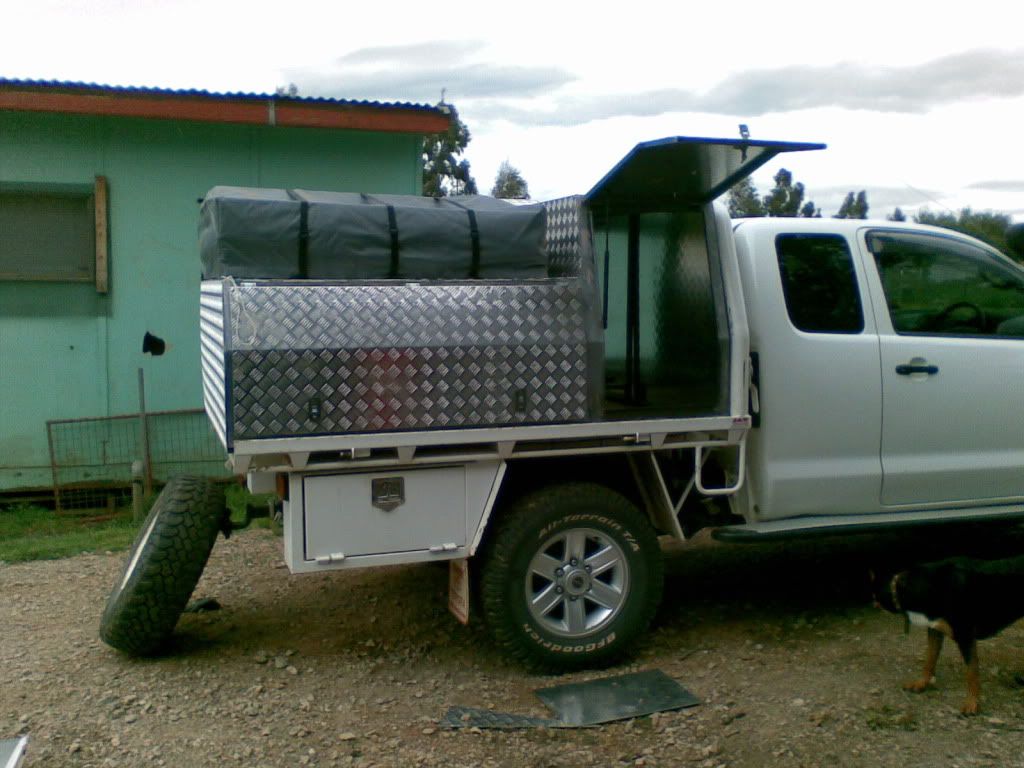
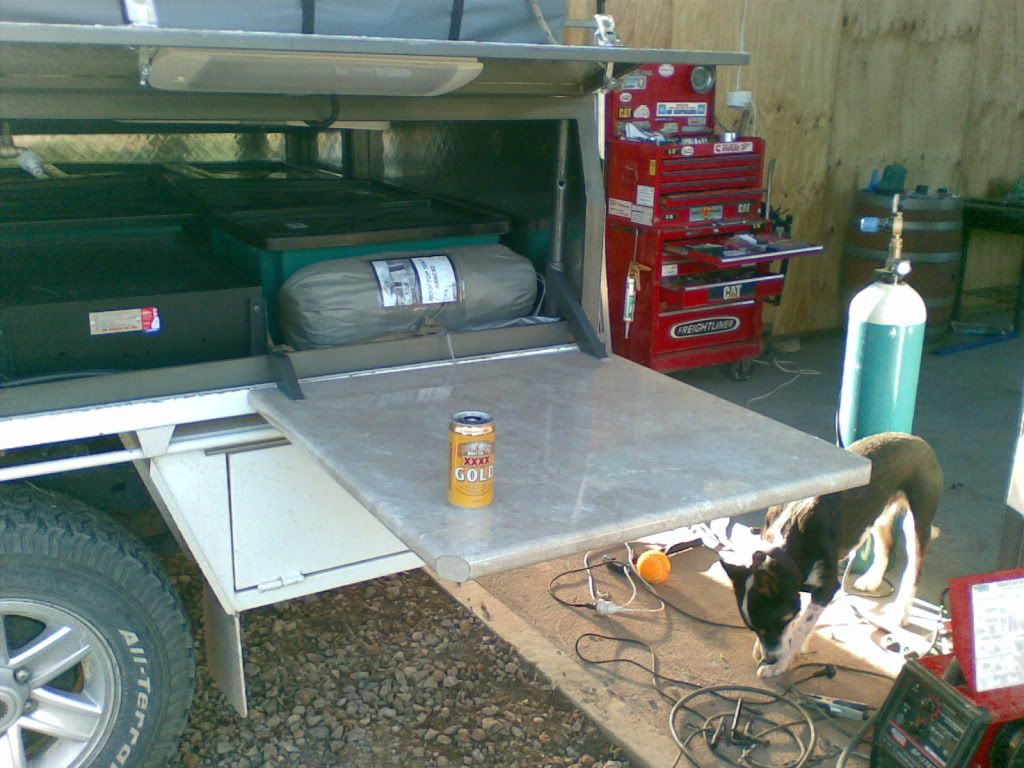
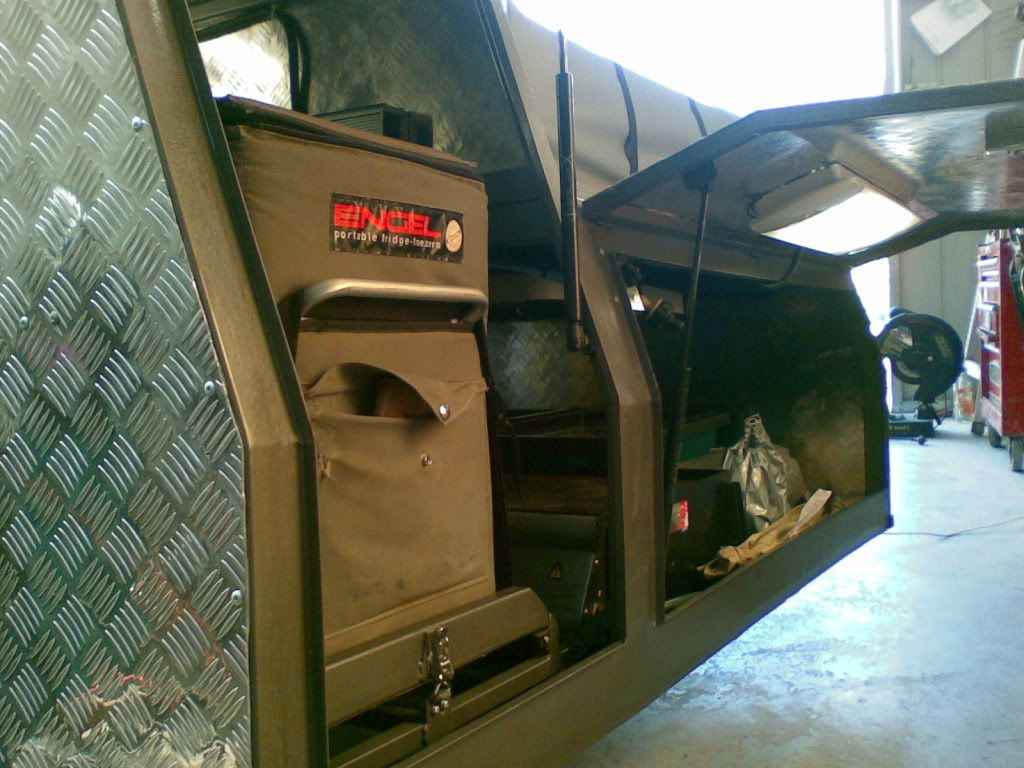
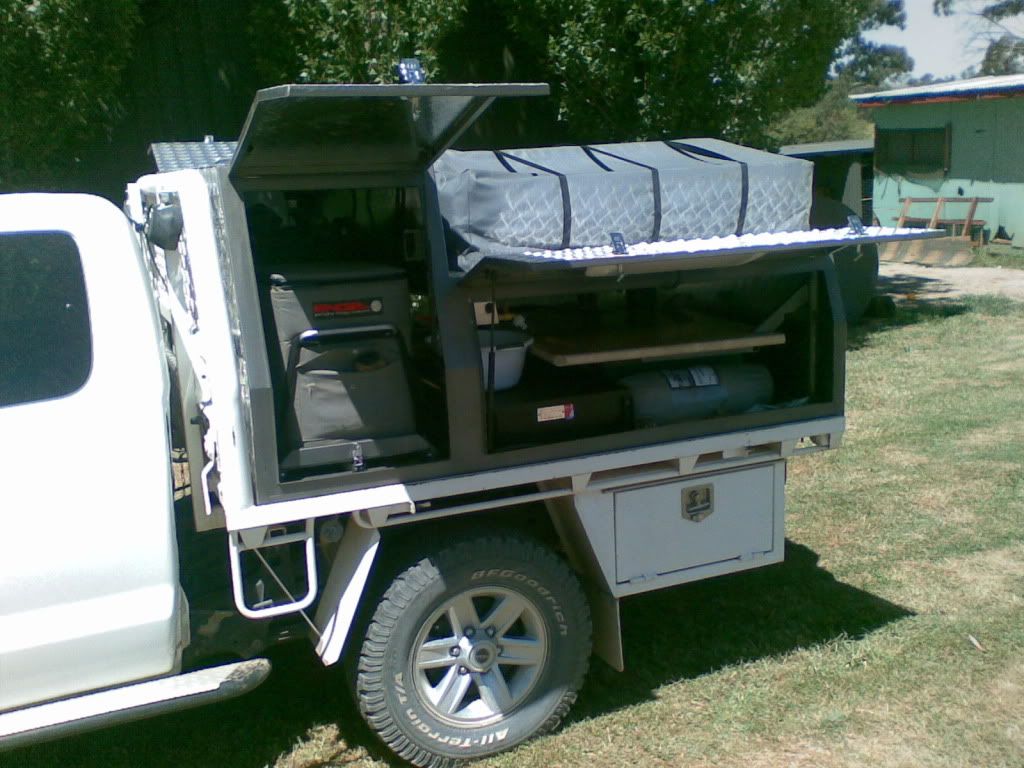
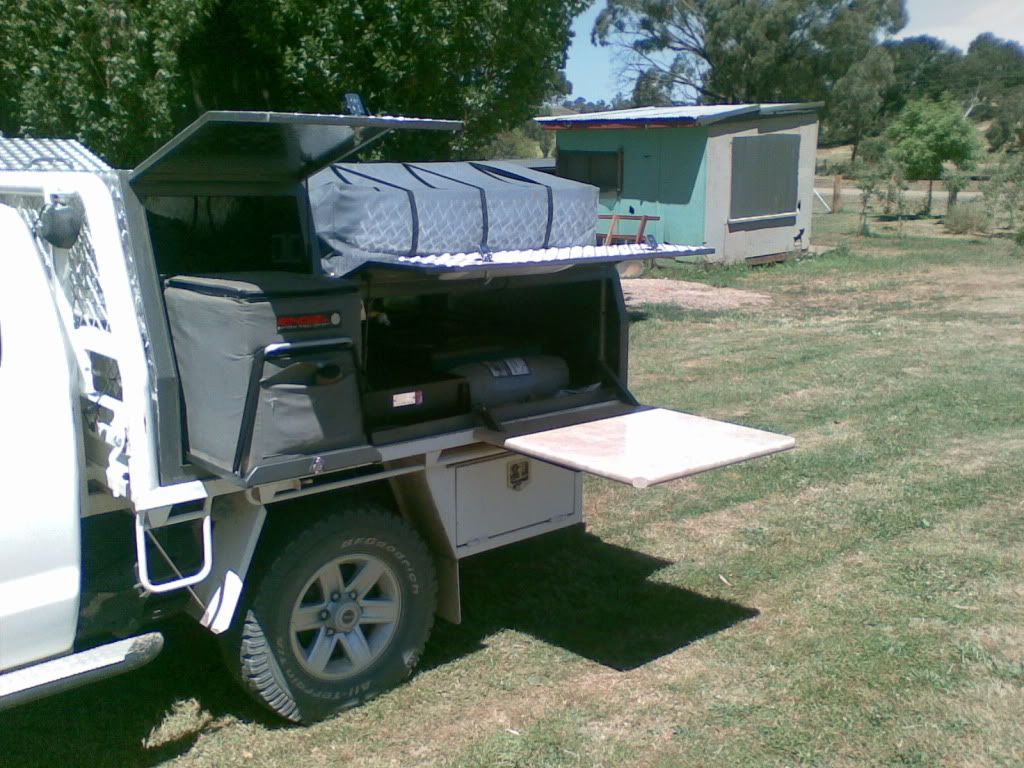
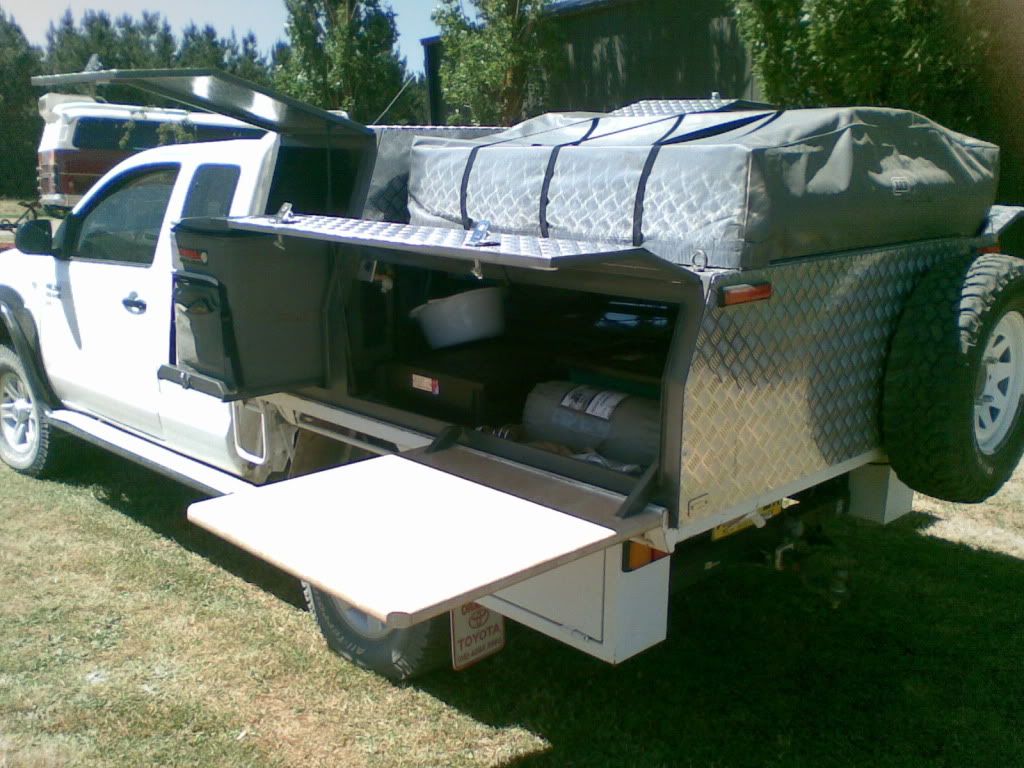
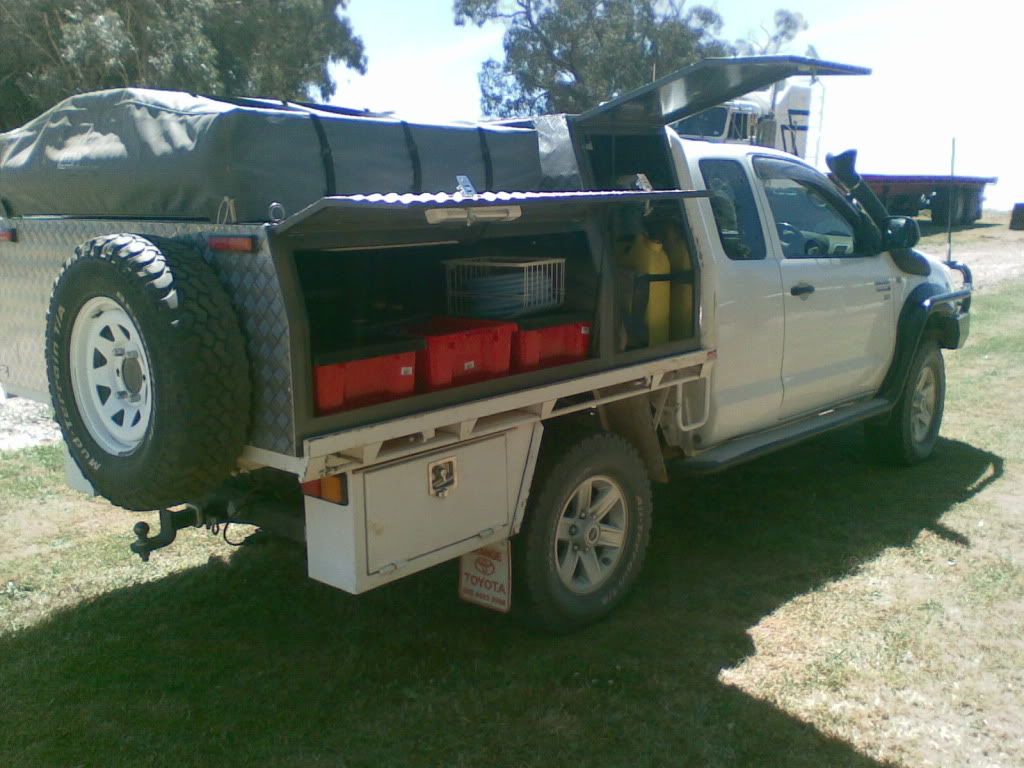
Next I installed the swing out kitchen top for the cook and the home made fridge slide to keep the beers handy. I found bought one to be dear as so made my own. Also mine can hold my 80ltr Rubbermaid esky and the 40ltr engel can then just go back behinds the seat for roadies!
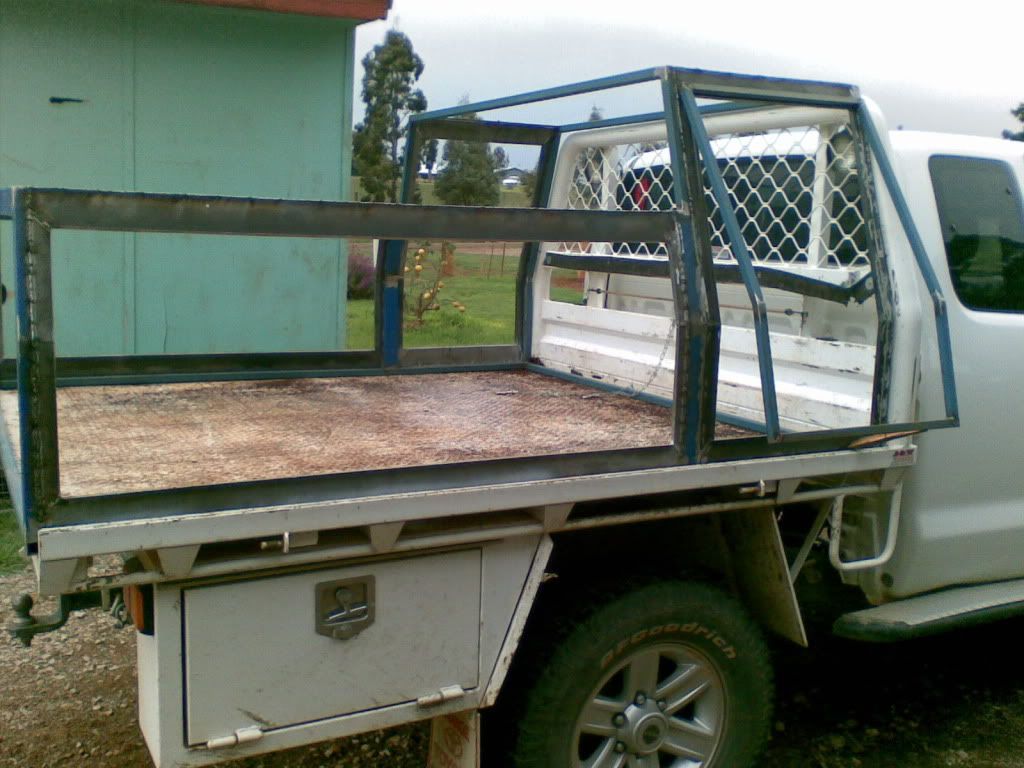
Spare wheel carrier went on.(still have one under the tray also).

And it is just about done!
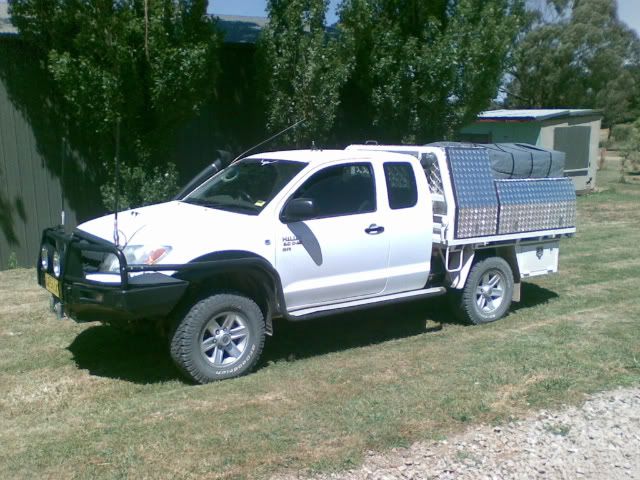
I'm pretty happy with it. I'll stick up some more pics (maybe better quality ones, not off my phone) after it's inagural run in a few weeks time. Can't wait![color=#FF0000][/color]
Any how this is what I had with the old ute. Worked well but took an hour or more to set up and unpack at home.
After scanning some magazines I saw this. Basically what I'd wanted but I didn't like the price tag.
I was doodling on the back of an envelope and drew this when the wife saw it she said 'why don't you build it?'. So it started.
Planning began in ernest with a white board marker on the inside of the shed, works well!
Then the work began. Obvious place to start was the frame.
I had local metal mob, B&W Welding in Orange (great guys) bend some 1.6 sheet steel for my door surrounds which I then mitred and welded into place. Then ground and flapdisc'd all the welds to smooth them. Long slow job!
Test fitting the frame.
Next all the ally sheet was ordered and cut. Careful planning was required because this stuff is expensive and I didn't want to buy any more than I had to. Gas struts came from the local wreckers and are EF/EL Falcon bonnet jobbies. Only $28 cheaper each than through Blackwoods!!
Test fitting again with ARB tent on top. Starting to come together.
All the ally was then removed and the frame painted with a hammer tone charcoal grey to match the tent.
The ally then was refitted but this time I used sika flex and over 350 pop rivets. Word of warning: if any one else is gonna build one like this dont be a tight ass like me. Go and buy an air rivet gun off ebay. Your fore arms will thank you for it!!
Then to fit the tent.
Tent annex is a bit too long for my application but we will get some velcro sewn into it so it can be tucked up then lowered again for use on the wifes prado (she wants one for when the rug rats come along in a coupla years).
Next step was the wiring. Done with three 12v fluros and a 12v water pump off ebay. Gotta love ebay! It came to the rescue with a 1000w inverter and some LED strip lights for inside the tent too!
Next I installed the swing out kitchen top for the cook and the home made fridge slide to keep the beers handy. I found bought one to be dear as so made my own. Also mine can hold my 80ltr Rubbermaid esky and the 40ltr engel can then just go back behinds the seat for roadies!
Spare wheel carrier went on.(still have one under the tray also).
And it is just about done!
I'm pretty happy with it. I'll stick up some more pics (maybe better quality ones, not off my phone) after it's inagural run in a few weeks time. Can't wait![color=#FF0000][/color]