Page 4 of 6
Re: Shaggys Build - Custom Rockers and 30" LED lightbar

Posted:
Thu, 09 Jan 2014 4:13 +0000by 2468bidw
G'day, nice looking truck. How did you get the handset of your radio running out of the switch panel?
I have the same radio under the drivers seat & can see how to route the extension lead up there.
Re: Shaggys Build - Custom Rockers and 30" LED lightbar
Posted:
Thu, 09 Jan 2014 4:29 +0000by GazaShaggy
I started off with mine mounted under the seat too but just moved it to under the plastic below the transfer case stick fits nicely in there (not that hard to remove), as for the hand piece cut a hole in a blanking plate and stick the extension piece on it then route the extension cord under the plastic in the center of the car then attach to the extension block, Hope I worded that good enough if not let me know and I'll get some photos to help.
Re: Shaggys Build - Custom Rockers and 30" LED lightbar
Posted:
Fri, 10 Jan 2014 1:44 +0000by 2468bidw
I'm visualising removing some of the prongs on the blanking piece & chop a hole for the handset plug in it. Then glue the white 'junction box', that would connect the extension lead to the handset, to the back of the blanking piece.... Close?
That spot for the radio unit is much better than under the seat. Good call.
Re: Shaggys Build - Custom Rockers and 30" LED lightbar
Posted:
Fri, 10 Jan 2014 2:07 +0000by GazaShaggy
2468bidw wrote:I'm visualising removing some of the prongs on the blanking piece & chop a hole for the handset plug in it. Then glue the white 'junction box', that would connect the extension lead to the handset, to the back of the blanking piece.... Close?
That spot for the radio unit is much better than under the seat. Good call.
Spot on, a Dremel or similar tool helps here.
Re: Shaggys Build - Digital Boost Gauge
Posted:
Sat, 11 Jan 2014 7:15 +0000by GazaShaggy
I'm planing on making my own roof console with a switch bank and hopefully some digital gauges can someone please point me in the right direction for good quality digital gauges I was thinking of getting boost and intercooler temp (this is the one I'm not to sure about) I found the thread on fitting the boost but can't find anything on intercooler temp if someone can help with that to it would be very much appreciated.
Re: Shaggys Build - Custom Rockers and 30" LED lightbar
Posted:
Wed, 12 Feb 2014 5:23 +0000by Geomatica
GazaShaggy wrote:...
...
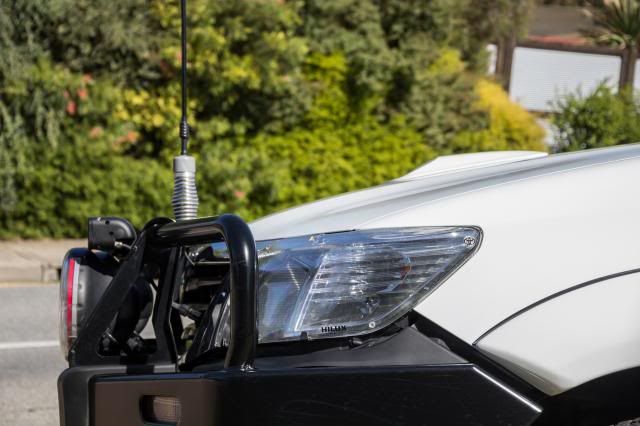
Have you an adapter on your UHF antenna mount for the smaller screw on style antenna?
Re: Shaggys Build - Digital Boost Gauge?
Posted:
Wed, 12 Feb 2014 6:31 +0000by GazaShaggy
No I don't have an adaptor just screw the little one on, its a bit hard but its not like I have to do it everyday, I also got a spare spring cap and punched a hole in it so it didn't look odd
Re: Shaggys Build - Digital Boost Gauge?
Posted:
Wed, 12 Feb 2014 7:19 +0000by Geomatica
Okay. Thank you.
Re: Shaggys Build - Runva Installed
Posted:
Sat, 01 Mar 2014 9:11 +0000by GazaShaggy
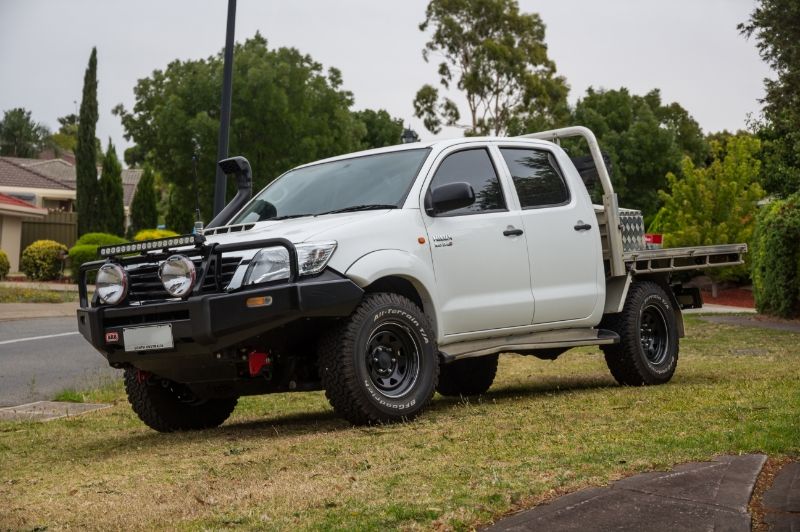
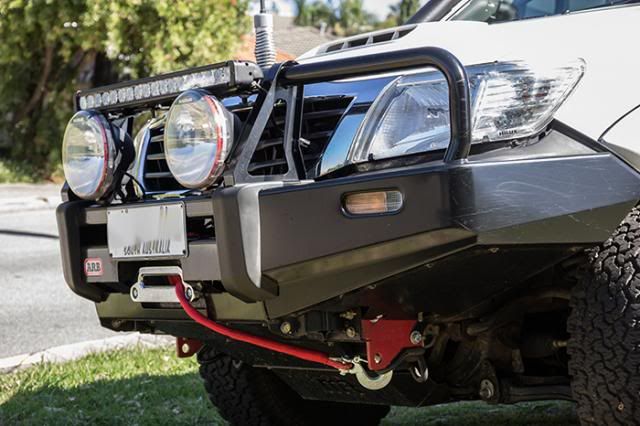
Well installed my Limmited Edition Runva 11XP this weekend.
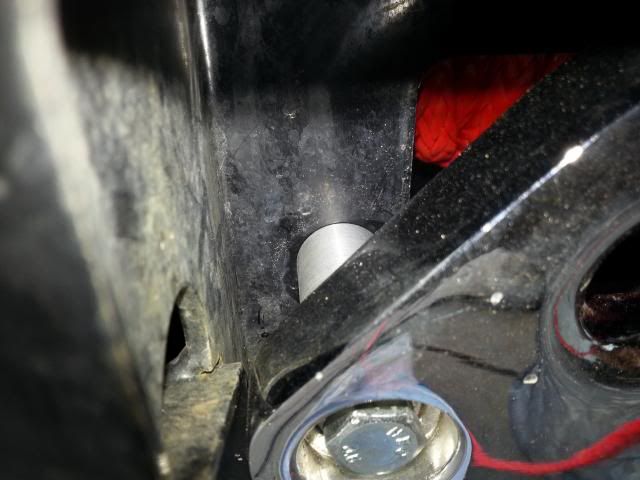
I was going to mount the control box under the bonnet but after playing around with brackets and all I wasn't happy with the strength and longevity of it so I went searching for a new location (didn't want it in the middle of the bull bar), after some looking around I ended up mounting it in the wing of the bull bar there is a bracing rail that goes through with some holes drilled at the perfect size for the M5 nutsert and M5 bolt that came with the winch (unfortunately they where the wrong spacing so had to drill one hole).
Anyway after spending $100 for cable thinking it was going under the bonnet I didn't need any of it but happy with the final outcome.


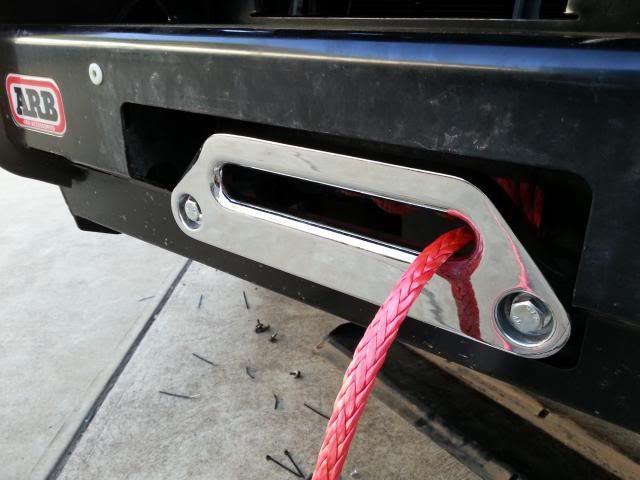
Added some 40mm spacers to the back of the fairlead so pulling up a steep slope wasn't an issue.
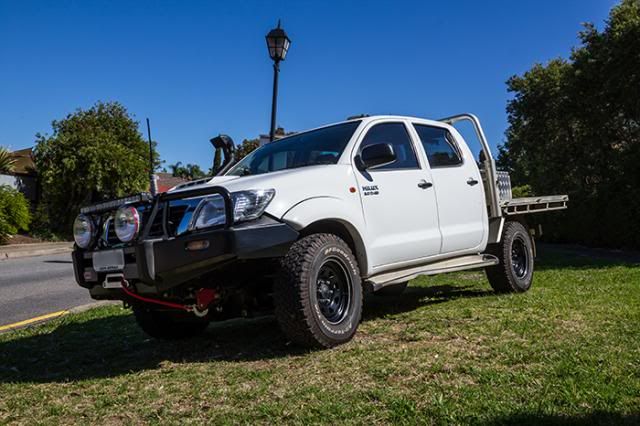
Also a couple of weekends ago I modified my lightbar brackets so it can sit lower after Boxheads advice.
Now there is no difference to intercooler temps between lightbar on or off.
I really need to get around to fitting my lift its been in the shed since begging of December.
Also made my roof console just trying to find some felt to cover it in if anyone knows a good place around Adelaide for me it would be very helpful Spotlight doesn't have the right grey so still looking when its done I'll move my spotlight switches to the console and get some winch controls in cab.
Re: Shaggys Build - Runva Installed
Posted:
Sat, 01 Mar 2014 6:27 +0000by packeteer
yeah, the Runva control box was a bit of a let down. I've hung mine off the back of the winch using the rails provided. Hopefully it lasts
Re: Shaggys Build - Runva Installed
Posted:
Sat, 01 Mar 2014 7:01 +0000by andy666
Good winches the runva. Mine has pulled me out of trouble a couple of times. I wouldn't recommit running the rope under the bull bar though, it gets cut really easy. Maybe look at a protective sleeve for the rope. Just a few metre of it that you can run up and down the rope to where you need it if you have to winch over rocks.
Re: Shaggys Build - Runva Installed
Posted:
Sat, 01 Mar 2014 7:21 +0000by GazaShaggy
Yeah I got 2x5m protective sleeves one for the end wrapped around the drum and the other at the hook end that I can move where needed. It doesn't sit nicely with the hook up against the fairlead but I planned on doing that before the start of the trip also makes it easier to get out when bogged in mud.

Re: Shaggys Build - Runva Installed
Posted:
Sat, 01 Mar 2014 7:51 +0000by packeteer
fwiw, I haven't bothered with the hook. the end of the rope has an eye which I just put a shackle through
Re: Shaggys Build - Runva Installed
Posted:
Sun, 02 Mar 2014 5:47 +0000by jaybags
Looking good mate. I'm looking at getting a Runva too I think, value for money by the sounds of it.
Re: Shaggys Build - Runva Installed
Posted:
Sun, 02 Mar 2014 4:48 +0000by mad_industries
How hard a job was it to install the winch? And did you. Just remove arb bash guard or the entire bull bar?
Looks good and I'm seriously considering the runva. Seems to be good bang for buck
Re: Shaggys Build - Runva Installed
Posted:
Sun, 02 Mar 2014 5:12 +0000by Geomatica
I'm pretty sure, having just installed my second hand bull bar, that you have to take it all off again

Re: Shaggys Build - Runva Installed
Posted:
Sun, 02 Mar 2014 5:13 +0000by GazaShaggy
Cheers Jaybags.
It was piss easy to install did it myself removed grill and fed it from the top then you can hold it up against the mounting locations (no lifting just hold it forward) do the bottom up finger tight then the top ones nip up then remove bottom ones and feed through with the fairlead I pulled the winch up a bit after nipping up the top ones so it wasn't resting on the bar at the bottom.
Note: you will need two longer bolts to go though the fairlead then into winch, from memory there 35mm normal you need them 10mm longer or if you space it out like I did you will need even longer ones.
Yeah I haven't heard a bad thing about the Runvas the only case I did here Runva was quick to replace.
Just went for a quick drive to spool it under tension and motor only got mildly warn pulling my car up an incline.
Re: Shaggys Build - Runva Installed
Posted:
Thu, 13 Mar 2014 1:16 +0000by piggo
Ha Gazza
Are able to take a detail photo of ur light bar install.
I have the same light and need to get to sit the same as yours.
Just want to see how the brackets sit.
Cheers
Re: Shaggys Build - Runva Installed
Posted:
Thu, 13 Mar 2014 2:54 +0000by GazaShaggy
piggo wrote:Ha Gazza
Are able to take a detail photo of ur light bar install.
I have the same light and need to get to sit the same as yours.
Just want to see how the brackets sit.
Cheers
Unfortunately the clamps I bought I cant find anymore the eBay seller no longer lists them (Ebay User-magic3org Item Name-2pcs 49-54mm Off-road Vehicle UTV ATV Driving Light Lamp ...)
They were slightly to loose so put some rubber on round the bar (also stops it from marking it).
Then I had to weld on a piece to make it 25mm longer otherwise the light would hit the clamp in its new orientation.

Here you can see the bit I had to weld on.

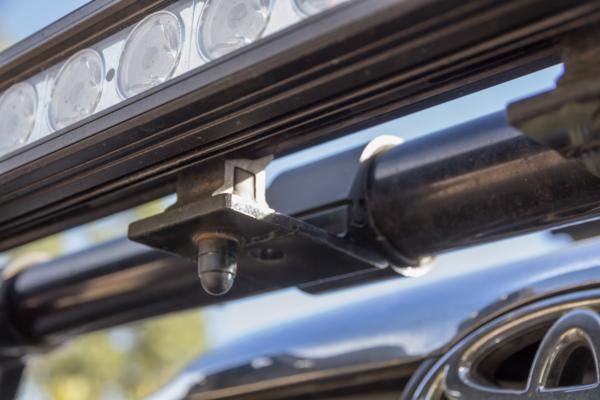
Hope that helps.
Re: Shaggys Build - Runva Installed
Posted:
Sun, 16 Mar 2014 6:14 +0000by GazaShaggy
Good news just found them from another seller stumbled across them while looking for LED replacement lights for ARB indicator/parker.
http://www.ebay.com.au/itm/Bull-Bar-Mounting-Lights-UHF-Antenna-Bracket-Clamp-for-Bullbar-4x4-/111267474513