Picked up new 2012 SR5 after work tonight. No time for pics but it is a standard SR5 right now.
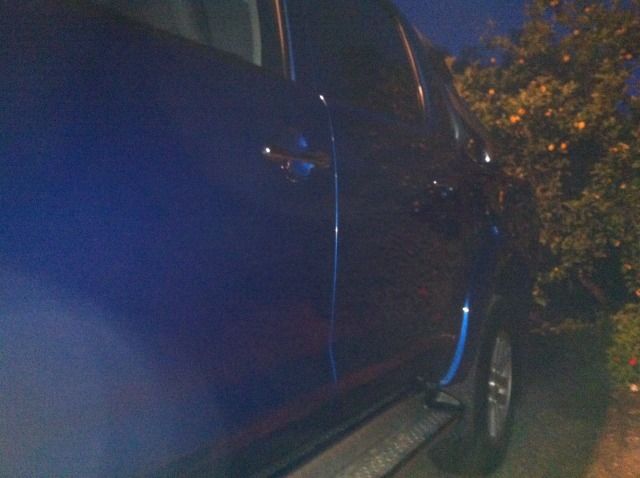
Small scratch on drivers door, but will be fixed at the first 1000km dealer inspection next month.
Not sure about the soft cover now, very tight to remove / replace but will prob soften up.
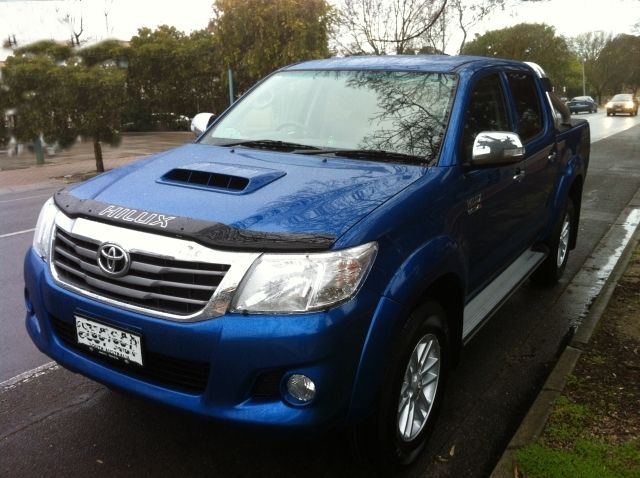
I got a Tidal Blue SR5 Diesel Manual , with the following
- New Toyota "No bungee" soft cover
- Toyota Reverse Camera.
- Tinted Bonnet Protector
- Head light protectors
- Toyota Tow bar (I got it in the deal but will be removing to fit ARB rear bar - & sell the toyota one - unused!)
- Front & Rear Mats
The Mods DONE List is:
1. Paint protection with the Maguires stuff
2. MTZ's 265x65x17 fitted
3. Wheels - Using the 17" Toyota's for now (may reconsider later)
4. Scotts Exhaust installed - needs little tidy up work
5. 4300K Bi-Xenon Headlight kit via ebay
6. Driving lights bolted and wired up
7. ARB Deluxe Winch Bar
8. ARB Tub Liner in - need to do tailgate protector
9. MR progressive bump stops
10. ARB rear Springs / shackles/ bushes.
11. Monster Rides ReKon stage II kit.
12. Tailgate protector
13. ARB Side Steps & front rails
14. ARB rear protector bar
15. Monster Rides Bash Plates
I now have in the shed waiting to be fitted:
- Racor Filter
- Spare switches
- ProjactA fused battery terminal - it was on evilbay & I couldn't help myself.
- EGT & boost gauges (only cheap china ones)
- Tiger II Grande 12K Winch & Fairlead
- Tiger 18l Air Tank & Tiger Thumper Compressor
Still to be decided:
- Window Tint - not sure who to use & what to get
- rear reverse & tub lighting.
- where to mount compressor & put airlines.
- do I want to replace toyota fog lights with HID spots
- move the toyota reverse camera to a better position.
- Steinbauer chip or no chip or something else
- front locker
- work out how/where to do 12v Power outlets ..
- Rear Seat Mod
I've never done a blog type thing so this is a first for me. Any input ideas always appreciated (especially before I F^&K something up - not after!) Time is limited for me due to work, so fitting progress for above list might be a bit slow.
I'll try & take pics as i go. As I said any hints tips appreciated ( I like to know what I'm going to do & how BEFORE I start!)
Fred's build - Monster Ride Installed - CV's replaced
Fred's build - Monster Ride Installed - CV's replaced
![]() by fredbear on Thu, 30 Aug 2012 8:18 +0000
by fredbear on Thu, 30 Aug 2012 8:18 +0000
Last edited by fredbear on Mon, 18 Mar 2013 6:28 +0000, edited 14 times in total.
- fredbear
- Posts: 150
- Joined: Wed, 19 Nov 2008 9:56 +0000
- Location: SA
Re: Fred's build.
![]() by fredbear on Thu, 30 Aug 2012 8:35 +0000
by fredbear on Thu, 30 Aug 2012 8:35 +0000
timothyg wrote:damn!
What? you wish you got a blue one also ?
I just looked at your link, great job on the Black paint - wow. Not sure if I'll get the blue one like that but I do like a goal to aim for. Any hints / tips /references to read up on getting a good / great finish?
Last edited by fredbear on Thu, 30 Aug 2012 8:40 +0000, edited 1 time in total.
- fredbear
- Posts: 150
- Joined: Wed, 19 Nov 2008 9:56 +0000
- Location: SA
Re: Fred's build.
![]() by 07luxyTD on Thu, 30 Aug 2012 8:39 +0000
by 07luxyTD on Thu, 30 Aug 2012 8:39 +0000
got her planned nicly  could you please let in where your money tree is?
"Lucky you weren't cut off by my stihl"
My build thread viewtopic.php?f=41&t=13794
My Landcruiser Build http://www.newlandcruiser.net/phpbb/vie ... 90&start=0
My build thread viewtopic.php?f=41&t=13794
My Landcruiser Build http://www.newlandcruiser.net/phpbb/vie ... 90&start=0
-

07luxyTD - Posts: 2826
- Joined: Wed, 22 Feb 2012 5:15 +0000
- Location: Quorrobolong, NSW
Re: Fred's build.
![]() by fredbear on Thu, 30 Aug 2012 8:46 +0000
by fredbear on Thu, 30 Aug 2012 8:46 +0000
07luxyTD wrote:got her planned nicly
Thanks
Last edited by fredbear on Thu, 30 Aug 2012 10:21 +0000, edited 1 time in total.
- fredbear
- Posts: 150
- Joined: Wed, 19 Nov 2008 9:56 +0000
- Location: SA
Re: Fred's build.
![]() by Blackie2008 on Thu, 30 Aug 2012 8:47 +0000
by Blackie2008 on Thu, 30 Aug 2012 8:47 +0000
I'd recommend waiting for the winch before putting your bar on. Saves doing the job twice.
What size tyres do you wanna run?
What size tyres do you wanna run?
Dan.
08' SR5 Dual Cab, Manual, Prado brake upgrade, 33" KM2's, DMS MR Rekon Stage II, MMKD, Stage 2 GTurbo, HPD FMIC, NPC Clutch, 360 UHD Gearbox...
Built, not bought
Build thread: http://www.newhilux.net/phpbb/viewtopic ... 41&t=15092
08' SR5 Dual Cab, Manual, Prado brake upgrade, 33" KM2's, DMS MR Rekon Stage II, MMKD, Stage 2 GTurbo, HPD FMIC, NPC Clutch, 360 UHD Gearbox...
Built, not bought
Build thread: http://www.newhilux.net/phpbb/viewtopic ... 41&t=15092
-
Blackie2008 - Posts: 918
- Joined: Sat, 01 Oct 2011 8:54 +0000
- Location: Adelaide SA
Re: Fred's build.
![]() by Loosey on Thu, 30 Aug 2012 8:55 +0000
by Loosey on Thu, 30 Aug 2012 8:55 +0000
-
Loosey - Posts: 2391
- Joined: Sat, 18 Aug 2012 2:55 +0000
- Location: Newcastle
Re: Fred's build.
![]() by fredbear on Thu, 30 Aug 2012 9:00 +0000
by fredbear on Thu, 30 Aug 2012 9:00 +0000
Blackie2008 wrote:I'd recommend waiting for the winch before putting your bar on. Saves doing the job twice.
What size tyres do you wanna run?
Thanks for tip on winch, sort of what I thought.
Tyres will be 32" ie 265x70x17 as I don't want to regear diffs. & 32 is legal AFAIK.
- fredbear
- Posts: 150
- Joined: Wed, 19 Nov 2008 9:56 +0000
- Location: SA
Re: Fred's build.
![]() by fredbear on Thu, 30 Aug 2012 9:05 +0000
by fredbear on Thu, 30 Aug 2012 9:05 +0000
I saw them while looking around. I kinda like the Classic II style / look. But they don't fit. Nor do the Procomp 1069.
Allied Thunder I'm told will fit. I like a couple of the Method ones but I'm not sure how much they are. Max didn't say when I was emailing re rekon kit & other stuff. Can you ballpark approx $$ for them for me?
- fredbear
- Posts: 150
- Joined: Wed, 19 Nov 2008 9:56 +0000
- Location: SA
Re: Fred's build.
![]() by Loosey on Thu, 30 Aug 2012 9:08 +0000
by Loosey on Thu, 30 Aug 2012 9:08 +0000
No idea on prices either, I'm partial to the double standards personally, lol
-
Loosey - Posts: 2391
- Joined: Sat, 18 Aug 2012 2:55 +0000
- Location: Newcastle
Re: Fred's build.
![]() by timothyg on Thu, 30 Aug 2012 10:20 +0000
by timothyg on Thu, 30 Aug 2012 10:20 +0000
I was referring to your awesome plans and goodies mate. 
For detailing stuff - just drop by meguiars online and its more than enough to get you started.
For detailing stuff - just drop by meguiars online and its more than enough to get you started.
-
timothyg - Posts: 362
- Joined: Sat, 17 Dec 2011 9:36 +0000
- Location: Sabah - Land Below the Wind
Re: Fred's build.
![]() by fredbear on Thu, 30 Aug 2012 10:25 +0000
by fredbear on Thu, 30 Aug 2012 10:25 +0000
timothyg wrote:I was referring to your awesome plans and goodies mate.
For detailing stuff - just drop by meguiars online and its more than enough to get you started.
Thanks. Yea I did go to their forums, to much info would be an understatement! But I did learn enough & will try to do a "basic" job on mine. Hopefully it will be better than dealer "paint protection".
- fredbear
- Posts: 150
- Joined: Wed, 19 Nov 2008 9:56 +0000
- Location: SA
Re: Fred's build.
![]() by fredbear on Fri, 31 Aug 2012 12:47 +0000
by fredbear on Fri, 31 Aug 2012 12:47 +0000
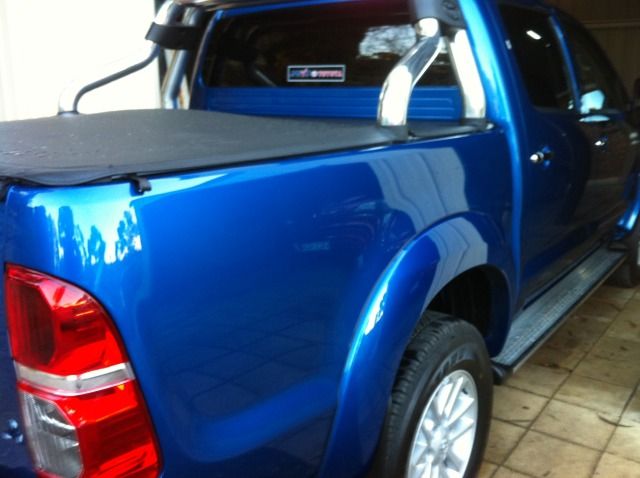
Here it is as delivered (I'm just testing uploading of pics also)
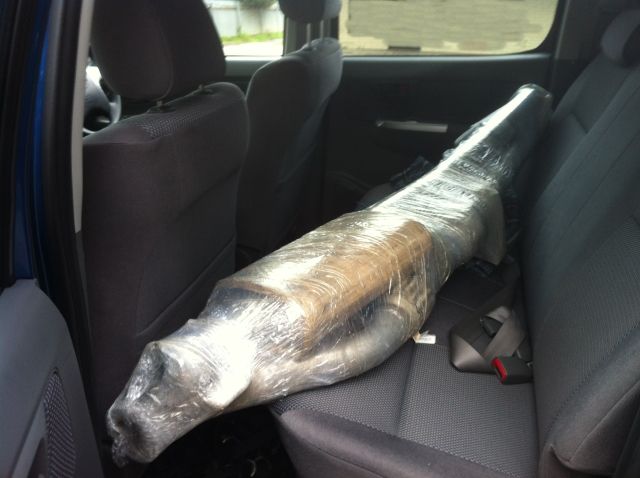
And a couple of Couriers delivered today.
A baby Scott 3" having a rest in the back seat after a long trip.
These also arrived today via ebay
4300K HID headlight inserts
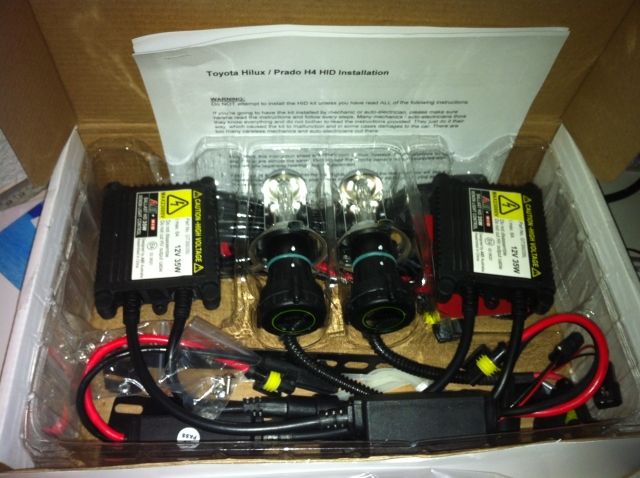
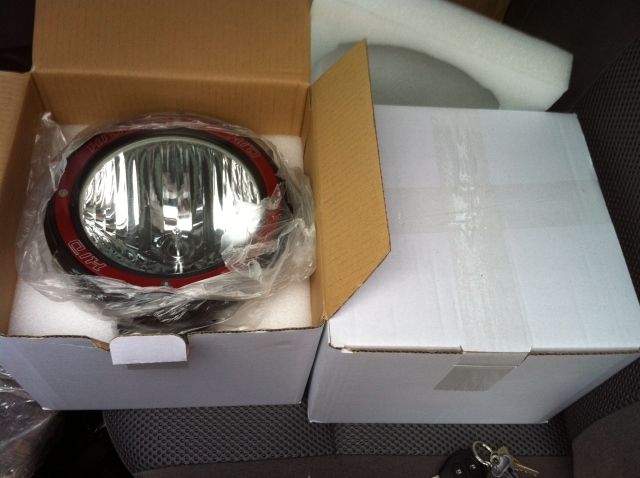
And these where a good price on ebay. (yea OK cheap, but thought they would do the job for a while)
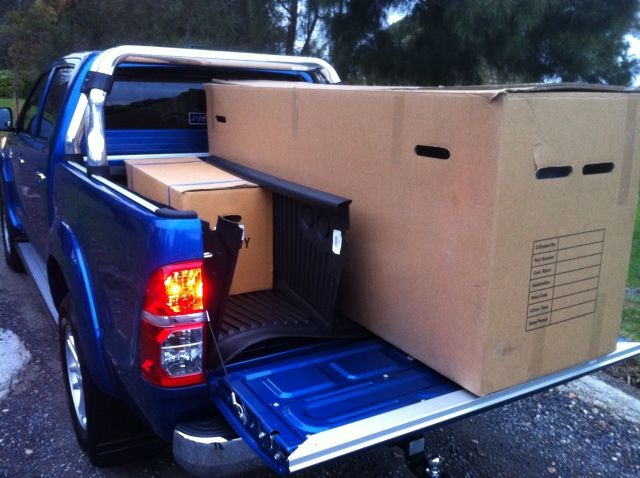
Then after work I went down to ARB to collect tub liner & Deluxe Winch bar that I bought several months ago when they had their sale on. I will prob wait to fit the winch bar until the winch gets here (after the 20/9 according to Tiger email)
The tub liner is the under lip one so I hope it works OK with the Toyota soft Tonneau. I thought this was better than cutting down a genuine Toyota tub liner.
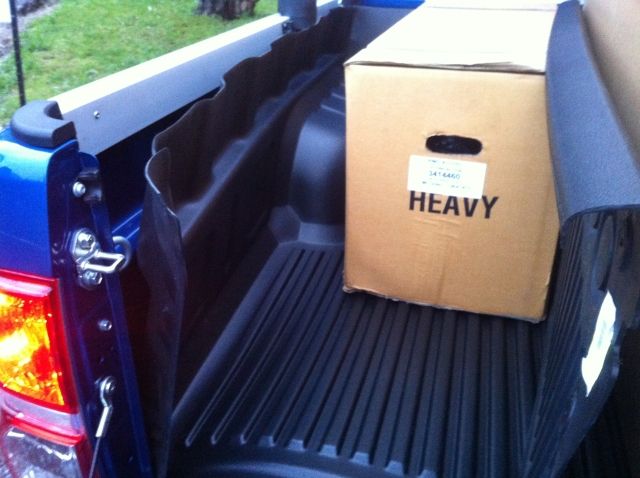
Its not fitted here, we just "threw" it in the tub so I could get it home. I have some 12v outlets & some anderson plug/sockets I bought a while back (ebay again), so wanted to run some power to the rear, before I fit the liner.
I also have some ARB cargo tiedowns I want to put in, again need a bit of thinking planning before liner goes in.
I also want to work out a mounting for 60" hi-lift so tub liner will prob be in the way if I put it in now.
The Air tank needs to go under the tub somehow, but this prob wont affect the liner and it's not here yet either, but I'm not sure where I want an Air outlet, maybe in the tub??? more planing / thinking. Ideas appreciated.
And a couple of Couriers delivered today.
A baby Scott 3" having a rest in the back seat after a long trip.
These also arrived today via ebay
4300K HID headlight inserts
And these where a good price on ebay. (yea OK cheap, but thought they would do the job for a while)
Then after work I went down to ARB to collect tub liner & Deluxe Winch bar that I bought several months ago when they had their sale on. I will prob wait to fit the winch bar until the winch gets here (after the 20/9 according to Tiger email)
The tub liner is the under lip one so I hope it works OK with the Toyota soft Tonneau. I thought this was better than cutting down a genuine Toyota tub liner.
Its not fitted here, we just "threw" it in the tub so I could get it home. I have some 12v outlets & some anderson plug/sockets I bought a while back (ebay again), so wanted to run some power to the rear, before I fit the liner.
I also have some ARB cargo tiedowns I want to put in, again need a bit of thinking planning before liner goes in.
I also want to work out a mounting for 60" hi-lift so tub liner will prob be in the way if I put it in now.
The Air tank needs to go under the tub somehow, but this prob wont affect the liner and it's not here yet either, but I'm not sure where I want an Air outlet, maybe in the tub??? more planing / thinking. Ideas appreciated.
- fredbear
- Posts: 150
- Joined: Wed, 19 Nov 2008 9:56 +0000
- Location: SA
Re: Fred's build.
![]() by fredbear on Sun, 02 Sep 2012 7:10 +0000
by fredbear on Sun, 02 Sep 2012 7:10 +0000
Washing & Polishing.
When I purchased the MY12 Hilux I said no to the "paint protection", not because I don't want it protected, but I thought I could use a better job myself. About 2 years ago I was washing my MY09 hilux and was a bit concerned about the "swirl marks" I saw on it. I know these are not a "dealer fit" and since I was the only owner my question was "How or Why did I put the swirl marks in the paint".
So I searched the net looking for answers, and I learned a lot. Firstly there are some really, I mean really, anal paint people out there....each to their own and their cars are the ones I love to look at in car shows at. But my vehicles are daily drivers, but I don't like swirl marks, I park on the street and I sometimes get bird poop on it, and on a trip bug guts etc are a pain to clean off and importantly I want to protect my investment so it looks good to resell in a few years.
So what did I learn about washing & polishing & looking after my paint / investment. Well here is a summary, some reasons and some thoughts. I'm not a detailer, nor am I in the auto trade, so if anyone has some suggestions or thoughts or improvements on the following I would be appreciative of any constructive critique or suggestions.
- fredbear
- Posts: 150
- Joined: Wed, 19 Nov 2008 9:56 +0000
- Location: SA
Re: Fred's build.
![]() by fredbear on Sun, 02 Sep 2012 7:50 +0000
by fredbear on Sun, 02 Sep 2012 7:50 +0000
So my goals are:
- Have it look good & stay that way for resale.
- Make it easier to get bug guts off
- Save time on washing. - I don't have time to do it each week, but we have a very long dirt driveway...and what I found with my MY09, is if the paint is Smoooooth the dust just doesn't stick to it, so the car looks better for longer with less washing.
So please remember the following is just my $0.02 worth, your value may vary!
So I got home from work at 3:30 today & got started.
After washing cars for 40+ years, I only found out the "correct" method 2 years ago, while searching the net re swirls.
1. Use the hose & wet the hilux all over & blast of loose dirt, bird poop etc as much as possible.
This also pre-wets the paint to minimize scratching
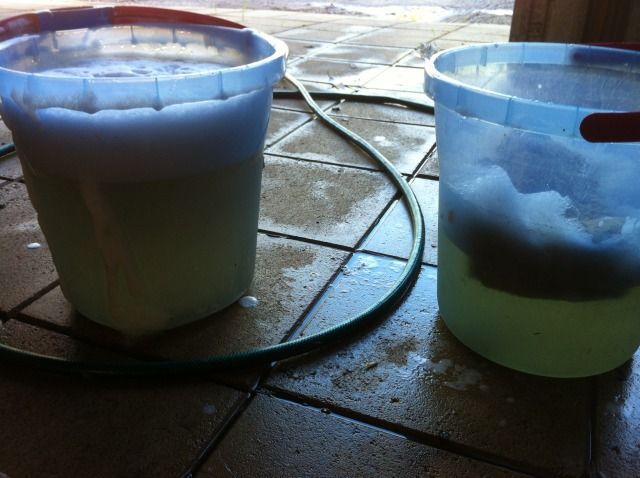
2. Then get 2 buckets of water, one with car wash one just water. Why? The idea is you rinse your sponge before putting it back into the soapy water, this way all the dirt is in the "rinse" bucket. It is this dirt on your sponge (or in your wash bucket if you only use one) that contributes to fine scratches / swirls. I admit I had problems with the 2 buckets when I started as the soap bubbles end up in the "rinse" bucket so it is easy to mix them up, so my idea was to put warm water in the soap bucket and cold water in the rinse bucket. I just check before I put the sponge in & it's easy to identify buckets.
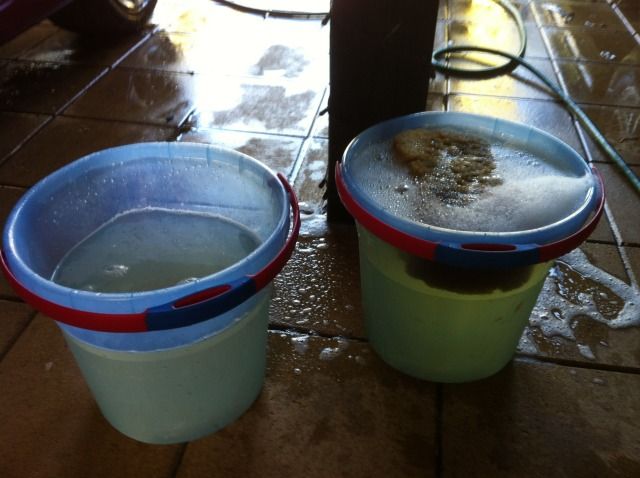
If you follow the 2 bucket method you will find a lot of dirt in the rinse bucket, which is good.
I always start at the top & work my way down & find the bubbles running down speed up the cleaning process.
I clean the sills & wheels last.
Fwiw I just use a heavy duty car wash (Amorall green one at the moment). Years ago I learnt not to use dish-washing liquid as it has salts? in it that can cause rust, and it also leave streaks after drying.
Another thing I learned from the net was to ONLY ever wash or rub or polish your car in the CORRECT direction. That is in the direction the wind would pass over the panel when driving. If you rub or wash in a circular fashion any scratches will appear as swirls due to the way overhead sunlight hits the scratch. If you rub / polish along the panel (basically front to back - ie as the wind passes over the panel) any fine scratch will reflect sunlight down-ways, and the mark will not be as noticeable.
After your done washing rinse of soap with hose & while it drip dries, you can earn some extra brownie points (redeemable for 4WD bits / extras later) by refilling the wash bucket and cleaning the wife shopping cart
- Have it look good & stay that way for resale.
- Make it easier to get bug guts off
- Save time on washing. - I don't have time to do it each week, but we have a very long dirt driveway...and what I found with my MY09, is if the paint is Smoooooth the dust just doesn't stick to it, so the car looks better for longer with less washing.
So please remember the following is just my $0.02 worth, your value may vary!
So I got home from work at 3:30 today & got started.
After washing cars for 40+ years, I only found out the "correct" method 2 years ago, while searching the net re swirls.
1. Use the hose & wet the hilux all over & blast of loose dirt, bird poop etc as much as possible.
This also pre-wets the paint to minimize scratching
2. Then get 2 buckets of water, one with car wash one just water. Why? The idea is you rinse your sponge before putting it back into the soapy water, this way all the dirt is in the "rinse" bucket. It is this dirt on your sponge (or in your wash bucket if you only use one) that contributes to fine scratches / swirls. I admit I had problems with the 2 buckets when I started as the soap bubbles end up in the "rinse" bucket so it is easy to mix them up, so my idea was to put warm water in the soap bucket and cold water in the rinse bucket. I just check before I put the sponge in & it's easy to identify buckets.
If you follow the 2 bucket method you will find a lot of dirt in the rinse bucket, which is good.
I always start at the top & work my way down & find the bubbles running down speed up the cleaning process.
I clean the sills & wheels last.
Fwiw I just use a heavy duty car wash (Amorall green one at the moment). Years ago I learnt not to use dish-washing liquid as it has salts? in it that can cause rust, and it also leave streaks after drying.
Another thing I learned from the net was to ONLY ever wash or rub or polish your car in the CORRECT direction. That is in the direction the wind would pass over the panel when driving. If you rub or wash in a circular fashion any scratches will appear as swirls due to the way overhead sunlight hits the scratch. If you rub / polish along the panel (basically front to back - ie as the wind passes over the panel) any fine scratch will reflect sunlight down-ways, and the mark will not be as noticeable.
After your done washing rinse of soap with hose & while it drip dries, you can earn some extra brownie points (redeemable for 4WD bits / extras later) by refilling the wash bucket and cleaning the wife shopping cart
- fredbear
- Posts: 150
- Joined: Wed, 19 Nov 2008 9:56 +0000
- Location: SA
Re: Fred's build.
![]() by fredbear on Sun, 02 Sep 2012 8:15 +0000
by fredbear on Sun, 02 Sep 2012 8:15 +0000
If your like me you have probably used a chamois to dry your car. The problem is it can be hard and can cause fine scratches, and my reading indicates its your grandfathers solution to the problem.
I found 2 "modern" solutions. The first you may or may not have but it works a treat if you have one, and gets 70% of the water off & also gets the water out from in the cracks & crevasses, which always seem to run / drip after your finished cleaning / polishing

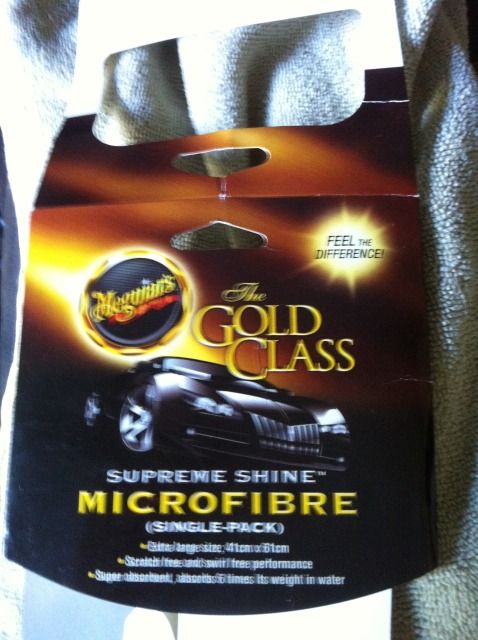
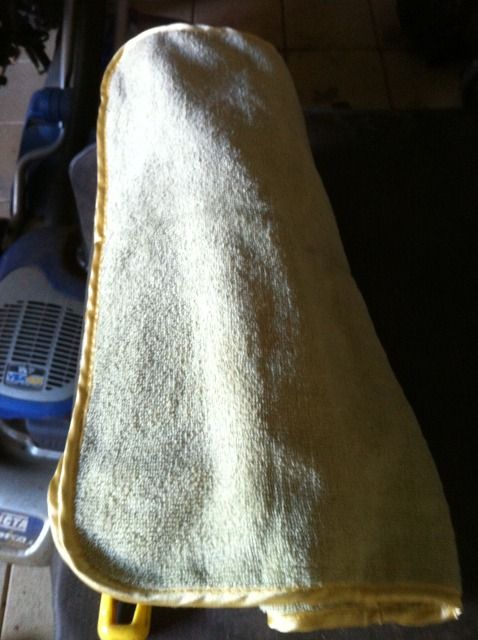
I then finished the drying process with a Microfibre cloth. The back of the packet has info on using, but basically you just keep folding it over. It drys much better than any chamois that I have ever used. I bought a large one and use it just for drying. (I wash & dry all my cloths after I finish washing the cars). If I remember right the large microfibre cloth holds something like 6x its own weight in water & really does dry well, better than sliced bread in my view.
I found 2 "modern" solutions. The first you may or may not have but it works a treat if you have one, and gets 70% of the water off & also gets the water out from in the cracks & crevasses, which always seem to run / drip after your finished cleaning / polishing
I then finished the drying process with a Microfibre cloth. The back of the packet has info on using, but basically you just keep folding it over. It drys much better than any chamois that I have ever used. I bought a large one and use it just for drying. (I wash & dry all my cloths after I finish washing the cars). If I remember right the large microfibre cloth holds something like 6x its own weight in water & really does dry well, better than sliced bread in my view.
- fredbear
- Posts: 150
- Joined: Wed, 19 Nov 2008 9:56 +0000
- Location: SA
Re: Fred's build.
![]() by fredbear on Sun, 02 Sep 2012 8:24 +0000
by fredbear on Sun, 02 Sep 2012 8:24 +0000
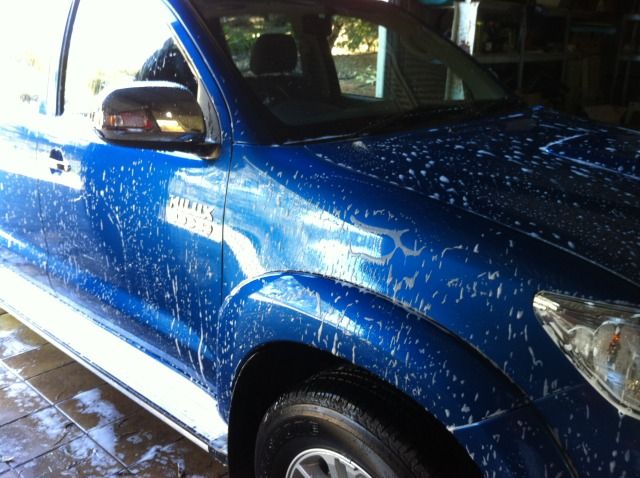
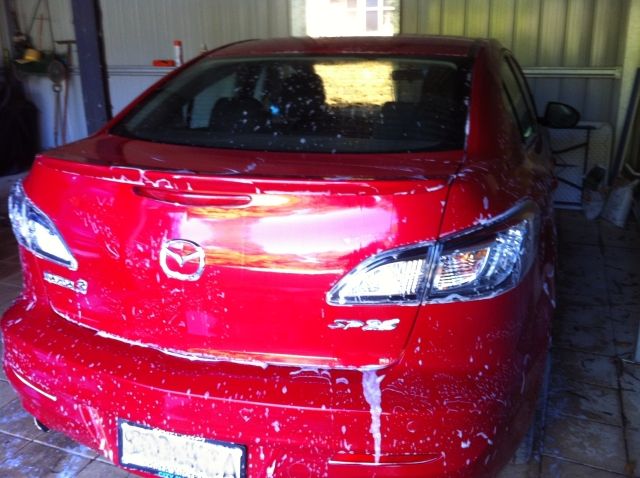
Ok so now it's washed & dried. Despite the fact that this is a new vehicle and looks all shiny when it comes from the dealer (who hopefully didn't hit it with a buffer & put a heap of swirls in it!). The reality is there are small "bits" (of what I'm not really sure) that have stuck to the paint. The easy way to remove these is to use CLAY. A lump of stuff that is a bit like firm plasticine. You use a lubricant (quick detailer) and simply wipe it over the surface.
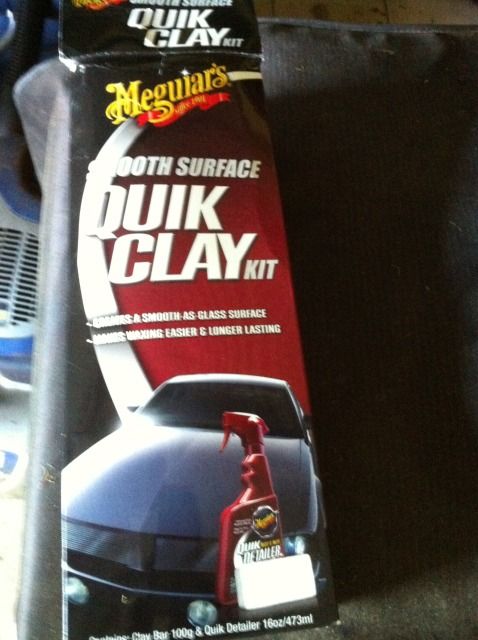
Again remember to only work in the front-back direction ie as the wind would pass over the panel
The clay slides in the lubricant and as you work it over the whole vehicle you can feel when you hit "bits". You turn / refolding the clay as you go. I sort of fold the dirty face to the inside of the ball.
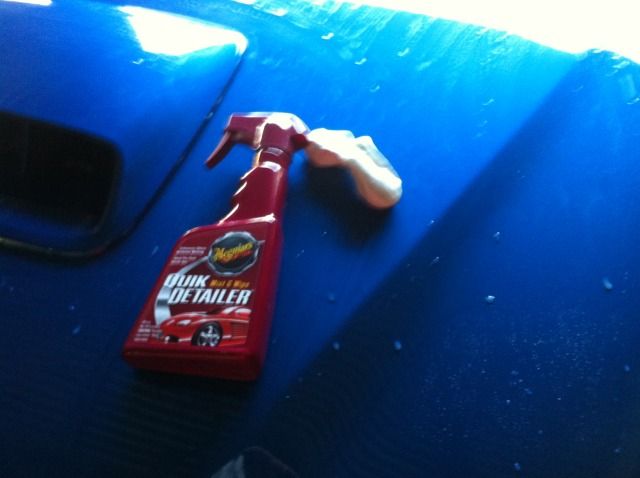
Once a section is all smooth, move to next one. Once you have done the whole vehicle, dry the residue lubricant up with a 2nd Microfibre cloth.
Again remember to only work in the front-back direction ie as the wind would pass over the panel
The clay slides in the lubricant and as you work it over the whole vehicle you can feel when you hit "bits". You turn / refolding the clay as you go. I sort of fold the dirty face to the inside of the ball.
Once a section is all smooth, move to next one. Once you have done the whole vehicle, dry the residue lubricant up with a 2nd Microfibre cloth.
Last edited by fredbear on Sun, 02 Sep 2012 8:40 +0000, edited 1 time in total.
- fredbear
- Posts: 150
- Joined: Wed, 19 Nov 2008 9:56 +0000
- Location: SA
Re: Fred's build.
![]() by fredbear on Sun, 02 Sep 2012 8:39 +0000
by fredbear on Sun, 02 Sep 2012 8:39 +0000
So now there are no "bits" sticking up as the clay has taken them off. What about the hollows / divots (microscopic ones!) ?
From what I have read, "polish" does 2 things, it takes down humps (depending on the coarseness of the polish as to how course it will cut), but polish also contains "fillers" (to many fillers are a bad thing also).
So I use a fine grade "polish", again only in the front-back direction. (I put a bit much on here so I could take a pic)
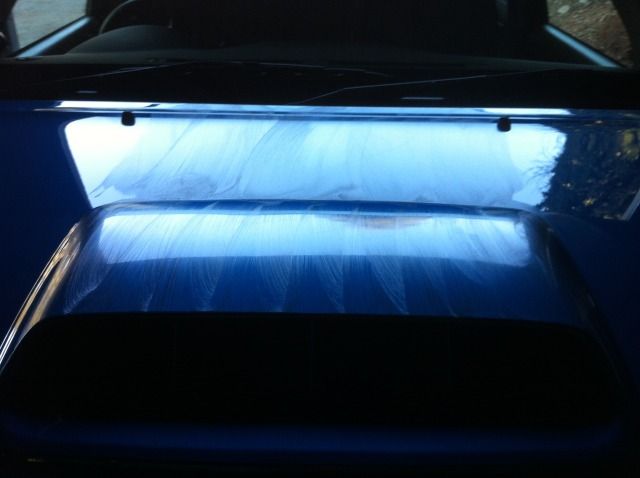
This particular polish says do small areas & don't let it dry before rubbing off.
I used a foam pad like these to put it on.
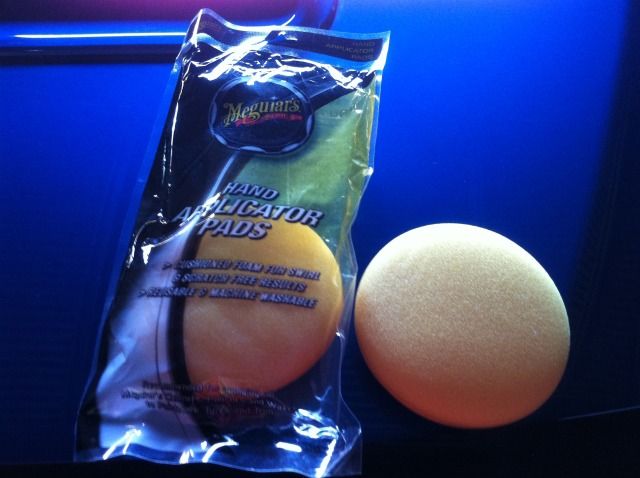
It was only 15c this arvo, so it wasn't drying very quickly so I put it on one panel (eg front door), and while it dryed off a bit, I put more on another panel (eg rear door), then went back & removed it from the first panel.
I rubbed it of (in correct direction) with a 3rd clean Microfibre cloth.
I also did the Sports bars which removed the stains & water marks (yep hilux is only 3 days old yet the sports bar was marked & oxidized already)
Once done I had paint that was clean, flat & smooth & of course shiny. But it wasn't "protected"
From what I have read, "polish" does 2 things, it takes down humps (depending on the coarseness of the polish as to how course it will cut), but polish also contains "fillers" (to many fillers are a bad thing also).
So I use a fine grade "polish", again only in the front-back direction. (I put a bit much on here so I could take a pic)
This particular polish says do small areas & don't let it dry before rubbing off.
I used a foam pad like these to put it on.
It was only 15c this arvo, so it wasn't drying very quickly so I put it on one panel (eg front door), and while it dryed off a bit, I put more on another panel (eg rear door), then went back & removed it from the first panel.
I rubbed it of (in correct direction) with a 3rd clean Microfibre cloth.
I also did the Sports bars which removed the stains & water marks (yep hilux is only 3 days old yet the sports bar was marked & oxidized already)
Once done I had paint that was clean, flat & smooth & of course shiny. But it wasn't "protected"
Last edited by fredbear on Sun, 02 Sep 2012 9:12 +0000, edited 1 time in total.
- fredbear
- Posts: 150
- Joined: Wed, 19 Nov 2008 9:56 +0000
- Location: SA
Re: Fred's build.
![]() by fredbear on Sun, 02 Sep 2012 9:07 +0000
by fredbear on Sun, 02 Sep 2012 9:07 +0000
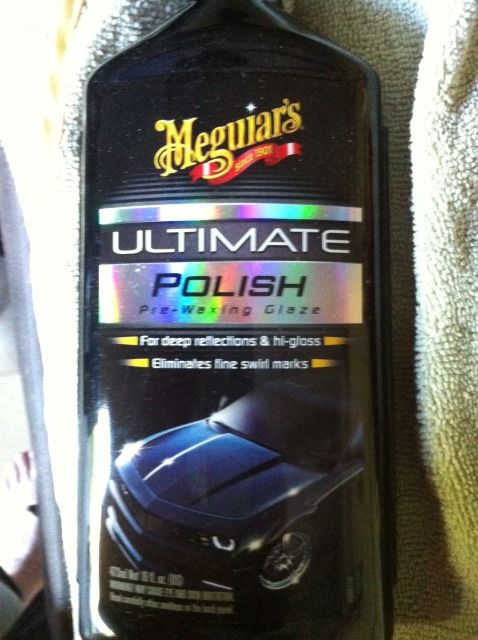
The "protection" I use is wax. As many layer / coatings as you want. I ran out of light so only did one on whole car but did a 2nd coat on the bonnet ( a horizontal surface that seems to be a target zone for bird poop!) I'll put a 2nd coat of wax on the rest of the Hiux next weekend & maybe a 3rd on the bonnet.
I used this wax, it came with it's own foam applicator which is black so it doesn't get mixed up with the polish applicator.
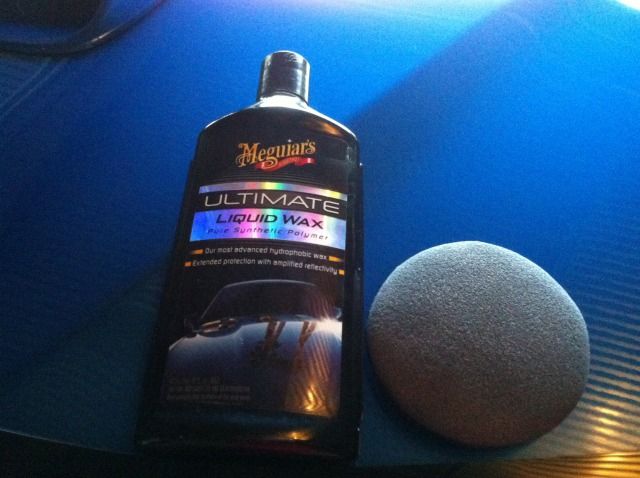
Again only applied & rubbed off in the one direction, not in circles.
I also have a black microfibre cloth (my 4th) that I use with the wax. This wax is applied then allowed to dry to a haze.
I went around and applied it to the whole vehicle before doing another lap rubbing it of. By this last rubbing of stage it was 6:30 and dark, so I worked under a flood light to finish of.
So approx 3hrs from start to finish. Wash, Dry, Clay, Polish, then Wax.
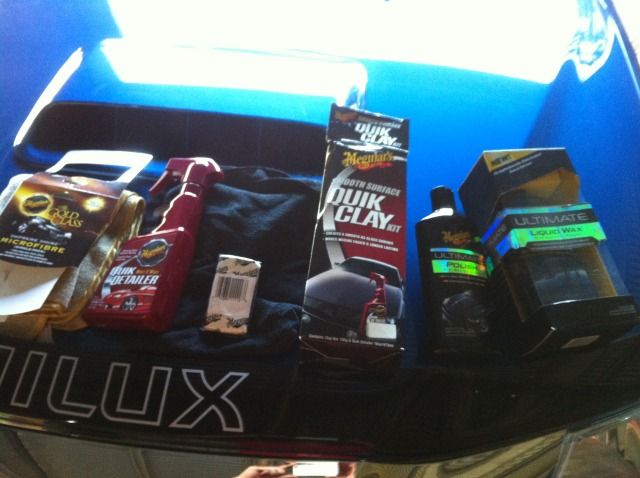
I bought the brand of products I did based on my reading, but there are many products out there that will probably do the same job. I got all mine from Repco, but again available almost any where. Cost was around $200, which was less than the dealers paint protection, and I have about 80-90% of the products left so I can redo many more times.
As I said at the start, I find water & importantly dust (we have a long, dirt driveway) seem to just fall off the waxed finish, so I have less washing / cleaning to do. And I have protection against Bird poop (I still don't leave it on there any longer than necessary) and bug guts wash of so much easier.
And I can see when I need to re-wax, the car get dirty quicker, the water doesn't bead on the bonnet as I'm driving, and If I hose the Hilux down, the water & dirt just run off.
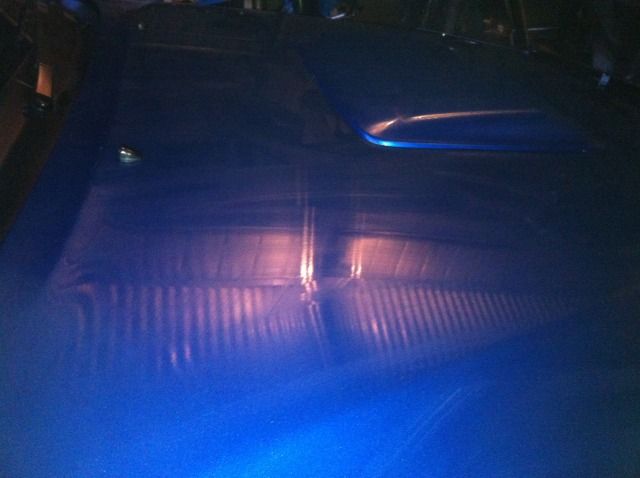
As I said it was dark when I finished, so the iphone pics I took are not very good. I'll take some more & post them up.
Any thoughts / comments / ideas on better methods appreciated.
OK now it's protected, its time to pull some bits off & add some others .....but until next sunday, work, work,work,work,work....roll on sunday!
I used this wax, it came with it's own foam applicator which is black so it doesn't get mixed up with the polish applicator.
Again only applied & rubbed off in the one direction, not in circles.
I also have a black microfibre cloth (my 4th) that I use with the wax. This wax is applied then allowed to dry to a haze.
I went around and applied it to the whole vehicle before doing another lap rubbing it of. By this last rubbing of stage it was 6:30 and dark, so I worked under a flood light to finish of.
So approx 3hrs from start to finish. Wash, Dry, Clay, Polish, then Wax.
I bought the brand of products I did based on my reading, but there are many products out there that will probably do the same job. I got all mine from Repco, but again available almost any where. Cost was around $200, which was less than the dealers paint protection, and I have about 80-90% of the products left so I can redo many more times.
As I said at the start, I find water & importantly dust (we have a long, dirt driveway) seem to just fall off the waxed finish, so I have less washing / cleaning to do. And I have protection against Bird poop (I still don't leave it on there any longer than necessary) and bug guts wash of so much easier.
And I can see when I need to re-wax, the car get dirty quicker, the water doesn't bead on the bonnet as I'm driving, and If I hose the Hilux down, the water & dirt just run off.
As I said it was dark when I finished, so the iphone pics I took are not very good. I'll take some more & post them up.
Any thoughts / comments / ideas on better methods appreciated.
OK now it's protected, its time to pull some bits off & add some others .....but until next sunday, work, work,work,work,work....roll on sunday!
Last edited by fredbear on Sun, 02 Sep 2012 9:22 +0000, edited 1 time in total.
- fredbear
- Posts: 150
- Joined: Wed, 19 Nov 2008 9:56 +0000
- Location: SA
Re: Fred's build.
![]() by fredbear on Sun, 02 Sep 2012 9:21 +0000
by fredbear on Sun, 02 Sep 2012 9:21 +0000
I forgot to ask, what have others done re the sports bar? I might go the powder coat / paint route if I can't find another solution. I'm not sure if the wax coating I put on will stop the oxidation / water-rain marking. Any solutions / ideas appreciated.
- fredbear
- Posts: 150
- Joined: Wed, 19 Nov 2008 9:56 +0000
- Location: SA
Who is online
Users browsing this forum: No registered users and 64 guests
![]()