Fred's build - Monster Ride Installed - CV's replaced
Re: Fred's build.
![]() by Aquaholics on Mon, 03 Sep 2012 6:07 +0000
by Aquaholics on Mon, 03 Sep 2012 6:07 +0000
-
Aquaholics - Posts: 226
- Joined: Mon, 27 Aug 2012 4:25 +0000
- Location: Lake Macquarie - Newcastle
Re: Fred's build.
![]() by lippa88 on Mon, 03 Sep 2012 7:08 +0000
by lippa88 on Mon, 03 Sep 2012 7:08 +0000
Came up looking great, I done all the process to my previous car every 12months.. Does take a lot of time but well worth it. Basically did exactly what you did, expect the drying process, certainly going to try the blower idea! Thanks
- lippa88
- Posts: 179
- Joined: Sun, 04 Mar 2012 1:44 +0000
Re: Fred's build.
![]() by Bobjones on Mon, 03 Sep 2012 9:15 +0000
by Bobjones on Mon, 03 Sep 2012 9:15 +0000
Good to see you looking after the paint. I detail cars, basically I only do it via referall these days, but yes I am one of those anal OCD types
I would also recommend that you use 3 buckets, wash, rinse and a separate bucket just for wheels, and also have a separate wash mit to use in this ONLY. You can still use the old chamois on the wheels, it does not really affect the factory type wheel coating, if you go chrome or polished throw it away.
I also recommend a waffle weave microfibre towel as apposed to a Microfibre chamois.
Those swirls you saw previously a mainly as a result of poor washing techniques. Here are my general pointers for customers:
1. Use 2 buckets, preferably with grit guards to avoid contaminents going back on the wash mit.
2. Rinse down vehicles in SHADE, wash vehicles in SHADE not direct sunlight.
3. Pre-rinse/foam if possible prior to washing.
4. Do wheels first, do each wheel individually, wash then rinse including inner guards.
5. Break up panels when washing, ie don't do a whole door without rinsing, especially if dirty. Rinse regularly in second RINSE bucket, which only holds clean water (and grit guard again). Don't forget to wash the door jambs.
6. Start at top of vehicle and work way down. Work from cleanest to dirtiest and if need be, replace water.
7. If you have a rinse/foam lance, use this to wash at the same time.
8. Rinse off vehicle constantly.
9. Do not use high pressure washers on paint, reserve that for inner guards if need be on your 4wd.
10. When drying, use a hose without the trigger on to stream the water off, leave less water on the panel, less water, less wipes to get off (more wipes = more marks), and a gentle blower on all gaps.
There you go.
Enjoy the car, my 2009 Hilux still looks brand new (chekc out my Build up thread), so with the right advice and a little effort your new rig will stay that way.
Cheers
Neill
- Bobjones
- Posts: 56
- Joined: Thu, 21 May 2009 7:00 +0000
Re: Fred's build.
![]() by fredbear on Mon, 03 Sep 2012 10:02 +0000
by fredbear on Mon, 03 Sep 2012 10:02 +0000
Bobjones wrote:Fred,
Good to see you looking after the paint. I detail cars, basically I only do it via referall these days, but yes I am one of those anal OCD types
I would also recommend that you use 3 buckets, wash, rinse and a separate bucket just for wheels, and also have a separate wash mit to use in this ONLY. You can still use the old chamois on the wheels, it does not really affect the factory type wheel coating, if you go chrome or polished throw it away.
I also recommend a waffle weave microfibre towel as apposed to a Microfibre chamois.
Those swirls you saw previously a mainly as a result of poor washing techniques. Here are my general pointers for customers:
1. Use 2 buckets, preferably with grit guards to avoid contaminents going back on the wash mit.
2. Rinse down vehicles in SHADE, wash vehicles in SHADE not direct sunlight.
3. Pre-rinse/foam if possible prior to washing.
4. Do wheels first, do each wheel individually, wash then rinse including inner guards.
5. Break up panels when washing, ie don't do a whole door without rinsing, especially if dirty. Rinse regularly in second RINSE bucket, which only holds clean water (and grit guard again). Don't forget to wash the door jambs.
6. Start at top of vehicle and work way down. Work from cleanest to dirtiest and if need be, replace water.
7. If you have a rinse/foam lance, use this to wash at the same time.
8. Rinse off vehicle constantly.
9. Do not use high pressure washers on paint, reserve that for inner guards if need be on your 4wd.
10. When drying, use a hose without the trigger on to stream the water off, leave less water on the panel, less water, less wipes to get off (more wipes = more marks), and a gentle blower on all gaps.
There you go.
Enjoy the car, my 2009 Hilux still looks brand new (chekc out my Build up thread), so with the right advice and a little effort your new rig will stay that way.
Cheers
Neill
Many thanks for the tips.
- fredbear
- Posts: 150
- Joined: Wed, 19 Nov 2008 9:56 +0000
- Location: SA
Re: Fred's build.
![]() by timothyg on Mon, 03 Sep 2012 10:35 +0000
by timothyg on Mon, 03 Sep 2012 10:35 +0000
-
timothyg - Posts: 362
- Joined: Sat, 17 Dec 2011 9:36 +0000
- Location: Sabah - Land Below the Wind
Re: Fred's build.
![]() by fredbear on Mon, 03 Sep 2012 11:41 +0000
by fredbear on Mon, 03 Sep 2012 11:41 +0000
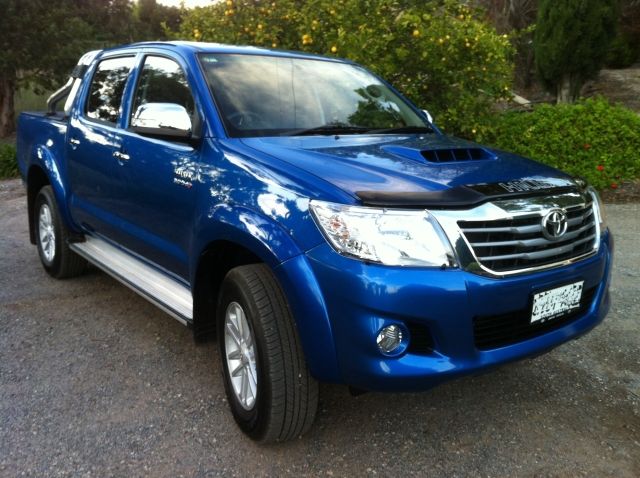
timothyg wrote:Seems that you're on the right track. For daily driven cars - we can just minimize the "damage". We dont have any blue (your blue) hilux here; so yours looks great!
Thanks. Hopefully it will look "better" once I actually start the build. Just need some time off work.
- fredbear
- Posts: 150
- Joined: Wed, 19 Nov 2008 9:56 +0000
- Location: SA
Re: Fred's build.
![]() by fredbear on Mon, 03 Sep 2012 12:05 +0000
by fredbear on Mon, 03 Sep 2012 12:05 +0000
- fredbear
- Posts: 150
- Joined: Wed, 19 Nov 2008 9:56 +0000
- Location: SA
Re: Fred's build.
![]() by packeteer on Mon, 03 Sep 2012 4:28 +0000
by packeteer on Mon, 03 Sep 2012 4:28 +0000
-

packeteer - Posts: 3468
- Joined: Wed, 27 Apr 2011 1:49 +0000
- Location: Chatswood, Sydney
Re: Fred's build.
![]() by MarkYounger on Mon, 03 Sep 2012 8:26 +0000
by MarkYounger on Mon, 03 Sep 2012 8:26 +0000
-
MarkYounger - Posts: 557
- Joined: Fri, 26 Nov 2010 2:35 +0000
- Location: Honduras
Re: Fred's build.
![]() by fredbear on Tue, 04 Sep 2012 11:59 +0000
by fredbear on Tue, 04 Sep 2012 11:59 +0000
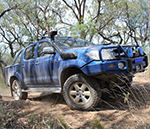
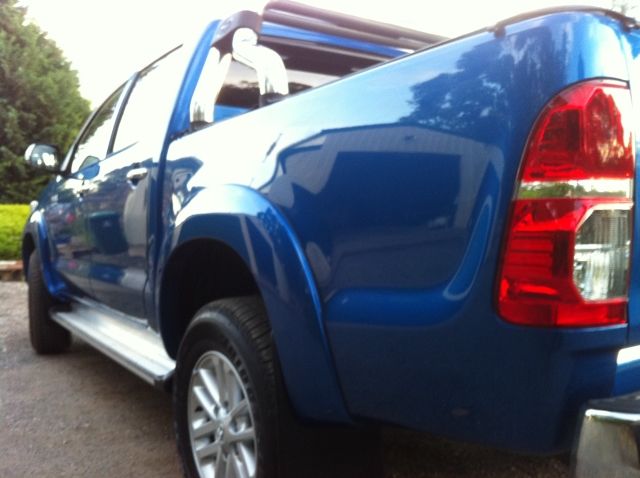
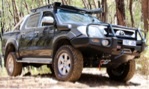
I got talked into getting 5 so I could do a 5 wheel rotation, but in hindsight that wasn't such a good idea, unless I want to drive around with one black steel rim. Oh well I got the trade in value, I have a correct size tyre just in case and I have a useable tyre at a "change over price" if I damage one. Need to look for a toyota alloy, unless I solve the orig question of what rims....going in circles here
The New boots:
- fredbear
- Posts: 150
- Joined: Wed, 19 Nov 2008 9:56 +0000
- Location: SA
Re: Fred's build.
![]() by lippa88 on Tue, 04 Sep 2012 12:50 +0000
by lippa88 on Tue, 04 Sep 2012 12:50 +0000
fredbear wrote:Couldn't decide on rims, I still need to do more research, but I needed to get the tyres done else I would have to many km's on them to be able to trade them in. So new boots in the form of MTZ 265x70x17" are on. After reading here I was going to import them from the USA. But the freight on tyres + fitting cost here, didn't seem to add up
I got talked into getting 5 so I could do a 5 wheel rotation, but in hindsight that wasn't such a good idea, unless I want to drive around with one black steel rim. Oh well I got the trade in value, I have a correct size tyre just in case and I have a useable tyre at a "change over price" if I damage one. Need to look for a toyota alloy, unless I solve the orig question of what rims....going in circles here
The New boots:
Looks sweet! How does the size go with the original suspension? No rubbing? Im thinking of getting new shoes in 265/70.. but not planing on a lift anytime soon..
- lippa88
- Posts: 179
- Joined: Sun, 04 Mar 2012 1:44 +0000
Re: Fred's build.
![]() by fredbear on Tue, 04 Sep 2012 1:02 +0000
by fredbear on Tue, 04 Sep 2012 1:02 +0000
lippa88 wrote:Looks sweet! How does the size go with the original suspension? No rubbing? Im thinking of getting new shoes in 265/70.. but not planing on a lift anytime soon..
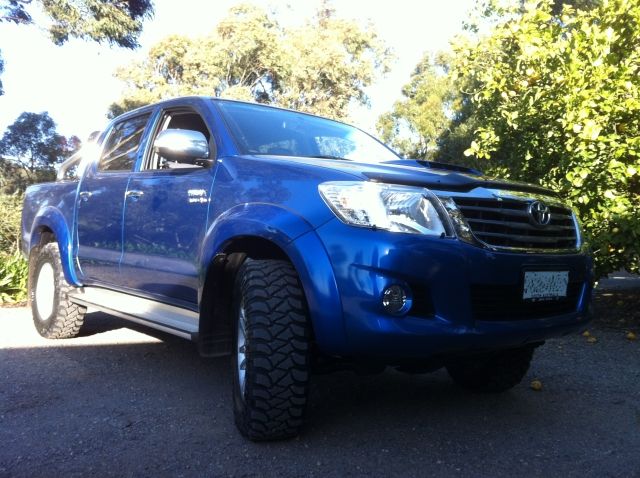
Thanks. I wandered out at lunchtime to have a look & take pics, but I haven't driven it as yet!. I gave the keys to the tyre guy this am & he dropped it back for me. Looking at it I did wonder if I should have got the 285's , but I'll find out if it rubs on our driveway tonight. I'm waiting on a courier from Monster Rides, so if it does rub it won't do so for long!
- fredbear
- Posts: 150
- Joined: Wed, 19 Nov 2008 9:56 +0000
- Location: SA
Re: Fred's build.
![]() by packeteer on Tue, 04 Sep 2012 1:51 +0000
by packeteer on Tue, 04 Sep 2012 1:51 +0000
I reckon you made the right choice. your truck looks sweet as now
-
packeteer - Posts: 3468
- Joined: Wed, 27 Apr 2011 1:49 +0000
- Location: Chatswood, Sydney
Re: Fred's build.
![]() by fredbear on Tue, 04 Sep 2012 7:57 +0000
by fredbear on Tue, 04 Sep 2012 7:57 +0000
packeteer wrote:285's will rub without lift and a change of rim
I reckon you made the right choice. your truck looks sweet as now
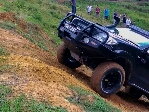
All went OK in a straight line and seemed OK when I turned, but just as I went over the small dip into the garage with about 1/2 lock on I heard something. I think the tyre touched the mudflap, but I couldn't see any marks when I looked.
I'll just be careful for a week or 2, while I wait on MR. But if you wanted to go with 32" on std suspension I think you would need to investigate a bit, but there is a whole thread on that somewhere here if I remember right.
- fredbear
- Posts: 150
- Joined: Wed, 19 Nov 2008 9:56 +0000
- Location: SA
Re: Fred's build.
![]() by Packdaddy on Tue, 04 Sep 2012 8:28 +0000
by Packdaddy on Tue, 04 Sep 2012 8:28 +0000
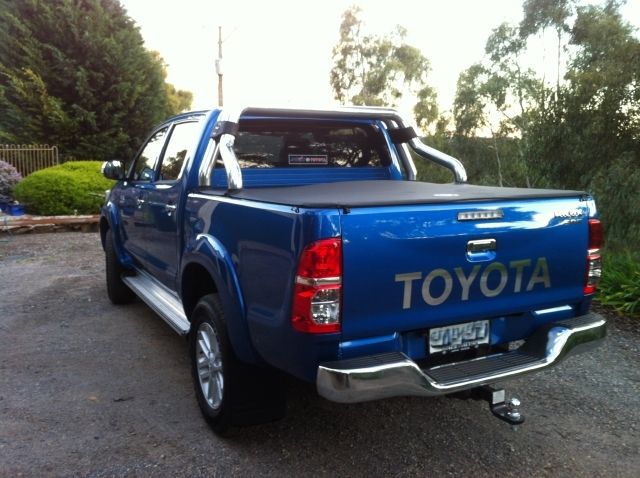
I'm surprised your spare is on a steel rim?! Mine's a 17" rim, same as the others...
Build Thread : viewtopic.php?f=41&t=14867
'Rules are for the obedience of fools and the guidance of wise men' - Sir Douglas Bader
-
Packdaddy - Posts: 382
- Joined: Wed, 15 Jun 2011 10:06 +0000
- Location: Nowra, NSW
Re: Fred's build.
![]() by fredbear on Tue, 04 Sep 2012 9:02 +0000
by fredbear on Tue, 04 Sep 2012 9:02 +0000
Packdaddy wrote:Yeah I have the same size tyres and they just barely rubbed the mudflaps at about half lock. 2" lift fixed that very well.
I'm surprised your spare is on a steel rim?! Mine's a 17" rim, same as the others...
Really, bugger me, I was assuming it was same as the old MY09 which was steel.....where is the torch...
Just checked, definitely a steel rim underneath not an alloy. Not sure how you got 5 x alloys.
- fredbear
- Posts: 150
- Joined: Wed, 19 Nov 2008 9:56 +0000
- Location: SA
Re: Fred's build.
![]() by packeteer on Tue, 04 Sep 2012 10:11 +0000
by packeteer on Tue, 04 Sep 2012 10:11 +0000
mine is an early 2011 vehicle (sale sheet says somthing like: MY11 upgrade pack)
-
packeteer - Posts: 3468
- Joined: Wed, 27 Apr 2011 1:49 +0000
- Location: Chatswood, Sydney
Re: Fred's build.
![]() by lippa88 on Tue, 04 Sep 2012 10:12 +0000
by lippa88 on Tue, 04 Sep 2012 10:12 +0000
Sent from my GT-I9100 using Tapatalk 2
- lippa88
- Posts: 179
- Joined: Sun, 04 Mar 2012 1:44 +0000
Re: Fred's build.
![]() by packeteer on Tue, 04 Sep 2012 10:25 +0000
by packeteer on Tue, 04 Sep 2012 10:25 +0000
-
packeteer - Posts: 3468
- Joined: Wed, 27 Apr 2011 1:49 +0000
- Location: Chatswood, Sydney
Re: Fred's build.
![]() by fredbear on Tue, 04 Sep 2012 10:34 +0000
by fredbear on Tue, 04 Sep 2012 10:34 +0000
packeteer wrote:importing is almost worth it for a wheel+tyre package. i know i'd be interested in a group buy
When I looked at it I found the wheels (eg classic II's where around $150 +post = $250, which is better than the 350'ish here) (I now know they don't fit, but just an example). However tyres where a different story. the tyre + freight wasn't that much less than the cost here. fwiw I was looking at summit racing as well as tirerack.
I'd like to find some rims like the classic II's that would fit. But no luck so far. Allied are close, but I don't like the "divets" they have in the outer edge of the thunder. If that was just plain I would have ordered them.
Any how, looks like the MY12 missed out on the 5 x alloy pack.
- fredbear
- Posts: 150
- Joined: Wed, 19 Nov 2008 9:56 +0000
- Location: SA
Who is online
Users browsing this forum: No registered users and 60 guests
![]()