Hey guys!
Might i just say as a first time user of this site, what a top site this is and look foward to doing alot of reading!!
i am changing out the injectors on my 2008 hilux due to a engine rattle when cold and was chasing the injector hold-down clamp bolt torque??
thanks..
Bill
Injector Change-out
81 posts
• Page 1 of 5 • 1, 2, 3, 4, 5
Injector Change-out
![]() by Bill21 on Sat, 23 Mar 2013 3:56 +0000
by Bill21 on Sat, 23 Mar 2013 3:56 +0000
- Bill21
- Posts: 2
- Joined: Sat, 23 Mar 2013 2:26 +0000
Re: Injector Change-out
![]() by Piratepete on Sat, 23 Mar 2013 4:10 +0000
by Piratepete on Sat, 23 Mar 2013 4:10 +0000
Hey mate the hold down clamps are 25nm and the injector pipe return crush washers are 17nm except for the very back one that doesn't connect to the injector is which is 12.5nm (that's if you bothered to remove that one)
Cheers
Pete
Cheers
Pete
-

Piratepete - Posts: 49
- Joined: Sun, 25 Mar 2012 1:03 +0000
Re: Injector Change-out
![]() by Bill21 on Sat, 23 Mar 2013 4:58 +0000
by Bill21 on Sat, 23 Mar 2013 4:58 +0000
Thanks Pete!!
will get into that tomorrow, couldn't think of anything better to do on a sunday!!!
will get into that tomorrow, couldn't think of anything better to do on a sunday!!!
- Bill21
- Posts: 2
- Joined: Sat, 23 Mar 2013 2:26 +0000
Re: Injector Change-out
![]() by 07luxyTD on Sat, 23 Mar 2013 5:06 +0000
by 07luxyTD on Sat, 23 Mar 2013 5:06 +0000
There was a torque when doing them 

"Lucky you weren't cut off by my stihl"
My build thread viewtopic.php?f=41&t=13794
My Landcruiser Build http://www.newlandcruiser.net/phpbb/vie ... 90&start=0
My build thread viewtopic.php?f=41&t=13794
My Landcruiser Build http://www.newlandcruiser.net/phpbb/vie ... 90&start=0
-

07luxyTD - Posts: 2826
- Joined: Wed, 22 Feb 2012 5:15 +0000
- Location: Quorrobolong, NSW
Re: Injector Change-out
![]() by Piratepete on Sat, 23 Mar 2013 5:24 +0000
by Piratepete on Sat, 23 Mar 2013 5:24 +0000
No worries bill. Nothing like working on them on a sunday of all days to choose from. Just for reference the injector pipes are torqued to 35nm or just go by feel  unless you have access to crows foot 17mm on the injector rail.
Hey 07luxyTD yeah there isn't really any need to torque the clamps down but i have seen first hand as to what happens if the injector crush washers are over torqued and not replaced
Hey 07luxyTD yeah there isn't really any need to torque the clamps down but i have seen first hand as to what happens if the injector crush washers are over torqued and not replaced
-
Piratepete - Posts: 49
- Joined: Sun, 25 Mar 2012 1:03 +0000
How to replace 1kd-ftv injectors
![]() by hilder91 on Fri, 02 Aug 2013 9:59 +0000
by hilder91 on Fri, 02 Aug 2013 9:59 +0000
I this thread I am going to show you how to replace your injectors yourself on a 1kd-ftv engine. 
(Make sure u have clip seal bags to put bolts in and seals so u don’t loose them)
(get 4 injector caps to put on the injectors so dirt doesn’t get in them)
(You will need carby cleaner and ten 8mm inside diameter copper washers.)
(torque wrench that goes up to 25nm, ¼ socket set that goes to 13mm or 3/8 ratchet set, Metric spanner set, seal picks, and screwdrivers)
(Boxhead brought to my attention that the injector lines should be replaced because the flanges on the injector lines is a soft compound. if u don't (which I haven't) u might get a fuel leak cuz the new set of injectors the seat will be a bit different to the last set.)
My vehicle is 2005 hilux. It may be a bit different to later model luxs cuz later models have a egr cooler mine does not.
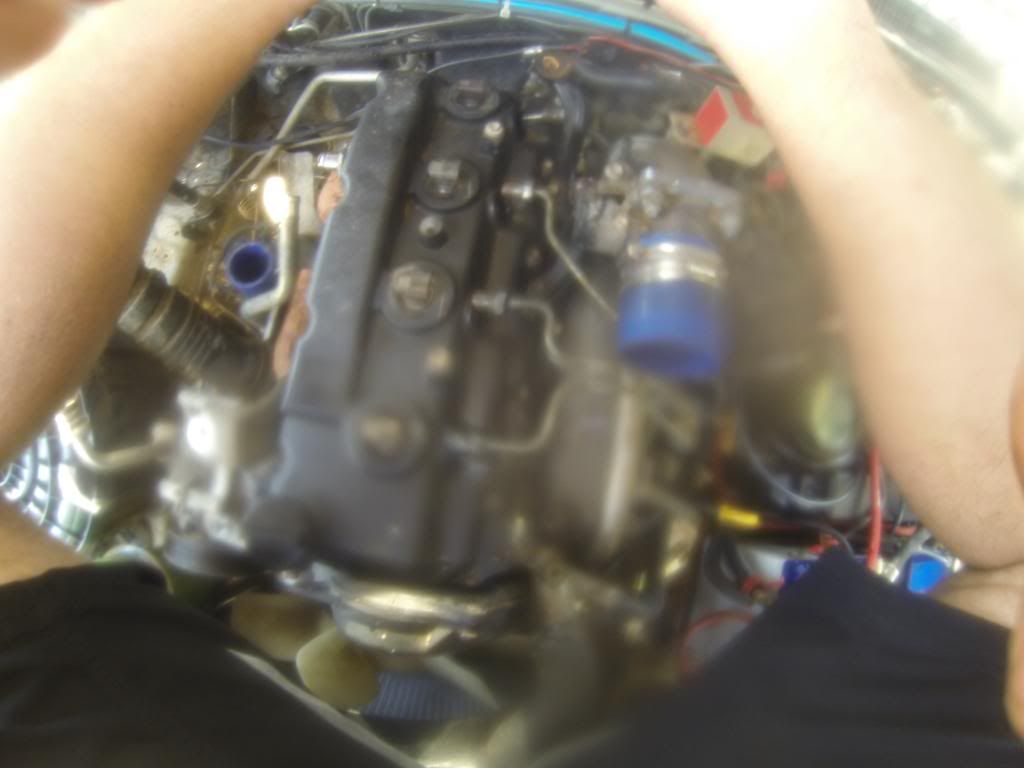
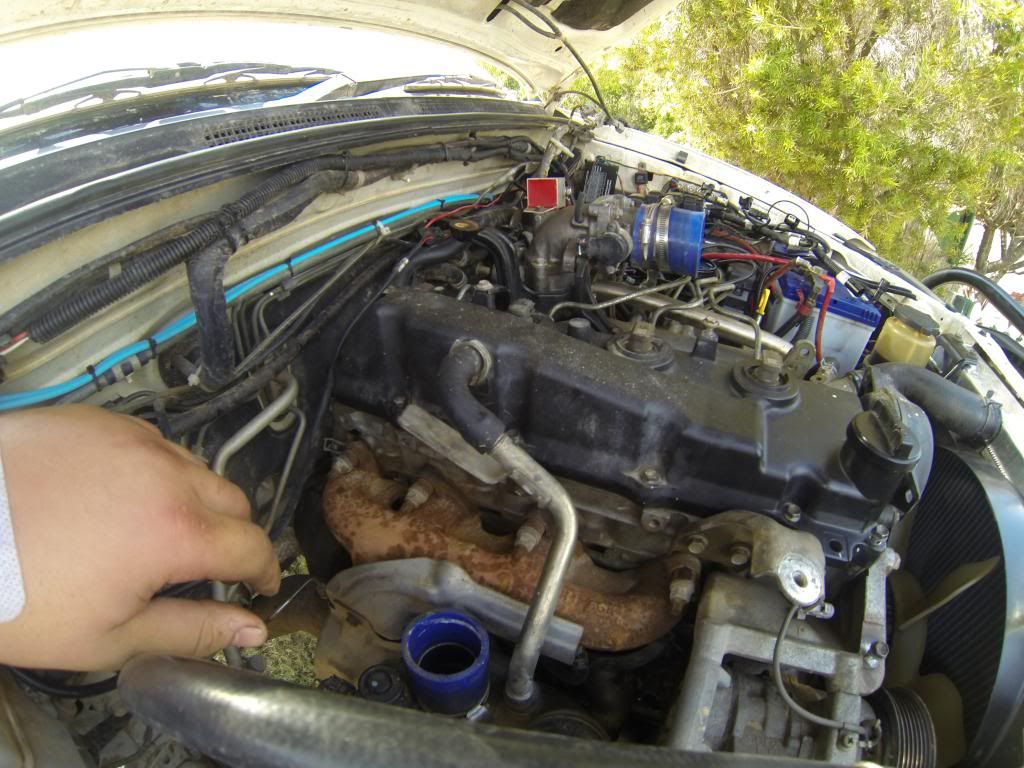
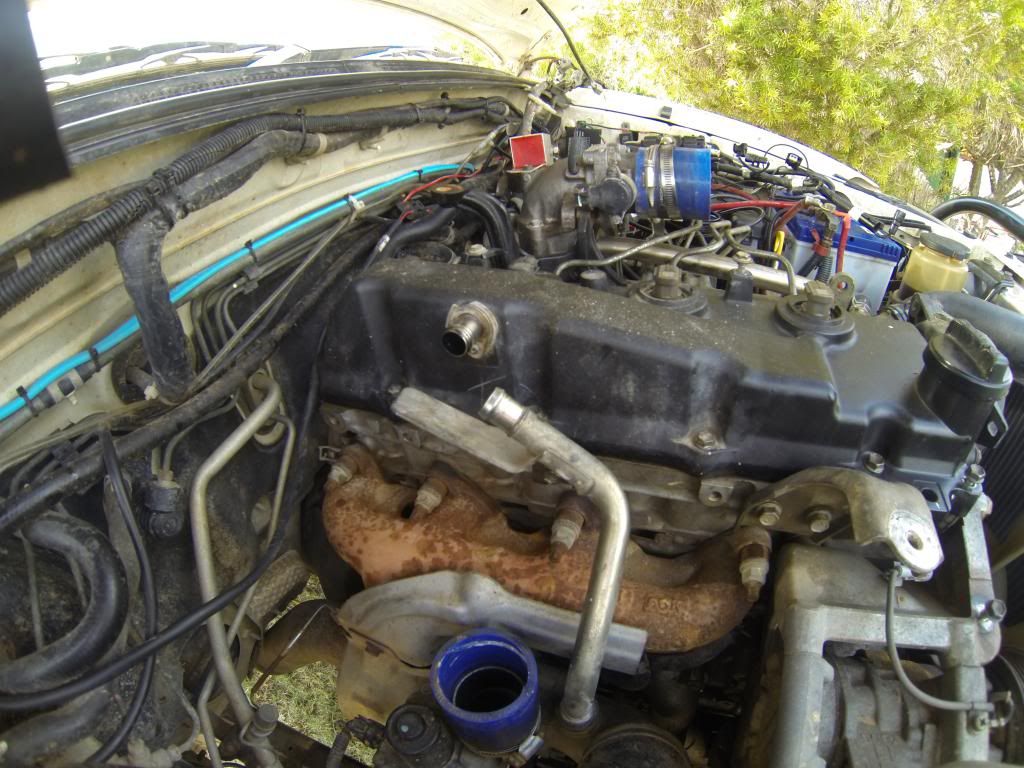
First of all remove the black plastic cover on top of the intercooler. I leave mine off on my car.
Once that is off u will see the intercooler.
First undo the hose clamp on intercooler pipe going to the throttle valve.
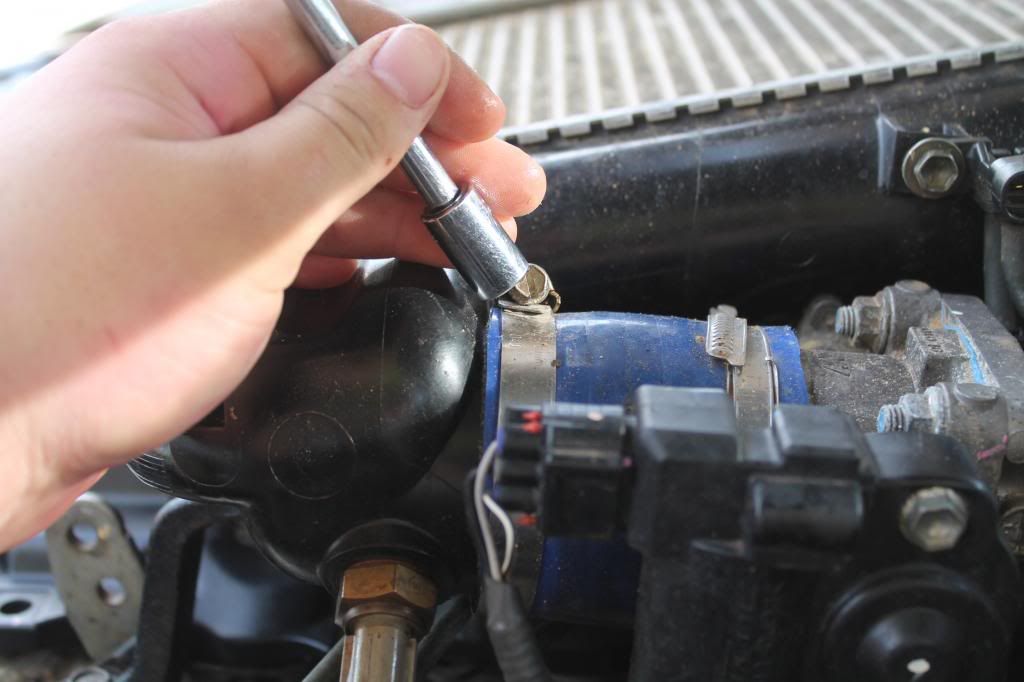
Then undo the hose clamp on the turbo side intercooler hose.
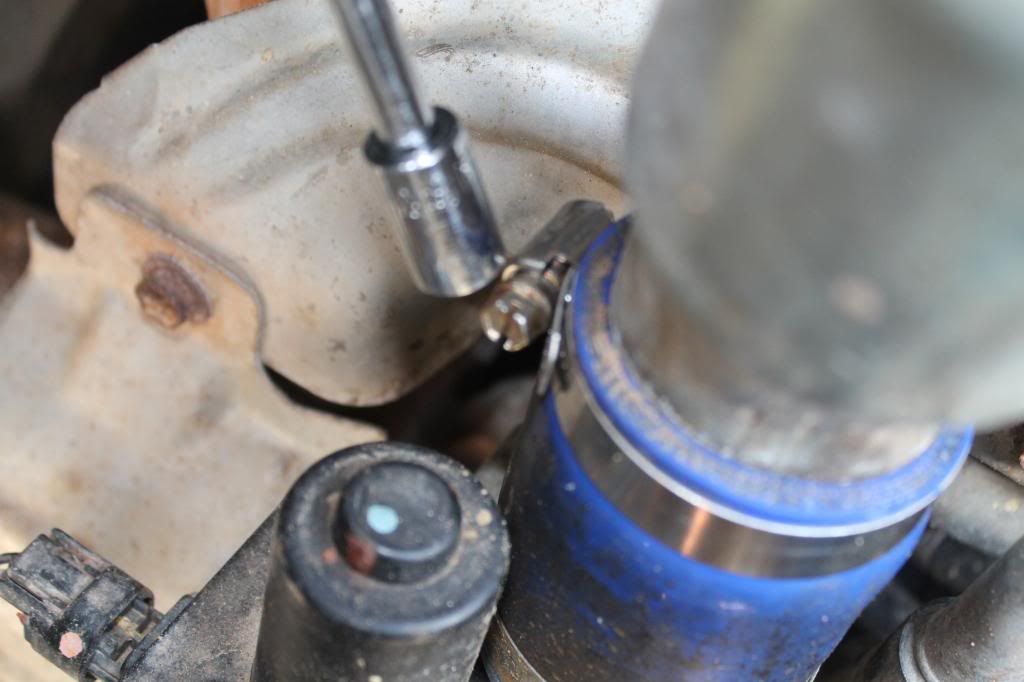
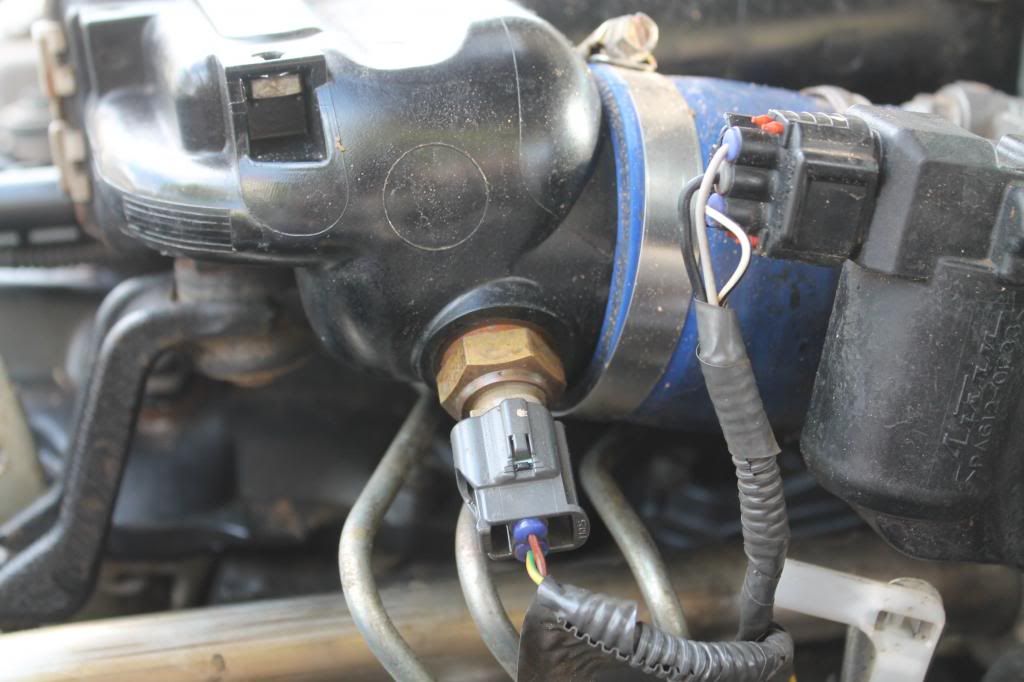
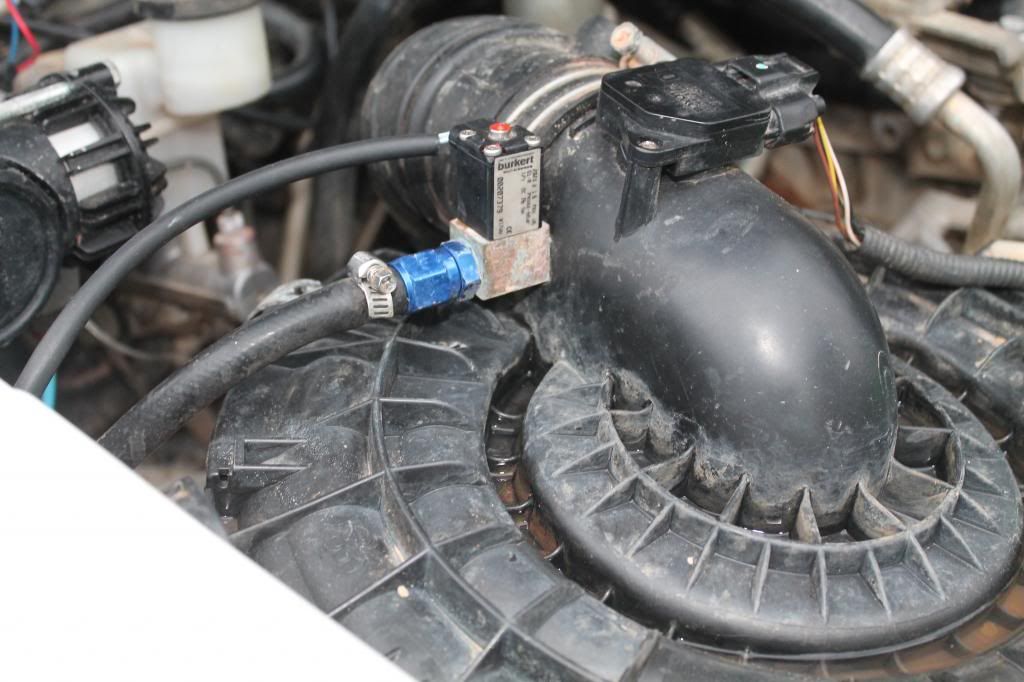
Once these are undone disconnect the Map sensor and pull the rubber hose off. U can either pull it off the intake manifold or off the sensor.

Disconnect this sensor that is on the front right elbow of the intercooler.
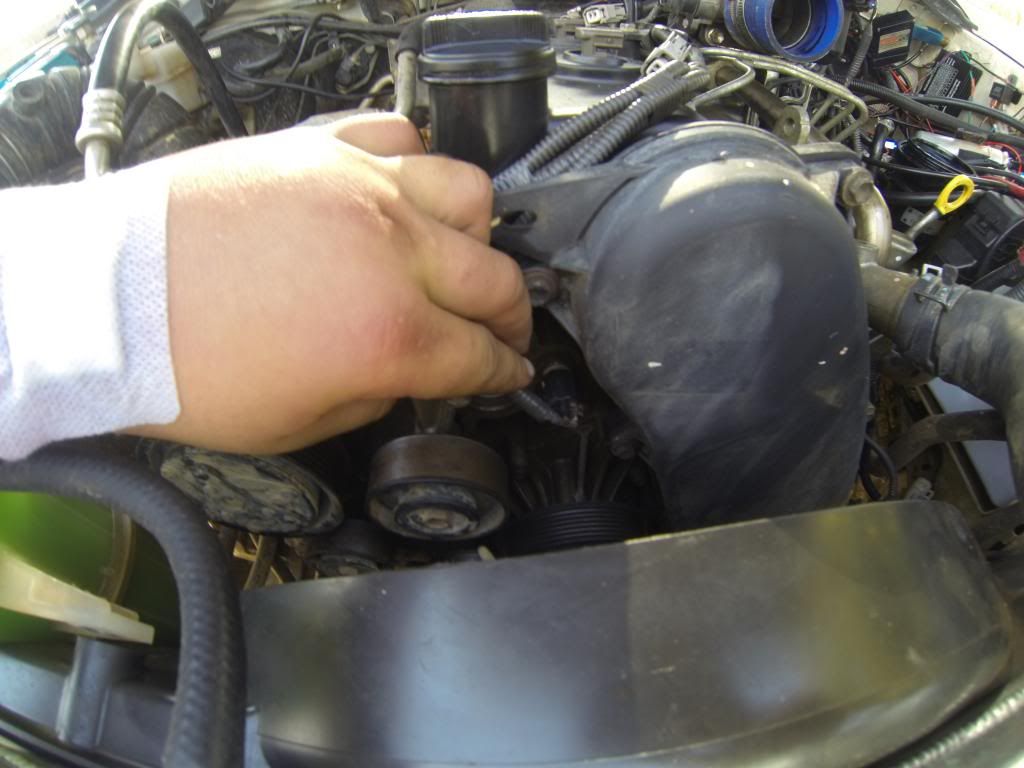
Now that all the wires are disconnected undo all the mounting bolts on the intercooler. (There are four 12mm bolts holding it on) the locations of them are one at the back right, another at the front right on the intake manifold. There one at the back of the left side and one at the front.
Now that is unbolted it should be ready to come off. This can be a bit of a struggle. (The intercooler hose can stick if the intercooler hasn’t been off for a while. This is ok just use a flat blade screw driver and run it in between the intercooler and hoses making sure not to damage the hose.)
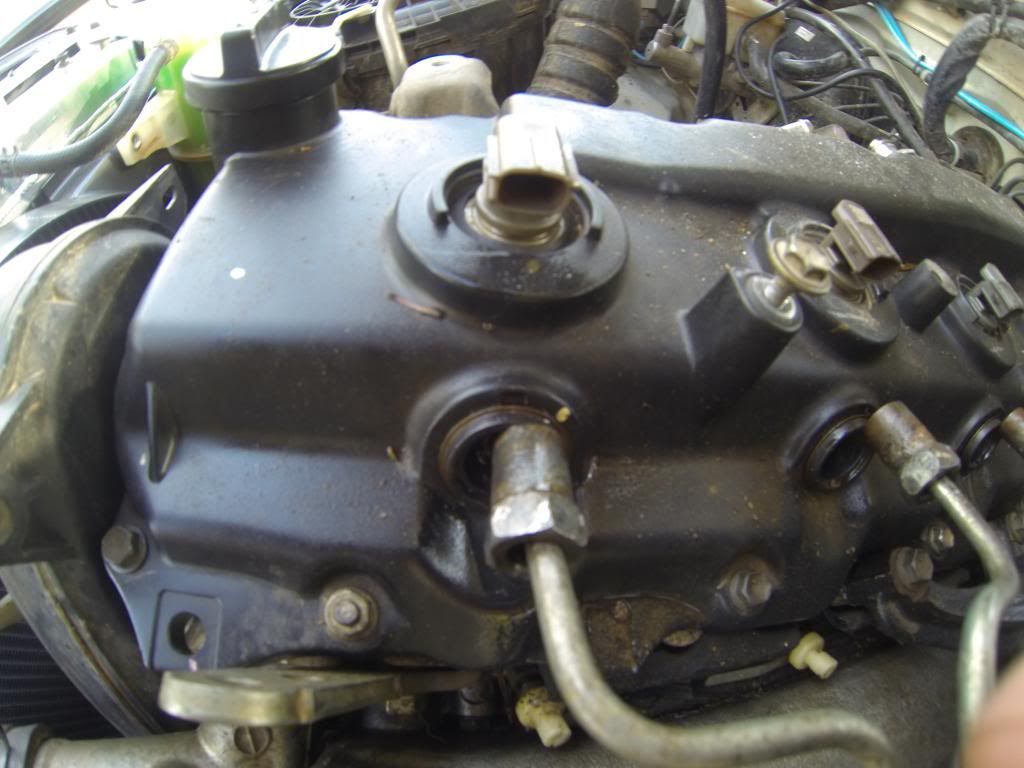
Ok now the intercooler is off u should see this.

Now we start disconnecting wires to move the injector wiring harness.
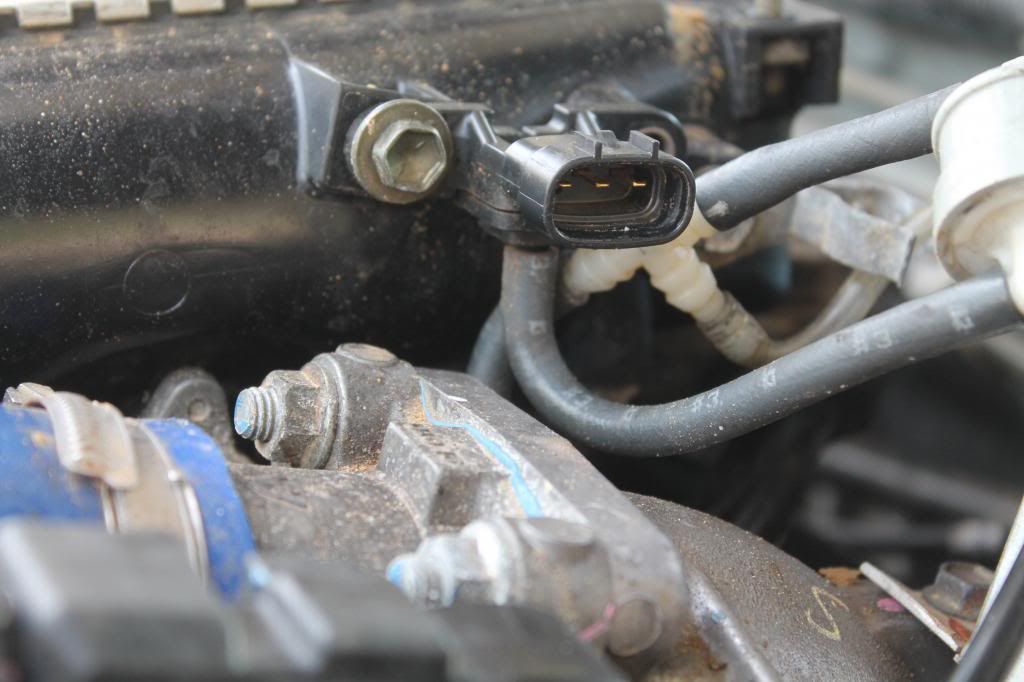
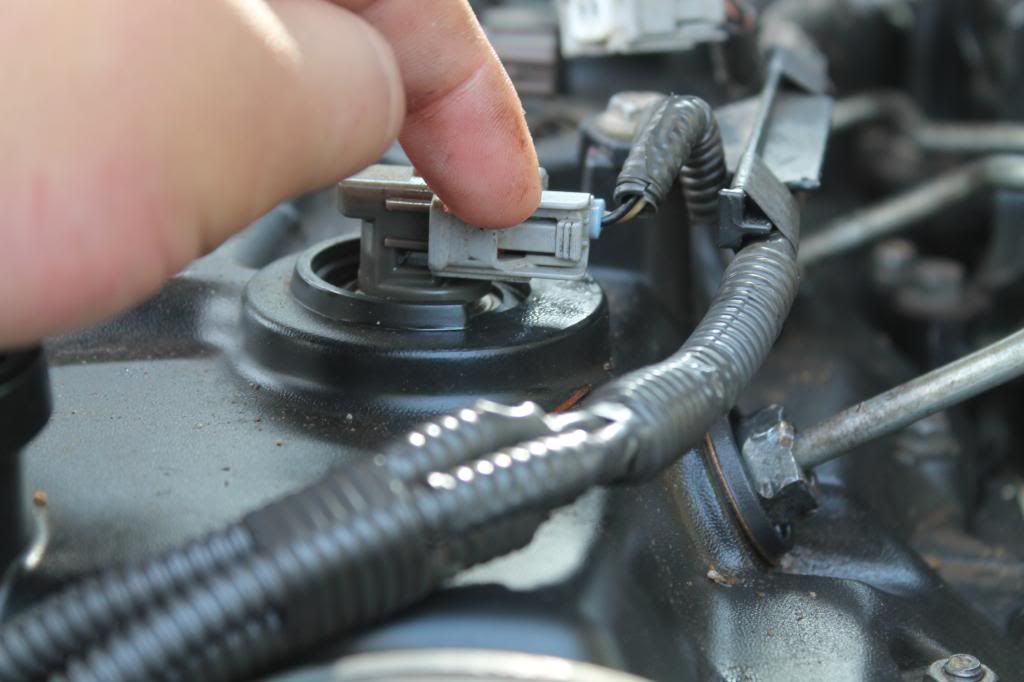
First disconnect the MAF sensor off of the air filter housing.
Then disconnect the air con wire. And take the bolt out of that metal bracket and unclip the a/c wire out of this bracket.
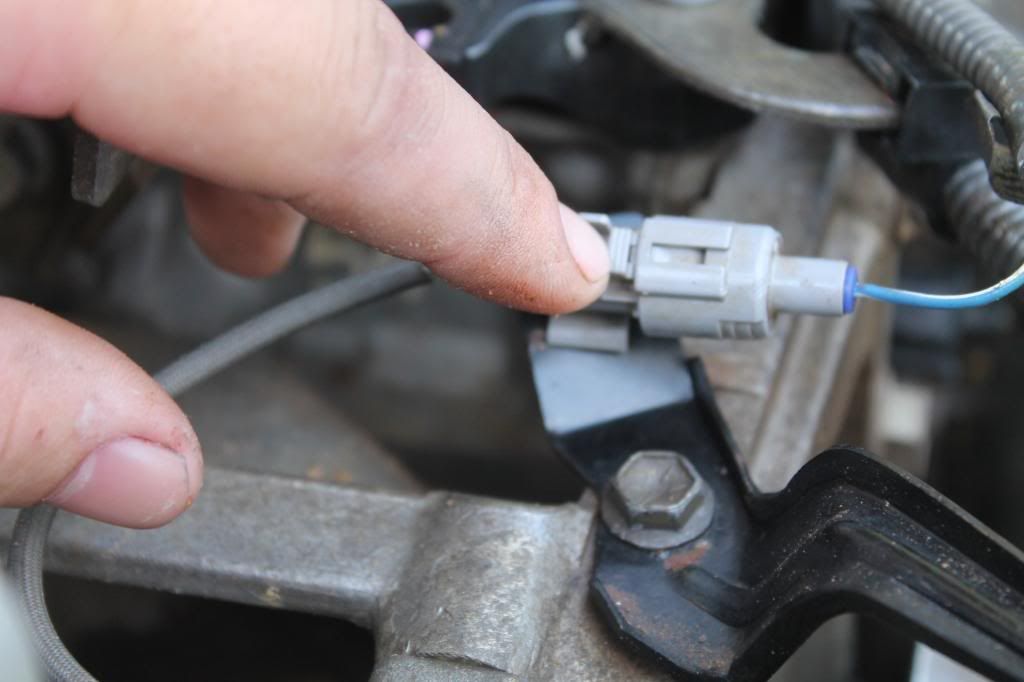
Disconnect the injection timing sensor
Disconnect all the injector wires
Undo the bolts that hold the wiring harness to the tappet cover
Now you should be able to move the whole harness out of the way.
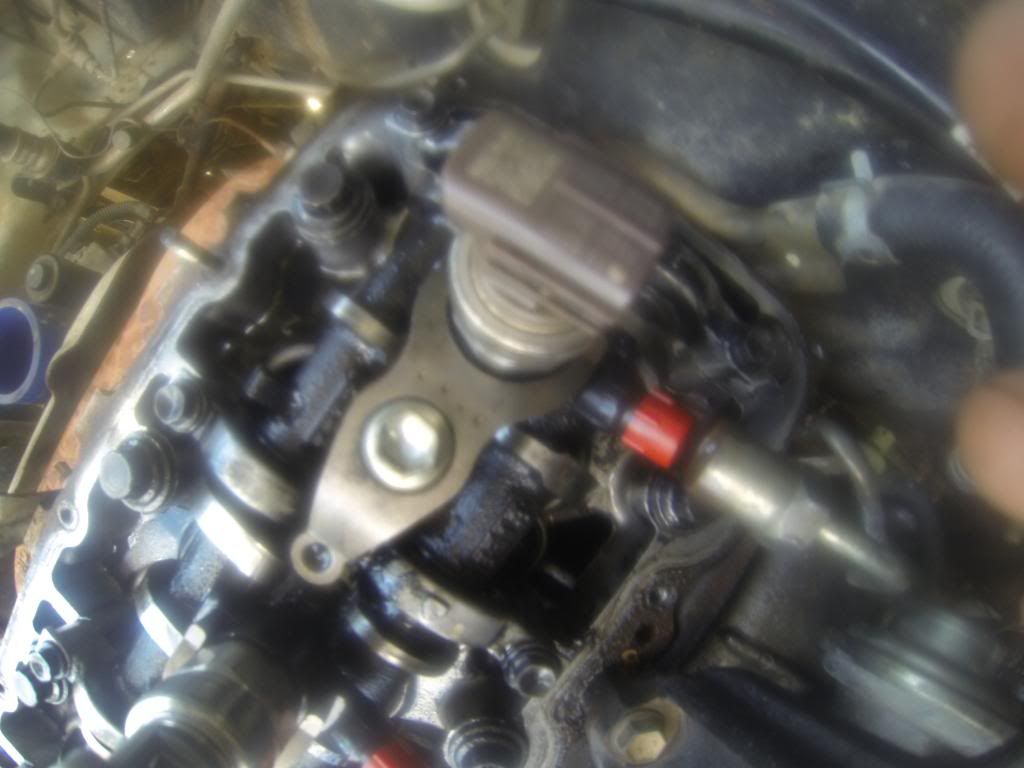
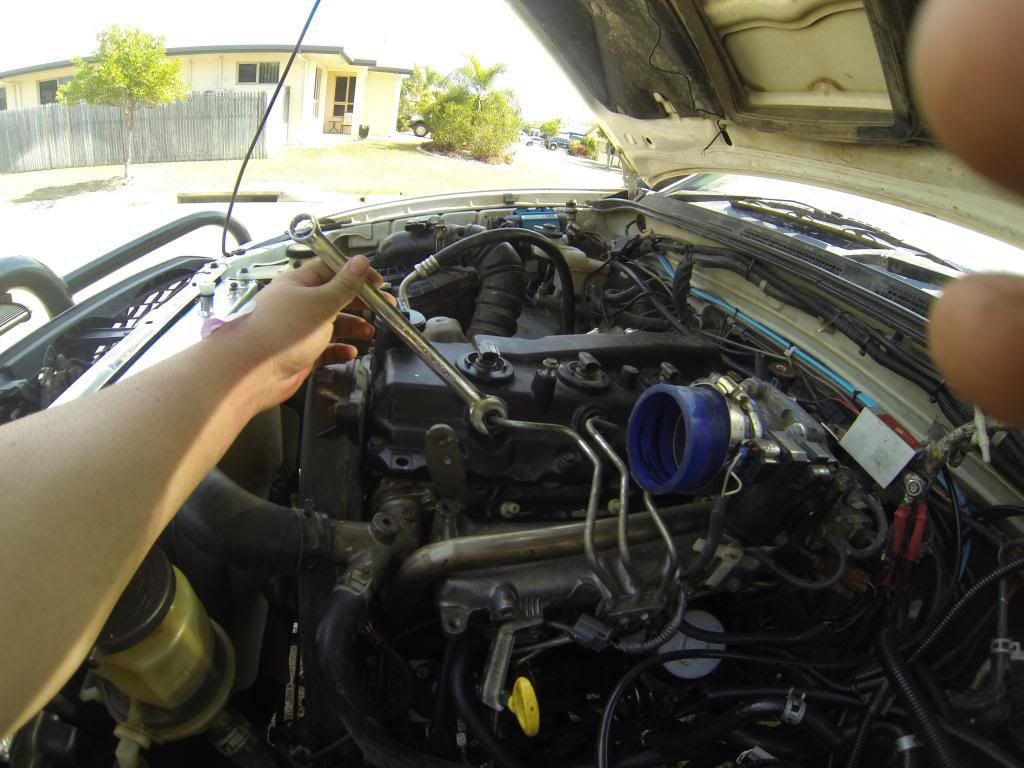
Ok now we are going to start to undo the injector line u will need a 17mm spanner. (Make sure the spanner is on properly or u can strip the nut. NOTE don’t be scared about high pressurized fuel. There is no pressure build up when the engine is off.

Once all the injector lines are undone on the injectors, you will need a flat blade screw driver to leaver out the bucket seal that are around the injectors. There is a little gap at the top of these to put the screw driver. They need to be completely removed out of the tappet cover just move the injector lines a bit so you can pull these seals out.
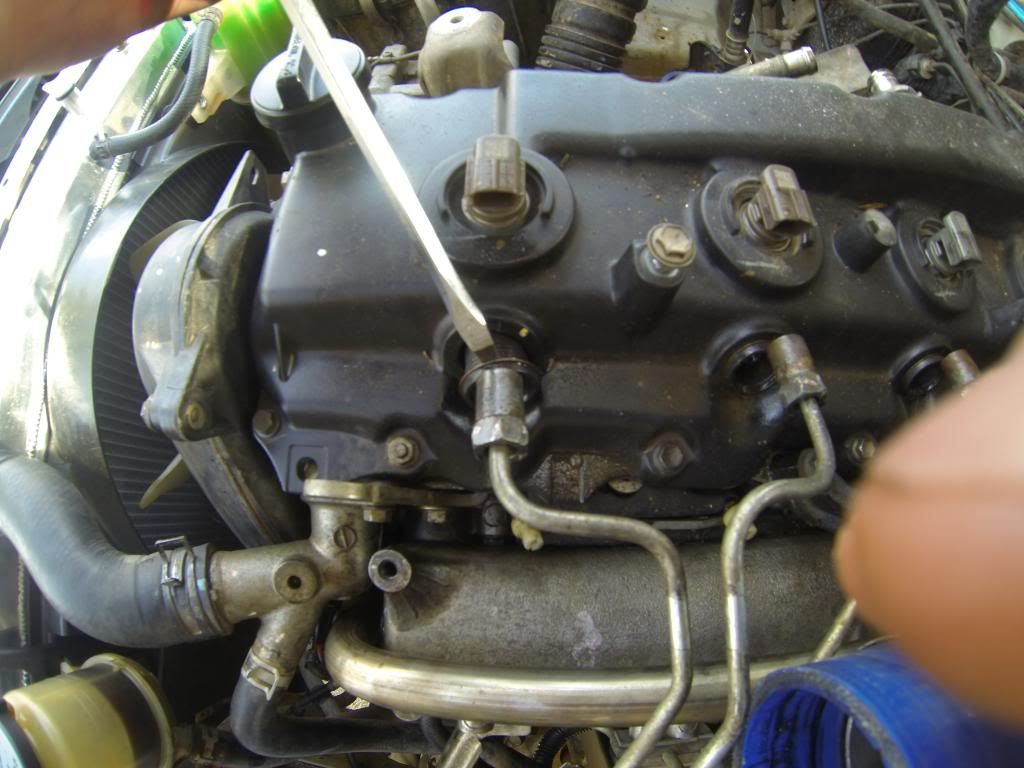
Remove this rubber hose on the left side of the tappet cover.
Start undoing the bolts and two nuts around the tappet cover. There are all 10mm. also get a clip seal bag to put these bolts and nuts in so u don’t lose them.
Now u should be ready to take the tappet cover. Start lift the tappet cover off the injector lines will be in the way. Just struggle and get the cover out without causing damage to the injector lines.

Check the tappet cove seal for damage and and stiffness. Replace if needed.
Now we are getting the close to removing the injectors yay.
Make sure you put those injector caps on at this point. And put clip seal bags over each of the injector line. Making sure there is basically no sh#t to get in.
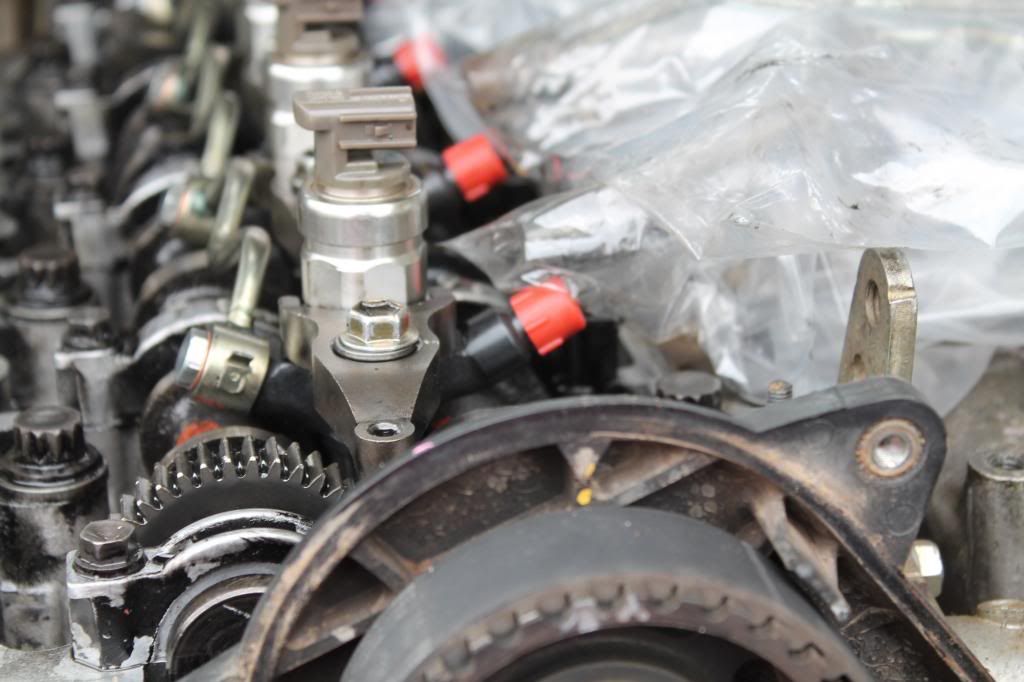
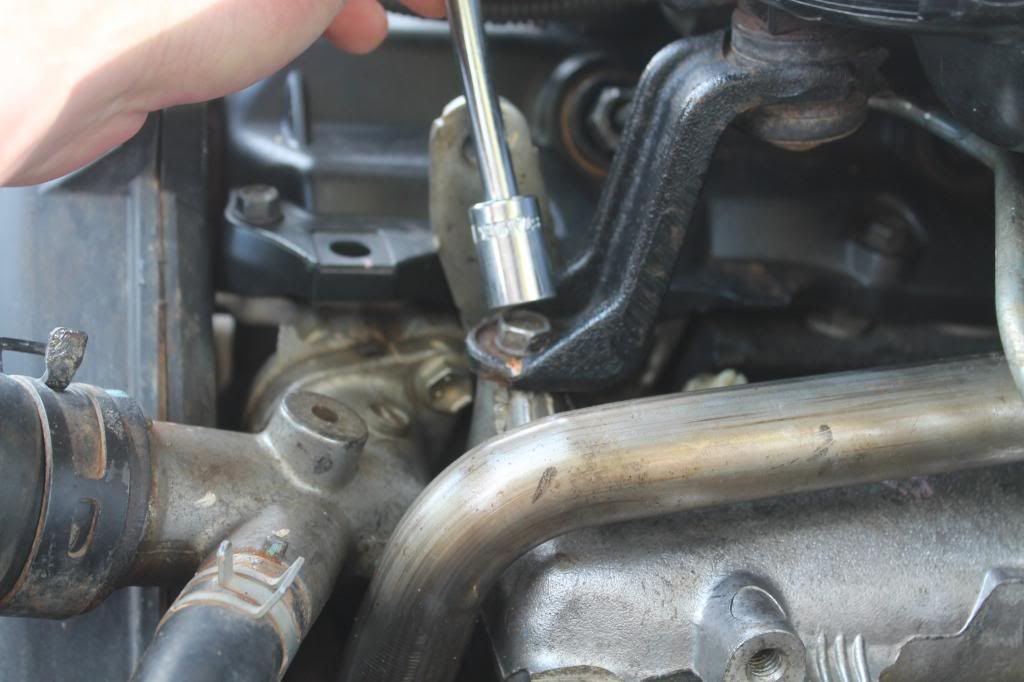
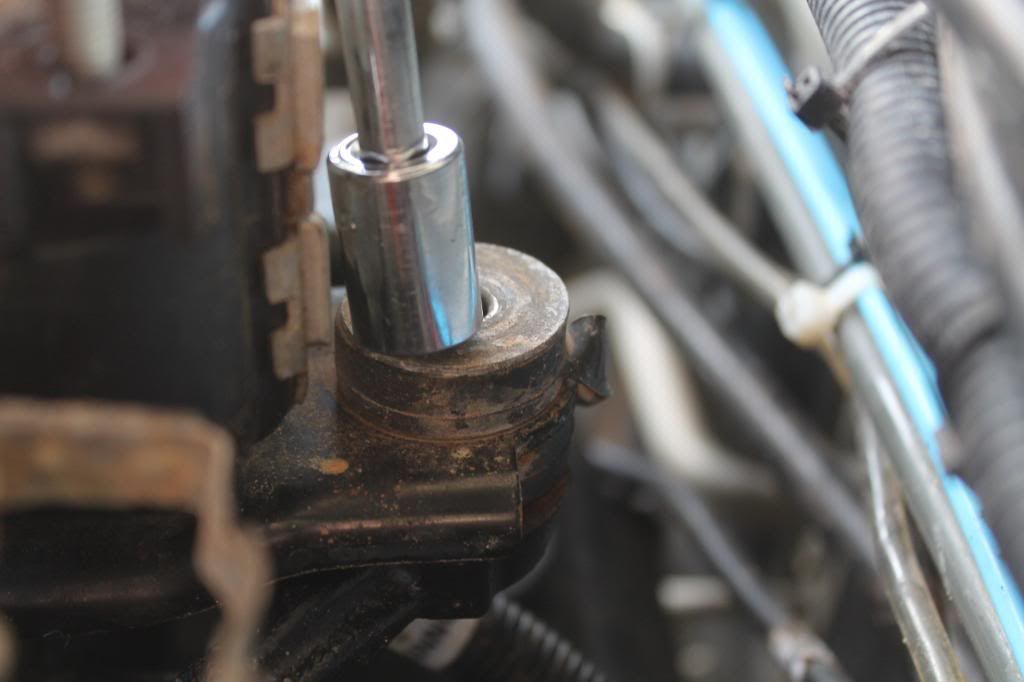
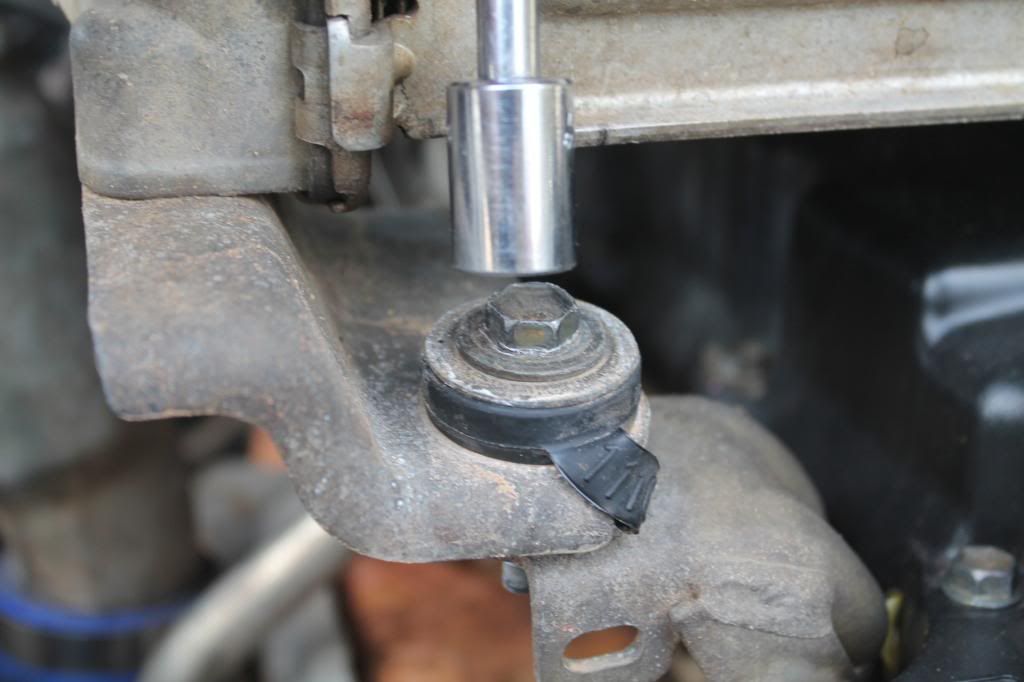
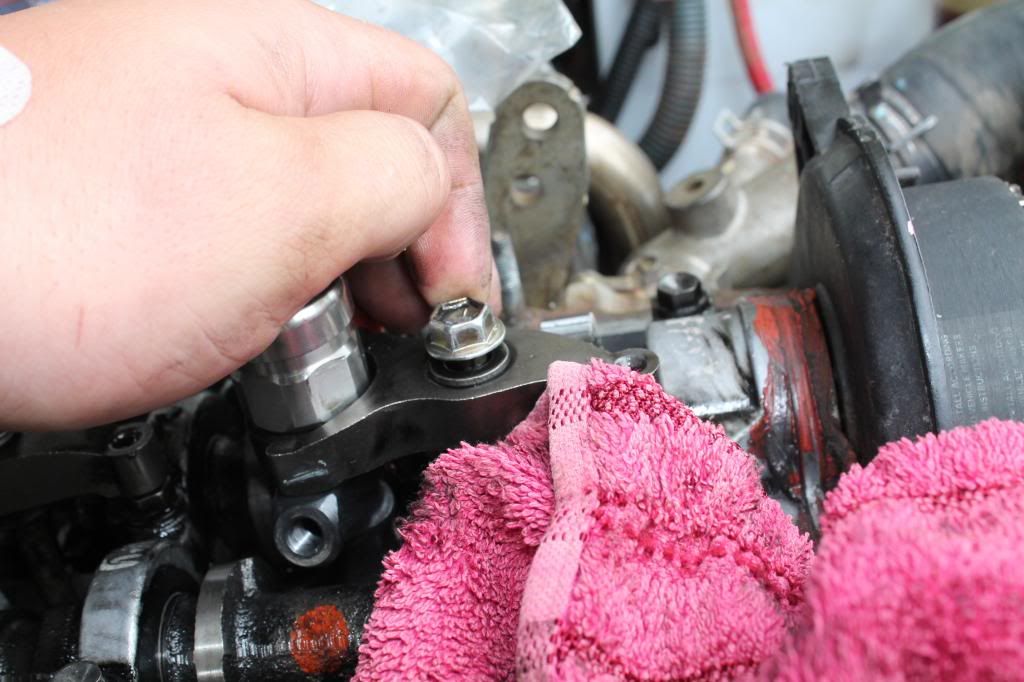
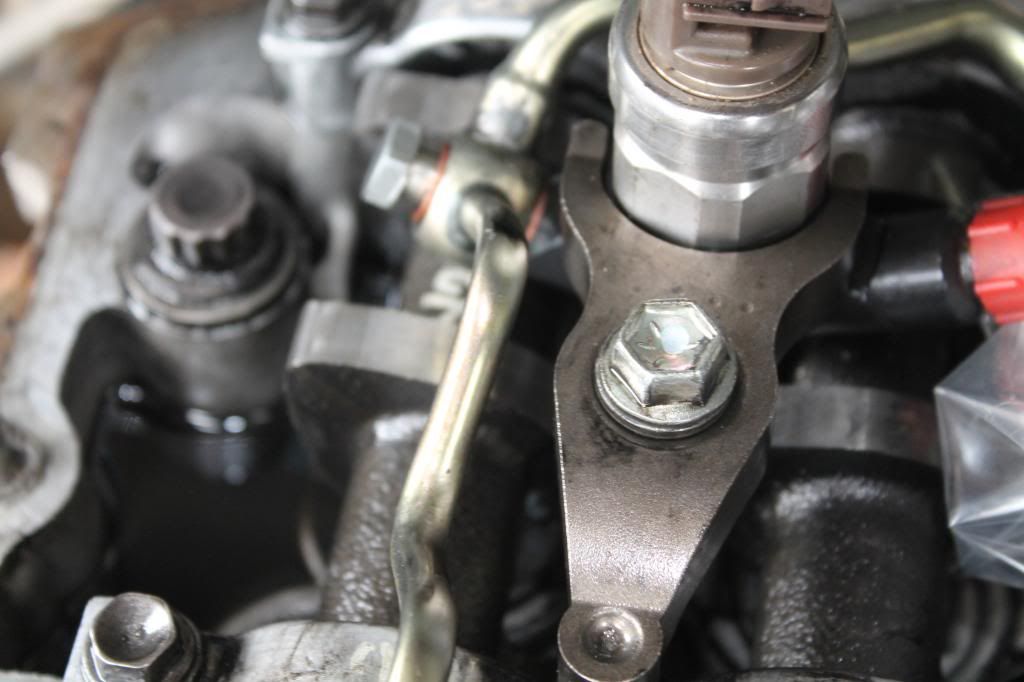
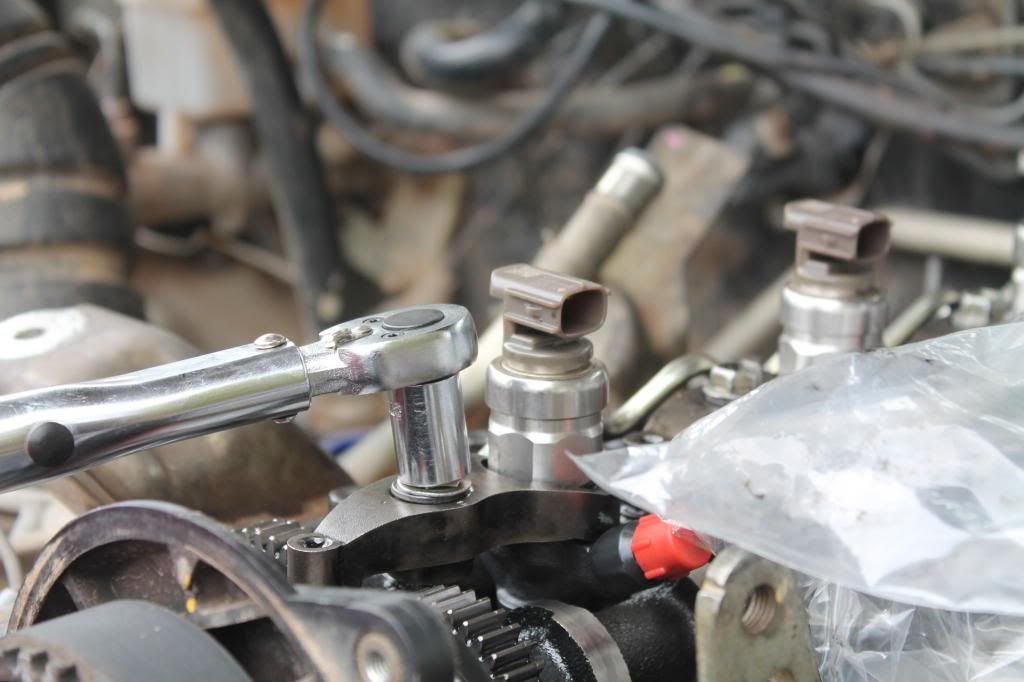
Ok now start undoing the run off rail on the injectors. (The bolts are 12mm) Be careful on removing the bolts of of these because there are copper washers either side of the rail. There is one bolt on each injector and another at the back right of the head.

Ok now we have the rail off put it in a plastic bag and in the cab or in a clean spot and put the bolts and washers in a clip seal bag.
Ok now get a center punch and hammer and make a mark on each injector holding flange. One mark for each number of injector. So number one injector get one mark and number four injector gets for mark. Number one injector is the on right at the front of the engine. (We do this cuz number one flange is slightly different to all the others.)
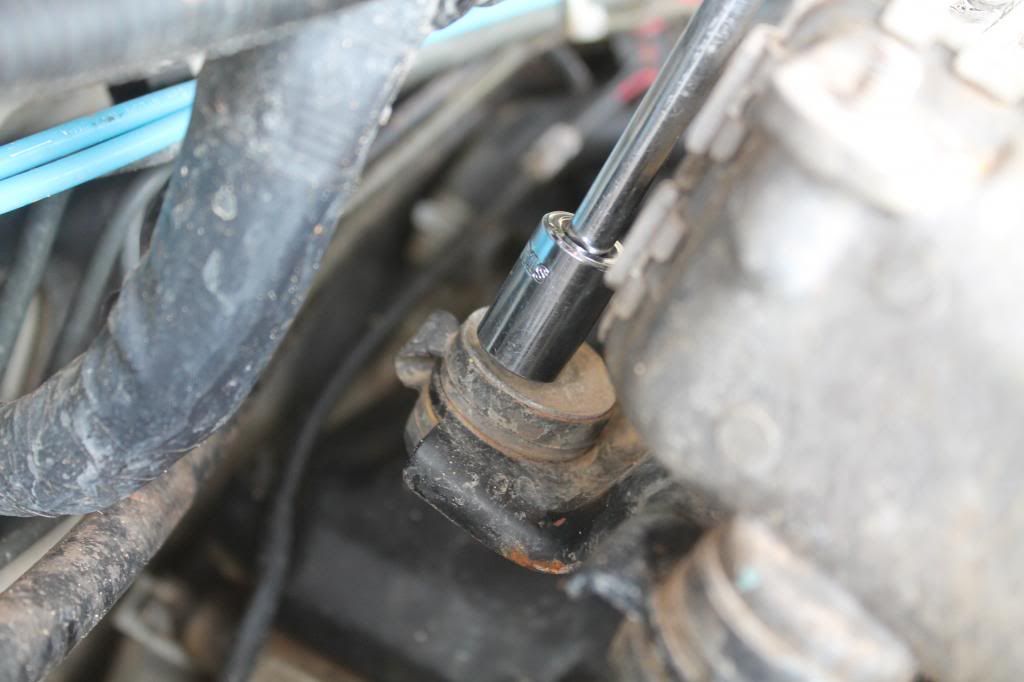
Start undoing the bolts that hold the flanges down. (These bolts are 12mm) once all out clean them if they are dirty e.g. carbon build up. Use carby cleaner to clean them and once clean put then in a clip seal bag.
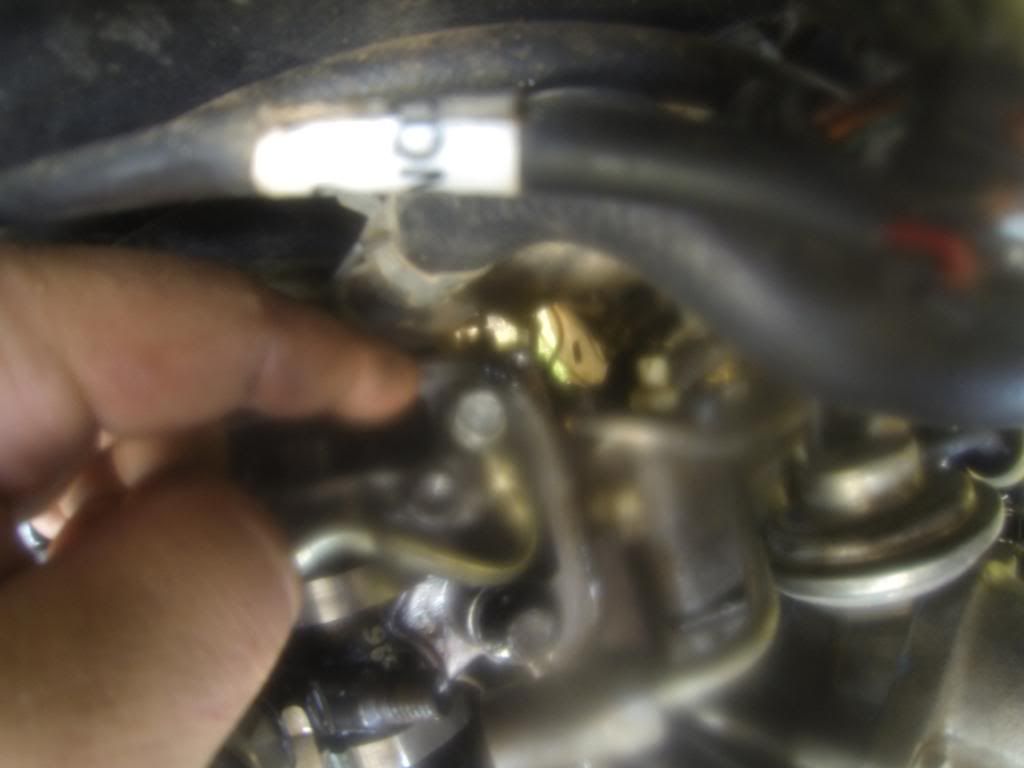
Now we are ready to remove the injector finally. These might or might not be easy to pull out. While pulling the injector up twist it side to side. Make sure the bottom seal is on the injector if it isn’t there it will be stuck in the head. You can remove it with a seal pick or a bit of wire with a hook.
Ok now the injectors are out we need to check if there is any crap on the seal seats in the head e.g. carbon. If there is carbon in there carby cleaner should clean it off or compressed air.
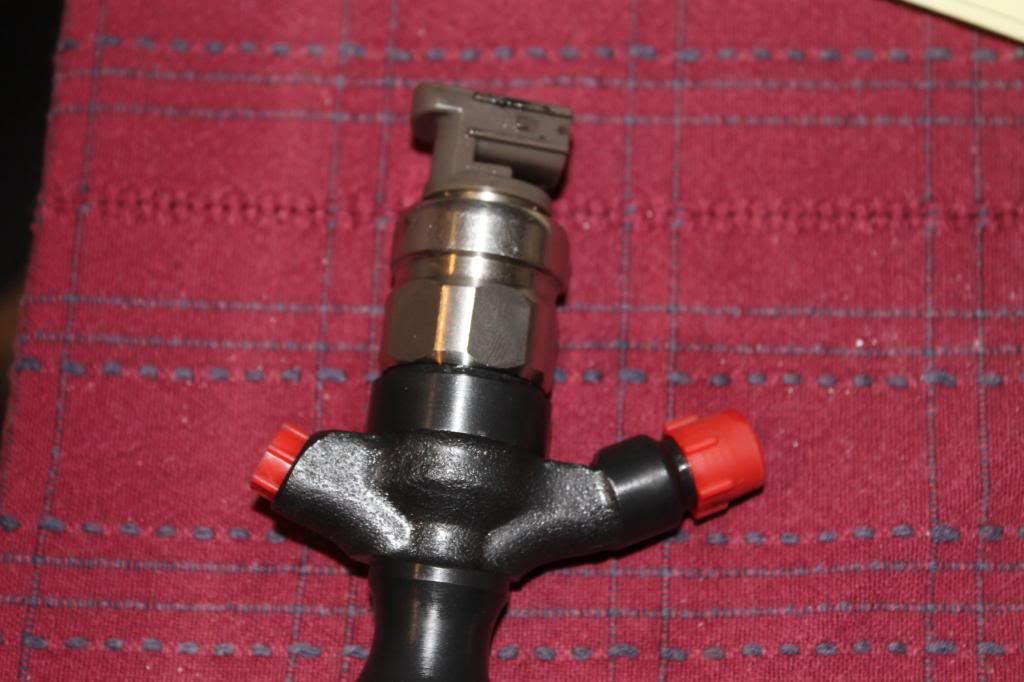
Check the new injectors for both seal the bottom steel seal and the o-ring oil seal. Make sure all four injectors have these on the. Don’t lose the injector codes either write a number on the piece of paper for what cylinder they went in. e.g. one injector goes in number 3 cylinder put a number 3 on the piece of paper to indicate that injector went into number 3 cylinder.
With the bottom steel seal u can drop into where the injector goes in just make sure it is sitting flat and then(Note put some engine oil or rubber grease on the o-ring seal on the injector) put the injectors in.
Now put the injector flanges and bolts in. making sure they go in the right place. And screw the bolts down. (only finger tight at this stage)
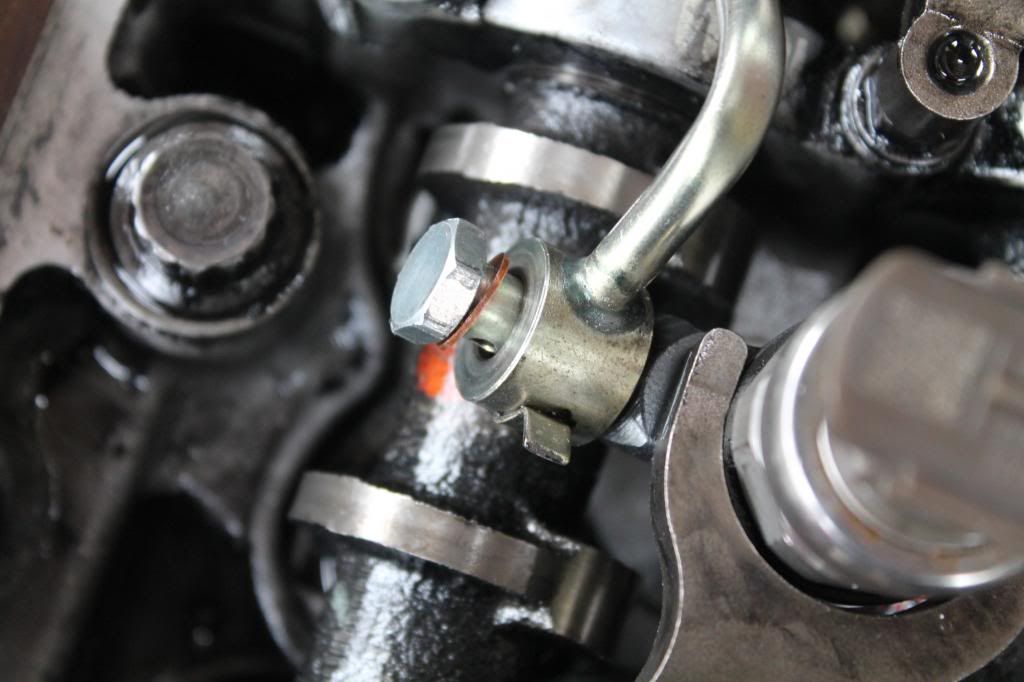
Now get the bango bolts for the leak off rail and replace the copper washer on them. (Not exactly necessary just gives you peace of mind that they won’t leak diesel)
Now start installing the fuel leak off rail put the back right bolt(the longest bolt) in first. (don’t screw them in all the way just a couple of turns.(Make sure there is a copper washer either side of the fuel rail) Then put the bolts into number 4 then 3 then 2 then one injectors. Again their has to be washer either side of the fuel rail.
Now we torque the fuel leak of rail bango bolts to 25NM start from the back right and work your way to the front

After the rail has been to torqued up u can torque the injector flange bolts to 25NM
Now the take the injector caps off and put the tappet cover back on (try not to damage the top seal in the tappet cover.) Put all the bolts and nuts in and do them up. They way to do them up is do one up and then do the other up diagonally across from it. (Do not over tighten these bolts just make them firm) again it might be a struggle putting the tappet cover back in.
Put the now put the bucket seals back in.
Once the becket seals back in connect and tighten all the injector hoses. (Again make these firm not tight.
Once all the the lines are back on and tight reconnect the injector wiring harness. So connect each injector wire, injection timing sensor, a/c sensor and MAF sensor. And put the bolts that hold the harness to the tappet cover back in to.
Now loosen one of the injector lines and crank the car for 8 secs or until diesel comes out of that line. Re tighten and then start car without intercooler on. (Make sure you’re not in a dusty area when doing this.) Just doing this to see if it starts.
Once u have checked that it starts re install the intercooler and put in the bolts that hold intercooler in place and tighten firmly. Tighten the hose clamps on the throttle body side and turbo side. Reconnect MAP senor hose to intake manifold and reconnect the MAP sensor wire and the wire that connects to the front right elbow sensor on the intercooler.
Now put the black plastic cover back on and you have successfully replaced your own injectors.
Now take the car to the closest mechanic that can code in the compensation codes.
if there are any problems with this write up tell me and I will fix it up
(Make sure u have clip seal bags to put bolts in and seals so u don’t loose them)
(get 4 injector caps to put on the injectors so dirt doesn’t get in them)
(You will need carby cleaner and ten 8mm inside diameter copper washers.)
(torque wrench that goes up to 25nm, ¼ socket set that goes to 13mm or 3/8 ratchet set, Metric spanner set, seal picks, and screwdrivers)
(Boxhead brought to my attention that the injector lines should be replaced because the flanges on the injector lines is a soft compound. if u don't (which I haven't) u might get a fuel leak cuz the new set of injectors the seat will be a bit different to the last set.)
My vehicle is 2005 hilux. It may be a bit different to later model luxs cuz later models have a egr cooler mine does not.
First of all remove the black plastic cover on top of the intercooler. I leave mine off on my car.
Once that is off u will see the intercooler.
First undo the hose clamp on intercooler pipe going to the throttle valve.
Then undo the hose clamp on the turbo side intercooler hose.
Once these are undone disconnect the Map sensor and pull the rubber hose off. U can either pull it off the intake manifold or off the sensor.
Disconnect this sensor that is on the front right elbow of the intercooler.
Now that all the wires are disconnected undo all the mounting bolts on the intercooler. (There are four 12mm bolts holding it on) the locations of them are one at the back right, another at the front right on the intake manifold. There one at the back of the left side and one at the front.
Now that is unbolted it should be ready to come off. This can be a bit of a struggle. (The intercooler hose can stick if the intercooler hasn’t been off for a while. This is ok just use a flat blade screw driver and run it in between the intercooler and hoses making sure not to damage the hose.)
Ok now the intercooler is off u should see this.
Now we start disconnecting wires to move the injector wiring harness.
First disconnect the MAF sensor off of the air filter housing.
Then disconnect the air con wire. And take the bolt out of that metal bracket and unclip the a/c wire out of this bracket.
Disconnect the injection timing sensor
Disconnect all the injector wires
Undo the bolts that hold the wiring harness to the tappet cover
Now you should be able to move the whole harness out of the way.
Ok now we are going to start to undo the injector line u will need a 17mm spanner. (Make sure the spanner is on properly or u can strip the nut. NOTE don’t be scared about high pressurized fuel. There is no pressure build up when the engine is off.
Once all the injector lines are undone on the injectors, you will need a flat blade screw driver to leaver out the bucket seal that are around the injectors. There is a little gap at the top of these to put the screw driver. They need to be completely removed out of the tappet cover just move the injector lines a bit so you can pull these seals out.
Remove this rubber hose on the left side of the tappet cover.
Start undoing the bolts and two nuts around the tappet cover. There are all 10mm. also get a clip seal bag to put these bolts and nuts in so u don’t lose them.
Now u should be ready to take the tappet cover. Start lift the tappet cover off the injector lines will be in the way. Just struggle and get the cover out without causing damage to the injector lines.
Check the tappet cove seal for damage and and stiffness. Replace if needed.
Now we are getting the close to removing the injectors yay.
Make sure you put those injector caps on at this point. And put clip seal bags over each of the injector line. Making sure there is basically no sh#t to get in.
Ok now start undoing the run off rail on the injectors. (The bolts are 12mm) Be careful on removing the bolts of of these because there are copper washers either side of the rail. There is one bolt on each injector and another at the back right of the head.
Ok now we have the rail off put it in a plastic bag and in the cab or in a clean spot and put the bolts and washers in a clip seal bag.
Ok now get a center punch and hammer and make a mark on each injector holding flange. One mark for each number of injector. So number one injector get one mark and number four injector gets for mark. Number one injector is the on right at the front of the engine. (We do this cuz number one flange is slightly different to all the others.)
Start undoing the bolts that hold the flanges down. (These bolts are 12mm) once all out clean them if they are dirty e.g. carbon build up. Use carby cleaner to clean them and once clean put then in a clip seal bag.
Now we are ready to remove the injector finally. These might or might not be easy to pull out. While pulling the injector up twist it side to side. Make sure the bottom seal is on the injector if it isn’t there it will be stuck in the head. You can remove it with a seal pick or a bit of wire with a hook.
Ok now the injectors are out we need to check if there is any crap on the seal seats in the head e.g. carbon. If there is carbon in there carby cleaner should clean it off or compressed air.
Check the new injectors for both seal the bottom steel seal and the o-ring oil seal. Make sure all four injectors have these on the. Don’t lose the injector codes either write a number on the piece of paper for what cylinder they went in. e.g. one injector goes in number 3 cylinder put a number 3 on the piece of paper to indicate that injector went into number 3 cylinder.
With the bottom steel seal u can drop into where the injector goes in just make sure it is sitting flat and then(Note put some engine oil or rubber grease on the o-ring seal on the injector) put the injectors in.
Now put the injector flanges and bolts in. making sure they go in the right place. And screw the bolts down. (only finger tight at this stage)
Now get the bango bolts for the leak off rail and replace the copper washer on them. (Not exactly necessary just gives you peace of mind that they won’t leak diesel)
Now start installing the fuel leak off rail put the back right bolt(the longest bolt) in first. (don’t screw them in all the way just a couple of turns.(Make sure there is a copper washer either side of the fuel rail) Then put the bolts into number 4 then 3 then 2 then one injectors. Again their has to be washer either side of the fuel rail.
Now we torque the fuel leak of rail bango bolts to 25NM start from the back right and work your way to the front
After the rail has been to torqued up u can torque the injector flange bolts to 25NM
Now the take the injector caps off and put the tappet cover back on (try not to damage the top seal in the tappet cover.) Put all the bolts and nuts in and do them up. They way to do them up is do one up and then do the other up diagonally across from it. (Do not over tighten these bolts just make them firm) again it might be a struggle putting the tappet cover back in.
Put the now put the bucket seals back in.
Once the becket seals back in connect and tighten all the injector hoses. (Again make these firm not tight.
Once all the the lines are back on and tight reconnect the injector wiring harness. So connect each injector wire, injection timing sensor, a/c sensor and MAF sensor. And put the bolts that hold the harness to the tappet cover back in to.
Now loosen one of the injector lines and crank the car for 8 secs or until diesel comes out of that line. Re tighten and then start car without intercooler on. (Make sure you’re not in a dusty area when doing this.) Just doing this to see if it starts.
Once u have checked that it starts re install the intercooler and put in the bolts that hold intercooler in place and tighten firmly. Tighten the hose clamps on the throttle body side and turbo side. Reconnect MAP senor hose to intake manifold and reconnect the MAP sensor wire and the wire that connects to the front right elbow sensor on the intercooler.
Now put the black plastic cover back on and you have successfully replaced your own injectors.
Now take the car to the closest mechanic that can code in the compensation codes.
if there are any problems with this write up tell me and I will fix it up
Last edited by hilder91 on Sun, 04 Aug 2013 11:06 +0000, edited 2 times in total.
- hilder91
- Posts: 749
- Joined: Wed, 04 Jan 2012 6:08 +0000
- Location: Townsville QLD
Re: How to replace 1kd-ftv injectors
![]() by hilder91 on Fri, 02 Aug 2013 10:01 +0000
by hilder91 on Fri, 02 Aug 2013 10:01 +0000
U might have to click on some of the photos to view the bigger image forgot to resize them
- hilder91
- Posts: 749
- Joined: Wed, 04 Jan 2012 6:08 +0000
- Location: Townsville QLD
Re: How to replace 1kd-ftv injectors
![]() by robert.campbell5 on Fri, 02 Aug 2013 10:34 +0000
by robert.campbell5 on Fri, 02 Aug 2013 10:34 +0000
Nice job mate. Thanks.
-

robert.campbell5 - Posts: 63
- Joined: Sat, 30 Jun 2012 7:01 +0000
Re: How to replace 1kd-ftv injectors
![]() by andy666 on Fri, 02 Aug 2013 10:34 +0000
by andy666 on Fri, 02 Aug 2013 10:34 +0000
Just a note. There is no need to crank the engine with the injector lines loosened off to bleed the air out. Just put everything back together, pump the hand primer until it goes hard and start the engine like normal.
The high pressure fuel pump flows enough fuel that it pushes the air out off the common rail.
The high pressure fuel pump flows enough fuel that it pushes the air out off the common rail.
-
andy666 - Posts: 908
- Joined: Sun, 12 Dec 2010 6:07 +0000
- Location: Brisbane
Re: How to replace 1kd-ftv injectors
![]() by amitch888 on Fri, 02 Aug 2013 10:44 +0000
by amitch888 on Fri, 02 Aug 2013 10:44 +0000
I had to repair a injector clamp that snap in half last week. I didn't crank mine over with the injectors loose, I did pump the hand primer and it still took a while to start.
Their is also a PDF file released by bailey's diesel with full instructions on replacing injectors in the d4d. Always good to have a good set of instructions within the forum
Their is also a PDF file released by bailey's diesel with full instructions on replacing injectors in the d4d. Always good to have a good set of instructions within the forum
FCCW
Mitch's Build
Education is what you get when you read the fine print, experience is what you get when you don't.
Mitch's Build
Education is what you get when you read the fine print, experience is what you get when you don't.
-

amitch888 - Moderator
- Posts: 5231
- Joined: Fri, 16 Apr 2010 7:18 +0000
- Location: Tennyson, Vic
Re: How to replace 1kd-ftv injectors
![]() by hilder91 on Sat, 03 Aug 2013 5:16 +0000
by hilder91 on Sat, 03 Aug 2013 5:16 +0000
andy666 wrote:Just a note. There is no need to crank the engine with the injector lines loosened off to bleed the air out. Just put everything back together, pump the hand primer until it goes hard and start the engine like normal.
The high pressure fuel pump flows enough fuel that it pushes the air out off the common rail.
the hand pump only prims it to the pump it doesn't bleed the air in the lines.
- hilder91
- Posts: 749
- Joined: Wed, 04 Jan 2012 6:08 +0000
- Location: Townsville QLD
Re: How to replace 1kd-ftv injectors
![]() by deffer64 on Sat, 03 Aug 2013 5:51 +0000
by deffer64 on Sat, 03 Aug 2013 5:51 +0000
Good job easy to follow to Cheers Darryll
- deffer64
- Posts: 112
- Joined: Sat, 24 Jul 2010 9:34 +0000
- Location: Atherton 4883 Queensland
Re: How to replace 1kd-ftv injectors
![]() by 07luxyTD on Sat, 03 Aug 2013 6:17 +0000
by 07luxyTD on Sat, 03 Aug 2013 6:17 +0000
Good write up and photos bud, well explained As the other boys said i never worried about cracking the lines and fired up after 5 seconds of cranking. The only thing i recommend you ad is putting some oring lube or caster oil on the injector oring when installing them.
Alot of people go about mechanical things different ways and have different opinions but still get the same results.
Alot of people go about mechanical things different ways and have different opinions but still get the same results.
"Lucky you weren't cut off by my stihl"
My build thread viewtopic.php?f=41&t=13794
My Landcruiser Build http://www.newlandcruiser.net/phpbb/vie ... 90&start=0
My build thread viewtopic.php?f=41&t=13794
My Landcruiser Build http://www.newlandcruiser.net/phpbb/vie ... 90&start=0
-
07luxyTD - Posts: 2826
- Joined: Wed, 22 Feb 2012 5:15 +0000
- Location: Quorrobolong, NSW
Re: How to replace 1kd-ftv injectors
![]() by hilder91 on Sat, 03 Aug 2013 6:22 +0000
by hilder91 on Sat, 03 Aug 2013 6:22 +0000
07luxyTD wrote:Good write up and photos bud, well explained
Alot of people go about mechanical things different ways and have different opinions but still get the same results.
completely forgot about writing in to put oil on the o-ring seal. I have edited it in
- hilder91
- Posts: 749
- Joined: Wed, 04 Jan 2012 6:08 +0000
- Location: Townsville QLD
Re: How to replace 1kd-ftv injectors
![]() by wakil on Sat, 03 Aug 2013 7:37 +0000
by wakil on Sat, 03 Aug 2013 7:37 +0000
Great write up mate, made it very clear! Cant believe with the majority of hilux's crapping out injectors that there wasnt a write up sooner!
Couple of questions, you definitely had to undo the injector fuel lines at top and bottom didnt you? or did they have enough play that you could get away with it?
And these copper washers, do they normally come with new injectors? or where can you get them?
Couple of questions, you definitely had to undo the injector fuel lines at top and bottom didnt you? or did they have enough play that you could get away with it?
And these copper washers, do they normally come with new injectors? or where can you get them?
Cheers, Will
He who laughs last thinks slowest!
35" CLAWS, Monster Rides Suspension, DC2 Wheels
Build Thread: viewtopic.php?f=41&t=18116
He who laughs last thinks slowest!
35" CLAWS, Monster Rides Suspension, DC2 Wheels
Build Thread: viewtopic.php?f=41&t=18116
-
wakil - Posts: 402
- Joined: Tue, 26 Jun 2012 8:19 +0000
Re: How to replace 1kd-ftv injectors
![]() by hilder91 on Sat, 03 Aug 2013 8:10 +0000
by hilder91 on Sat, 03 Aug 2013 8:10 +0000
wakil wrote:Great write up mate, made it very clear! Cant believe with the majority of hilux's crapping out injectors that there wasnt a write up sooner!
Couple of questions, you definitely had to undo the injector fuel lines at top and bottom didnt you? or did they have enough play that you could get away with it?
And these copper washers, do they normally come with new injectors? or where can you get them?
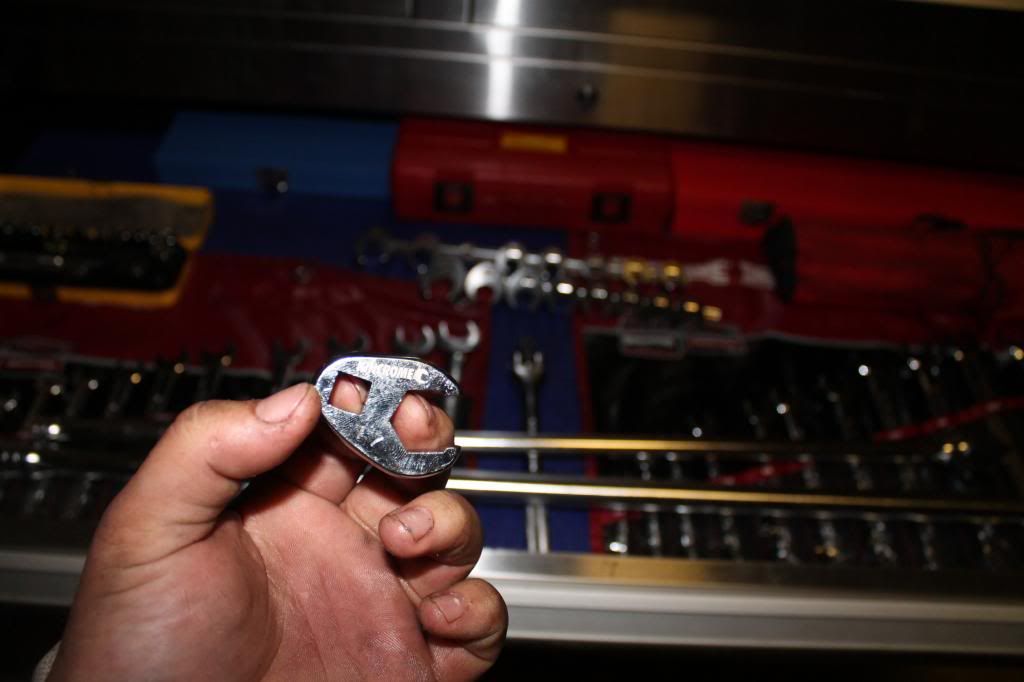
I just undone the top the lines should have enough play. And those copper washer I got off a mate in a workshop but u could go pertec. They should have copper washers. U can undo the bottom of the line but it is a stuff around. I will post a pic of the tool to use later on
- hilder91
- Posts: 749
- Joined: Wed, 04 Jan 2012 6:08 +0000
- Location: Townsville QLD
Re: How to replace 1kd-ftv injectors
![]() by StevenS on Sat, 03 Aug 2013 9:22 +0000
by StevenS on Sat, 03 Aug 2013 9:22 +0000
Wouldn't a 17mm line spanner be better for undoing the fuel lines? Last thing you'd want is to strip the nuts
-

StevenS - Posts: 1172
- Joined: Tue, 21 Feb 2012 7:49 +0000
- Location: SE QLD
Re: How to replace 1kd-ftv injectors
![]() by Hellbound on Sat, 03 Aug 2013 9:24 +0000
by Hellbound on Sat, 03 Aug 2013 9:24 +0000
top write up mate, great job!
60% of the time, it works every time
-

Hellbound - Posts: 1167
- Joined: Sun, 09 May 2010 4:06 +0000
Re: How to replace 1kd-ftv injectors
![]() by hilder91 on Sat, 03 Aug 2013 9:29 +0000
by hilder91 on Sat, 03 Aug 2013 9:29 +0000
StevenS wrote:Wouldn't a 17mm line spanner be better for undoing the fuel lines? Last thing you'd want is to strip the nuts
Yes it would be. But if u have the spanner on properly u wont have any trouble. And instead of just pulling tge spanner to undo the nut. Use the palm of ur gand to hit it the sudden jolt should crack it.
- hilder91
- Posts: 749
- Joined: Wed, 04 Jan 2012 6:08 +0000
- Location: Townsville QLD
Re: How to replace 1kd-ftv injectors
![]() by hilder91 on Sat, 03 Aug 2013 5:03 +0000
by hilder91 on Sat, 03 Aug 2013 5:03 +0000
- hilder91
- Posts: 749
- Joined: Wed, 04 Jan 2012 6:08 +0000
- Location: Townsville QLD
81 posts
• Page 1 of 5 • 1, 2, 3, 4, 5
Who is online
Users browsing this forum: No registered users and 3 guests
![]()