Fitting 35's is a decent commitment on these hilux's - once you've taken the first step due to the mods required in most cases its a way one street. You need to take into account the following factors to overcome:
1) the limited amount of room within the hilux's wheel arches
2) the larger turning arc any wider offset results in
3) the decrease in clearance everywhere with the larger diameter tyre
4) extra castor adjustment to move the front wheels forward a little to aid in clearance
5) guard/fender clearance upon compression
6) bodymount clearance
7) chassis rail clearance
8) swaybar clearance
9) differential gears
10) better braking
I'll be cut and pasting exerpts from my build into here:
Anyway, back to my steering stop project.
The hilux's as mentioned previously do not have built in physical steering stops on their lower ball joint brsckets like the FJ's and Tacoma's do.
So I ordered in a set of FJ brackets.
Some of the local FJ owners that run 35's have ended up welding extra metal to the ends of these to minimise the steering arc.
I didn't like the idea as the current FJ;s are built on the 150 chassis not the 120 as the Hilux is, and there are differences with the angle the front mount sits at so naturally there'll be differences in clearances requirements.
I wanted these steering stops adjustable to work out exactly how much limited I could get away with.
So I drilled a couple holes and tapped them in the lower FJ ball joint brackets -
I decided to try and make some Nylon bushes to screw into these brackets.
Why? I dont know, sounded good and easy enough at the time.
So I got one of the wifes choping boards from the kitchen, this was 10mm thick, cut two pieces out each, and fitted them to the brackets.
So they were 20mm thick each.
Also realised I needed to change the bolts I was using so I could counter sink the bolt heads -
The other thing I came across when I went to fit the actual bracket was that the ball joint itself was a bee's dick different as was thw hole taper on the bracket.
The top end was the same but the bottom was less than a 'mm' larger.
I had a spare lower arm at my neighbours house for some other R&D project so I took both the hilux and FJ lower brackets there.
We stripped the boot off the spare BJ and mounted both to see how they both fitted.
Surprisingly even thou the Hilux bracket sat firmer straight up the FJ bracket sat hard up against the little shoulder on the BJ itself.
Me and my neighbour decided it was safe enough to use.
I added a washer to cover the lower surface area of the BJ nut, so the force is spread out over a larger clamping area, not just the surface area of the nut itself which was small in comparison.
Used Locktite liberally.
Took her for a test drive and worked fine, felt actually nice as there was some cushioning at full lock.
Once home had a look and realised that the Nylon was way too soft as it had dented aginst the lower arm and one of the bolt heads was bent.
I cut it off and salvaged the brackets, managed to unscrew the damaged bolt.
Did some brainstoriming and searched through my scrap metal pile and found some solid square 20x20mm metal bar.
Cut some pieces out, used the bylon versions as templates and drilled holes and counter sunk the heads.
Got some new different allen keyed bolt heads and painted it all up.
Sorry, havent got pics of final version yet. Bolts I bought were slightly too long so need to replace them.
Yes, alluminium would be better but will see how these metal spacers go.
Had some free time on the weekend and started planning my fender trimming.
Pic above is the profile I will be cutting when ready, as you can tell I removed the fibreglass flares.
But what I am going to do is the following:
Going to cut section as shaped in pic above. At top of fender is a good 1.5"
The lower triangular portions will be discarded.
The rest of the pieces will have enough room to paint the sides once cut to protect from rust.
The dots is where I will drill holes before cutting.
These holes are where I will screw up into the plastic inner fender liner once the tabs have been bent inwards and upwards.
There is a one or so inch section of inner liner directly behind where the tabs are that will be cut off, but my idea is to keep things tied together to maintain both strength and sealing inside the guard.
Once completed, Ill be mounted 3" sidemount rubber flares. then paint everything inside the fender.


Steering stop were needed to stop the tyre hitting the chassis at the rear on full lock and some compression. the 20mm per side was sufficient to minimise the amount required and for the suspension to cycle. a wider offset would help this, but will also put the tyre closer to the firewall....bodylift would help this somewhat.
Bolted in place -
And when turned this is how they will work -


Picked up my hilux from the local ARB this morning after having the 4.5's fitted.
Goin by the GPS on my phone, she shifts up into 4th lockup just on 70kph as opposed to the previous 85kph, 90 if there was a headwind and the revs are at just on 1500rpm when this happens.
Not only that but the revs hold....even with slight throttle application she doesnt drop down a gear but holds top gear and slowly accelerates.
Didnt go more than 80kph on the way home. Got home and adjusted the speedo box....at 80kph phone GPS is saying 77/78kph so thats close enoughy. considering the tyres are abbout half worn that means new 33's would be pretty much spot on.
(time Lapse)
Just got back from the second test drive....
Got her very briefly upto 100kph going down hill to gauge the difference in revs and all I can say is Im f$@#&% rapt!
Before Regear
After Regear
Before Regear = @1700rpm at 100kph with 305/70x16's and 3.7 diff gears
After Regear = @2050rpm at 100kph with 305/70x16's and 4.5 diff gears
The hilux feels alot smoother and quieter, more torquey aswell.
I put her into the factory transfercases L4 by itself on a gravel road and it actually felt like a normal transfercase again.
I also put her into compound low and let me tell you....those diff gears have brought on a new level of SLOW!
1st, 2nd, 3rd and even 4th in compound low is slower than 1st compound low by itself previously.


A simple rule is as follows: D4D Auto use 4.5's for 35's, all else use 4.1:1 diff gears.
Also, all brand of 35's are different, some a larger diameter, narrower width, other other way around, some are just plain big all over. Its important if you can to get a tape measure and measure the actual tyre inflated on a rim.The online specs are never correct.
Because I wanted to retain a low COG and didnt want to fit a bodylift I had to overcome the fender clearance that would be an issue upon compression. Even a full size 33" tyre will touch the fender on full compression...only just in hard stuff but it still happens. Therefore I had to clearance for the extra diameter on full stuff.
I had a bit of time today so thought Id replace my aftermarket fibreglass flares with the 3" (which ended up being closer to 4") sidemount rubber flares.
If you've never removed your fibreglass flares beofre on your vehicle (non genuine), your in for a shock, they wreck your fenders. Fill up with heaps of mud, and the flare itself rubs through the paint.
Anyway, lets begin:
Before
Side view of front fender with fibreglass flares as they were.
Naked Fender
Flares removed, mud cleaned off. You can see the lines scratched onto the fender from where the fibreglass flares used to be.
Sidemount Flares Fitted
These were tech screwed all the way around. The rubber is very thick and heavy so was a bit of a struggle to get the shape I wanted. I first screwed the tech screws into the rubber so they were already there when I held the flare against the fender. I aimed to follow with the outside of the rubber flare the factory profile/curve on the side of the fender. This allowed me 1" on the underside of the flare for mounting screws and a good 30mm right around that will be removed later on. At the bottom/rear of the front fender I went a little wider to accomadate the larger tyres turning arc.
Rear Fenders
Same method with the tub. I tapered the flares a little wider on the front and rear edges as thats the most likely place of contact with a stuffed tyre.
Completed
I ran out of time, so the exposed "body colour" panels underneath the side mount flares was painted black so as not to stand olut so much until I get time to begin cutting and bending the panelling for a larger fender opening.
Forward 3/4 View
They look abit "jeepish" with the flat and wide profile, but it is required if pursuing 35's and wanting them to work properly.
This truck is screaming for a matte black paintjob after all this is done.


So today I completed the last stage of my "Project 35's" on the Bronze Bitch. That beign trimming the fenders.
My grinder copped a workout and me hands are killing me.
I had gone over the process many times in my head beforehand but as always things dont always go smoothly in practise.
My aim was to cut tabs, drill a hole in the bottom of each tab and when I bend it inwards to attach to the inner guard liner.
Due to the shape of the inner guard liner and the amount I was trimming it didnt work out as planned everywhere.
Short of cutting the tabs right off and completely removing the inner fender liner but I didnt want that.
I aint no panel beater and I think judging by the pics you'll agreeguess I could be called a proffesional metal butcher

So, wheres the pics?
Below: you can see the tabs I cut and bent inwards then with tech screws attached to the inner guard liner. The main reason for this method was to retain strength in the fender itself.
At the rear of the front guards I went as far back as the firewall...the tabs are bent up against it. Painted with rust kill. Whhen I get a chance I "may" make some custom inner fender liners and Im thinking bout smearing gearbox sealer silicon over everything to cover it and have a smooth finish or equivalent.
That pinchweld copped a few hard wacks to push it back further too.
The rear end copped the same treatment -
I didnt take a complete whole view of the front...to be honest I was stuffed by this time and then spent a few hours gardening after this so Im surprised I can even type on the keyboard.
I was surprised how much metal/plastic/dry mud I had to clean off the floor when done.


Today I trialled fitted my neighburs 35" tyres off his Patrol onto my hilux.
The wheels were the factory GU Patrol 17x8 with +10 offset and tyres were Khumo KL71 MT's.
The tyres are the 315/70x17 which according to Kumho are 34.6 x 12.7
We did a little bit of massaging of the mount aswell and ended up with a very good result in the end.
For everyday driving it looks like it'll clear everywhere.....for offroading, that might need some progressive trial and error to see how I go. From measuring the tyre theres still a couple inches of uptravel available, but also note I will be limiting uptravel by an inch and take it from there.
Pic below, two 6mm washer inbetween chassis and the Wheelers bump stop that Im trialling out. (hence 12mm = 24mm uptravel reduction).
I'll replace them with even larger diameter washer when I get a chance.
The stance was spot on....look damned tudd! waycool1
[IMG]http://i61.photobucket.com/albums/h68/mmaaxx1977/Project%2035s/IMG01258-20121028-1547.jpg[/IMG


NOTE: I ended up using just one 6mm thick washer to minimise uptravel by 12mm, the same setup i had whilst running my 33's before that.
Tyres and wheels specs are - 17x8 GU Patrol Alloys, +10 offset, and tyres are 35/12.5x17 Maxxis Bighorns.
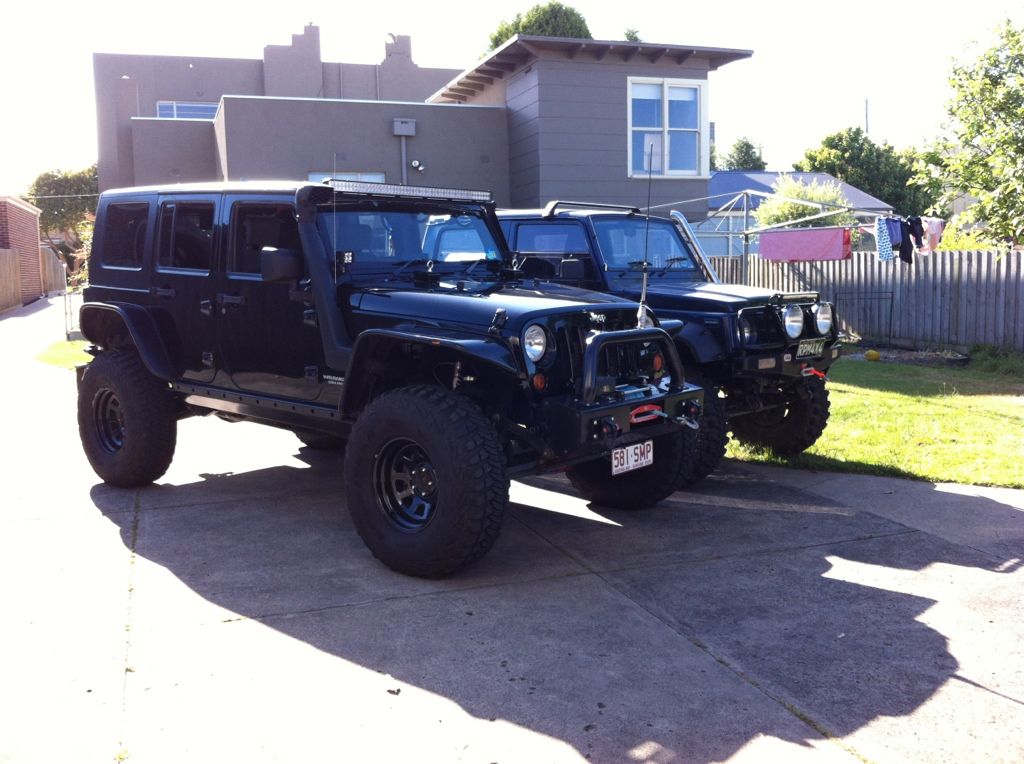
Picked up the wheels/tyres this arvo from fitment......

Without a bodylift I found this offset to be a "sweet spot" with what I have done.
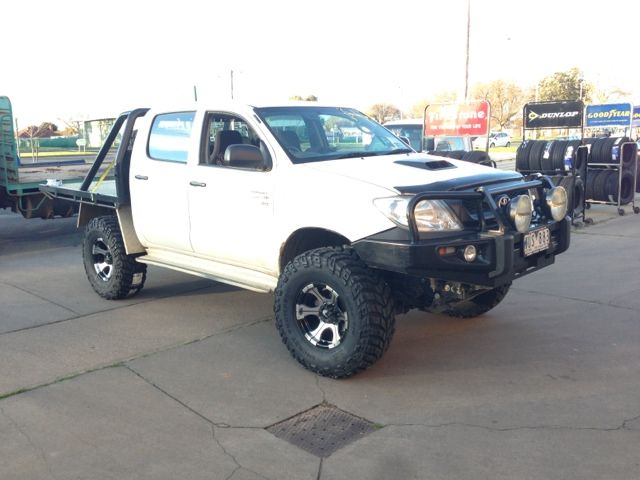
Parked below next to a stock hilux with front bar.
Stock next to Not-Stock.

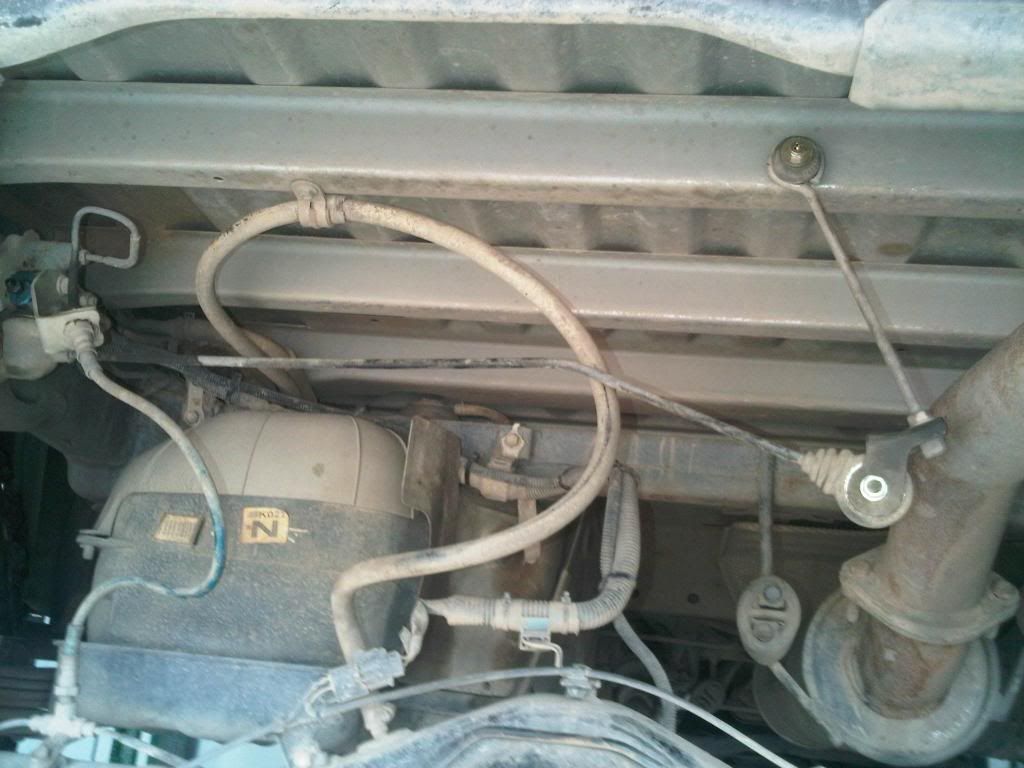
Aswell as the regear to regain lost performance, Braking is another very important factor because with all the extra rolling mass, your standard hilux's brakes will suffer to pull up safely. below was step one with the bigger brake booster I fitted - dual diapghram.
Bigger Brake Booster for the Hilux
So the Boss has allowed me to finally mention to you all about a little test product I have been trialling the last few months and give you some info/feedback etc on it.
It's a larger brake booster for the current model hilux.
We all know how pitiful the factory front brake performance is 05-2010 model hilux'sAt times scaring the crap out of you when you need them to work most. I have had several near misses over the years amd it was time to take a step in the right direction.
I'll start of with the product itself and the install:
Product came well presented, wrapped up in bubble wrap, gaskets were provided as were new bolts and plastic covers held on by the nuts over the front and rear opening.....the rear piston with a cover to protect it aswell.
Sensors and vacumn plugs came with the new Booster
If your reasonably mechanically experienced it shouldn't be a problem swapping it over. To be honest I found it easier than expected. But if your not sure, better to get someone who knows what they are doing to do it.
Inside the vehicle
1) Start off by disconnecting the brake switch off the brake pedal.
2) Disconnect the brake pedal tension spring.
3) Pull the R-clip off the pin attaching the booster rod to the pedal
4) Loosen the 4 nuts from the foot-well that hold the booster through the firewall.
In the engine bay
Factory Booster below:
1) Disconnect the brake booster switch and disconnect the manifold vacumn hose
2) Disconnect the low brake fluid switch off the brake master cylinder
Note: Going by the book you should drain the brake fluid and remove the brake master cylinder entirely....not really required.
3) Disconnect the brake master cylinder from the front of the Brake Booster
Note: If you have ABS fitted as I do, you will need to unbolt the ABS module from the guard, gently lift it up and move it forwards and out of the way along with the brake master cylinder. Also disconnect the brake hose plastic clamp from the brake hoses on the firewall to the right hand side of the booster.
Once this has been cleared, got back inside the vehicle and completely remove the 4 nuts holding the booster on.
4) Back in the engine bay, gently tease the booster out of its location being careful not to damage anything in the process.
Once removed I sat both booster on the bench to compare them. The new booster was a good inch longer/deeper than the standard hilux booster with the overall diameter being near on the same.
Once both were on the bench, I double checked the length of the piston on the new booster. Its important to ensure that the piston length on the new one is the same as the factory one that was there. There is a tool for this, I had it somewhere thou when needed couldnt find it....a small steel ruler did the trick and I adjusted the length accordingly.
Installation was pretty much reverse of the removal process.
New booster installed in place
Performance Review
To be honest, I have no idea what mods have been done on the inside of the Booster itself, I'll leave that to the manufacturer.
I wasnt expecting too much of a difference to be honest, my brake pads are near the end of their life and I've never replaced my brake fluid in the 110,000km's I've had the hilux (I've bled her once and topped her up when needed). So the brake fluid itself is not the best either.
First drive out late at night, past 10:30pm after install......I took her to bout 40-50km/h and jammed the brake pedal.
NOTE: My vehicle has ABS
You can imagine my shock/surprise when the right hand wheel, wearing a 305/70x16 MTR Kevlar "chirpped" before promptly pulling up the hilux.
I briefly paused for a second and thought....."You've got to be shitting me!"
In the whole time Ive owned the hilux and she's been on 33's, I have never and I mean never been able to chirp the tyres......braking was always a slow slowing down and driving with larger tyres, braking usually has to be planned infront.
This clearly told me that this booster was pushing some extra pressure to the master cylinder and in tern the brake calipers themselves.
The pedal also (I forgot to mention) felt slightly firmer.
I continued on, letting the brakes cool down a little (after pulling up a heavy truck on wide tyres) and tried again.....brief chirp and awesome pulling up.
I knew this was a winner.
I didn;t think that this was helped the factory (smaller sized) hilux's brakes pulling up power but boy improvement was very noticeable.
It has given me alot of confidence daily driving in traffic, and even driving normally and pulling up gently as you do with the 35's today they felt fine.
I have no hesitation stating that after I fit my FJ calipers this weekend and slotted rotors, that the hilux will pull up much better than a Hilux with just the larger Prado120 caliper/rotor upgrade by itself.


So I finally got my brake upgrade completed. I didnt have time to do it myself plus I preffered to have a proffessional bleed everything and make any adjustment that might need doing.
In the end it payed off.
I dropped the hilux off last night. Dropped off with the FJ calipers, rotors, pads, a new set of brake line brackets as I modified the previous set a little too much with my last trial and the new master cylinder.
Got a call late this morning to tell me that the master cylinder will not work as the way it seals and works with the piston is different. Yes it does bolt on but it wouldnt work the way it should. There was no way of me knowing the internal differences as I didnt remove the factory hilux master cylinder to check it out, only when I replaced my booster.
Below is a pic comparing the two. You can see the factory one has the extra piston length poking out.
My options were to either replace the booster with one that would suit the new Master Cylinder or refit the original one and work with that and see how everything ends up.
They had to make up a pair of hard brake lines from the caliper to the braided lines as the factory ones were too short to work properly.
I also found out that ,my RHR drum brakes adjustment was totally out.
One of the other mods done was to remove the Load Sensing Proportioning Valves adjustment rod and cable tie the LPSV lever itself up against the bottom of the tub.
This lever was adjusted "just" before the point that lever itself is pushing against the valve.
I was told this makes the system "think" that there is always some load on the back so the rear brakes a bit more.
I know what many of you are thinking - why not just get an extended adjustment rod up to the same point?
I asked the very same question. The answer was, that an extended adjustment rod adjusted to the same level would push too hard against the LPSV valve itself when a load would be carried, prematurely wearing it out.
By having the LPSV Lever cable tied where it is, even when loaded the amount of braking going to the rear will remain the same and not put any further load against the valve itself.
Like I said earlier, its adjusted/held up to the point where there is near max braking without stressing the valve.
THE RESULT:
A great feeling pedal to begin with but more importantly, at 50 kays or so when you stomp on the brakes I could noticeable chirp both front tyres at once before ABS came in, ABS pulsation was stronger, I could actually feel the rear brakes slightly ABS pulsing aswell.
was told the pedal would feel slightly firmer as the brakes "bed-in".
Finally this mod has been done and no master cylinder replacement was required.


So as not to have the cable ties holding the lever rod off the LPSV, I used the original adjusting rod that was attached to the lever and flipped it upside down....measured the position on the tub support braces so it would all still be the same and with a self tapper screwed it in.
Now its a permanant position, with a little bit of adjustment if required in the future.
First Trial Flex
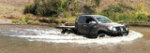
I took the hilux out this arvo and parked her up against a mound to force the vehicle weight down over the opposing front wheel and to compress it as much as i could.
Not knowing what to expect I carefully backed up the hill.
I then got out and inspected.
Progressive bumpstop was squashed pretty hard.
My clearancing on the fenders had worked out well.....theres was bout another half to 3/4 of an inch clearance with the tyres pointing straight ahead. So much so that I am considering removing one 6mm spacer under the progressive bumpstop to gain the extra 12mm uptravel there is.
Problem was when I turned the steering wheel as slightly expected. I could only turn half the "limited" steering amount as the tyre fouled on the firewall.
Like they say " If they aint rubbing they aint big enough! "
Realistically, the vehicle rarely spends alot of its time at full lock and full compression. But regardless, I'll be required to do a little bit more "massaging" over the next few weeks.


Second Trial Flex
So I stuffed around with the Punisher today....and unfortunately she inadvertantly got " a little ' punished in the process
Went back to the same mound in the paddocks near home to flex her up with the aim of marking on the inner fender/firewall with a paint texter where the problem areas was for later reference.
So I backed her up like last time and turned the steering as far as shed go before the tyres hit the firewall/pinchweld area.
I almost had full lock with the limited steering but not quite -
A few mm to go with steering against the lower arm
I then marked with the paint texter on the firewall on both sides
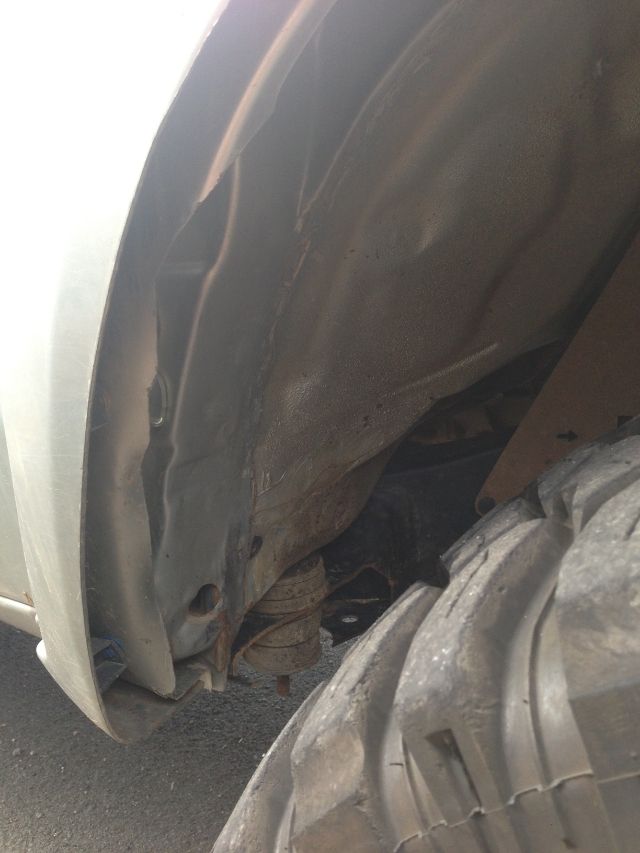
While she was flexed up I had a closer look around at everything......on the rear even thou not touching, a problem area showed up that I know would touch the rubber in severe suspension stuffing -
area in question highlighted with white texter line
I took care of that when I got home by bending the tab inwards out of the way and smoothing the corner next to it with my trusty "sheet-metal-forming-tool"
On the front the tyre got pretty close to the edge of the Axis bars sidewings....not gonna touch this unless it shows itself to be a problem in the future.
Once home, let the kids play in the garage while I embarked to finalise my clearance issues so damn it, I can wheel this bitch again soon!
I ended up cutting the lower tabs that I had inverted before off, the piece of plastic from the inner liner that I had there I removed, and with a hammer, oops, I mean, sheet-metal-forming-tool, I started to gently tap the corner of the outer firewall area to soften it up.
That outer firewall area upto the inner side of the pinchweld was the problem area that needed some loving. I had to "tapper" it from the outside being a little further back to in.
NOTE: for those thinking of using this method, the lower portion of the firewall is a much thicker and stronger metal, more than likely double layer whilst on the upper portion its softer single layer. The top portion I used tha back end of a ball hammer and gently pursuaded her backwards all around. Once the outer corner had been pursuaded with a hammer, I then got my sledghammer and flattened the pinchweld completely, and then tapper pushed in the outer area.
I cleaned the surface with a wire brush, then got a tube of black gearbox silicon I had, and a plastic scraper, and smoothed out any open edges between the flattened pinchweld and the firewall.
The result is, the outer portion of the firewall from the pinchweld out is a good half inch or so "tubbed".
I am yet to flex her up the same way to test but I am confident that is is pretty damn close if not right there to working the way I want it too.


Thought this would be an interesting comparo with my hilux.
I came across the following JK Jeep on 37" MTR's on another forum:
He states that he has just over a foot of clearance under thee front diff -
So I thought id just out and get my tape measure and see what my hilux is at to compare.
My Hilux:
Front = 36cm
Rear = 31cm
Therefore I have just on 2" more clearance on the front end and the same as the jeep on 37's on the rear end.
No, my hilux wwill never flex as well as a modded Jeep would but damn thats not bad clearance comparo figures I think.

Theres quite a few threads about how to chop the bodymoutnts.......i was running mine chopped and not sealed for 18 months before deciding to do this.
Thought after about 18 months or so of running without the bodymount sealed off it was time to do it
I used our Monster Rides kit and trimmed it down to size required and welded it on.
Stills needs a few minor finishing touches Ill do another time but it looks alot better than how it was.


End Result


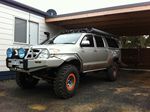
And fully flexed up!
So for shits and giggles I tee'd it up with Rob at The Suspension Centre to flex the rear of my hilux up as high as possible and just evaluate how things look/work etc.
It's different when your wheeling as you cant see what the vehicle is doing from inside the hilux unless someone outside is tapping or taking pics.
So we jacked up the rear off the ground then slipped some hydraulic truck jacks under the LHR tyre. We then slowly jacked her up asw high as we could....took some photo's as you'll see below and evaluated the 115,000km old leaf springs and front rekon.
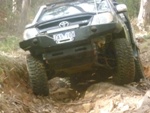
And the front bumps working:
I know many times offroad Ive driven her at angles where you KNOW you driving for 20 or so metres on 3 wheels but to see the angle the hilux was parked at was impressive. Obviosuly pics dont to it justice and theres always room for improvement.
Note: The top LHR corner of my tub was just higher than another hilux parked there that had a 4" Ultimate it and 285's which was getting replaced for a Rekon kit......now thats some height.
Note 2: I am running factory rear leaves, slightly reset with an add a leaf fitted. 40mm total height over standard.


And thats it. Like I said at the start, it isnt the be all and end all. You can try other ways, such as using some of the dropped crossmember lift kits, combining suspension and bodylifts for extra clearance etc. or even SAS'ing.
I am happy to answer any questions anyone may have on the topic.
(Mods, could you please sticky this thread for the members)