Quinny23 wrote:Great job.... Hope it all continues to go smoothly.... (And thanks for the pics...)
Thanks mate, so far so good.
mmaaxx wrote:good stuff mate, make it look easy.....your reports are always well worth reading.....quality explanations and with pics.
whats the saving estimate on DIY compared to the caddy setup?
Not game to add up the cost, but my initial estimate was $1,100 or so against $1920 for the Caddy one and then I'd have to add a fair bit of finishing touches as that was for the drawer only. Black Widow was $3k from ARB and some of the others might have been $2,400.
Anyway, I think I am pretty much on track with the budget but still have to buy the plywood which is about $45 per sheet for 12mm x 2400x1200 I have not made up my mind if I should use 16mm for the drawer bottoms which is about $65 for the sheet...
Anyway, got down to Ovesco this morning at Nerang and picked up some bits and he told me there was a bolt shop just round the corner so I got all my hardware now. Did not get home tlll about 11:00 so did not get that much done (forgot some bolts until the way home so had to do a U turn across the 8 lane M1 which was annoying....)
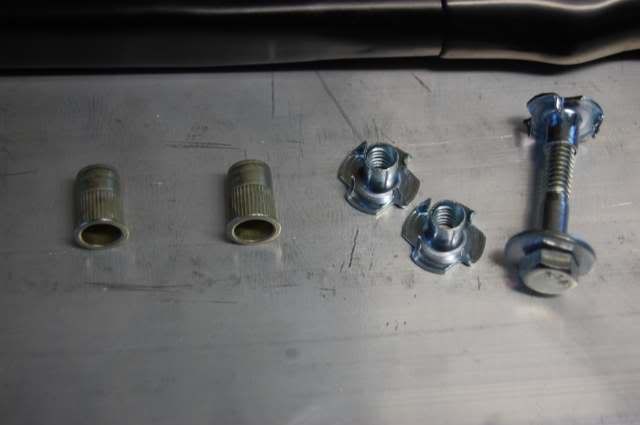
Anyway when I got to Ovesco, they had a 1200 mm drawer all welded up using the Occo rollers so I had a good sample to work off. Here is some of the bits I got:
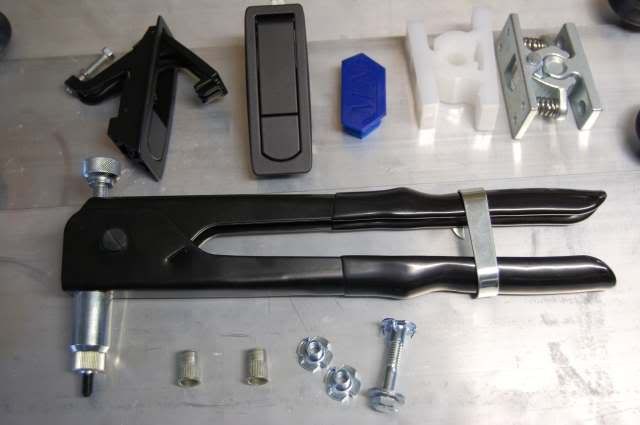
From top left, first two black things are the flush mount drawer catches, one open and the other closed. You push the bottom button and the handle pops out. Blue thing is the end cap for the Occo track, The next two items are catches and on their sample they used the cheap white plastic one to hold it closed (about $4) and I also bought the metal ones (about $20). They had their drawer set up so there was one plastic catch to keep it shut and another to keep it open...
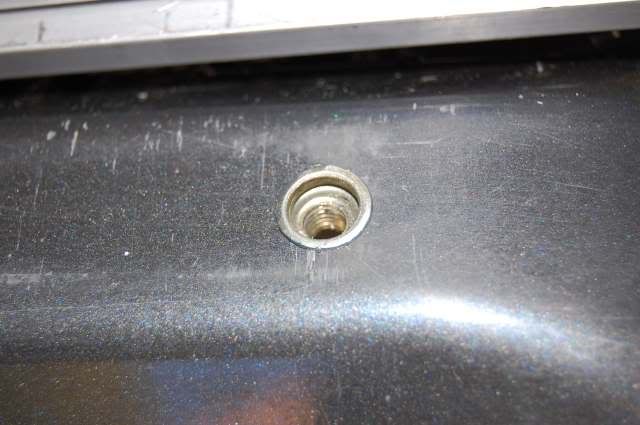
The pliers gadget is a nutsert tool which cost about $70 plus $15 for each thread die. Thay had another kit there for about $540 but that was a bit over the top for casual use. To use this tool, you drill a 10mm hole in sheet metal (like a Hilux tub) and you then crimp in a M6 thread (dies for smaller sizes an some imperial ones as well). Scotty used a $300 version of this so if you want to see these in use roll back though this thread to my water tank... I bought 50 M6 nutserts at 31 cents each from Ovesco (good choice, they were 70c each at the bolt shop).
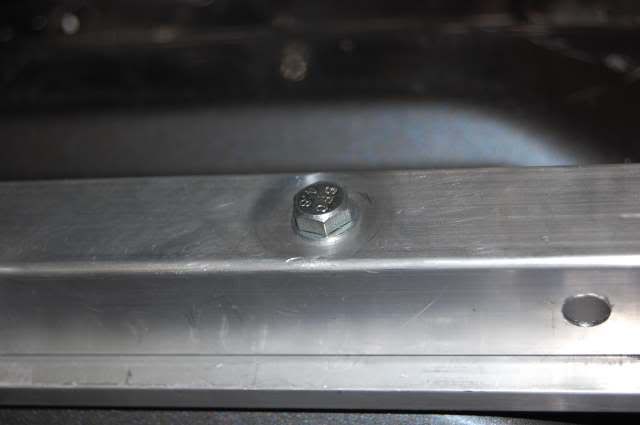
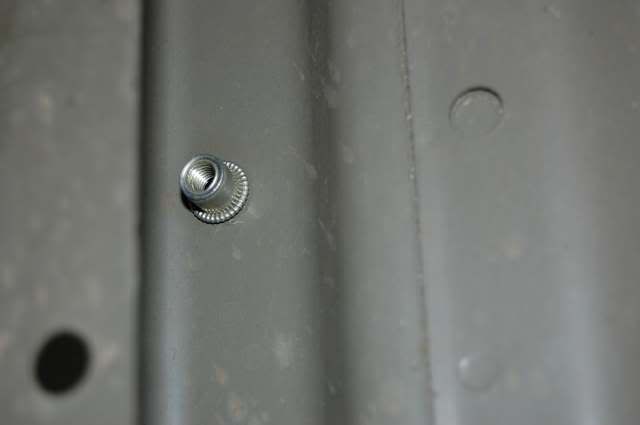
And finally a couple of T nuts that bite into the plywood to bolt the top deck to the Cubelock. I use a 3/4" wood bit in a hand brace to countersink the ply (basically cut out one layer of ply and once you put carpet over the top, they are totally hidden.
Close up of the fasteners (I just got to work out how to crimp in the nutserts):
So anyway, I got all of the Occo Rollers fitted basically following the pattern that they had used in their show room example (These are the four plates shown in yesterday's post) with 20 rollers at about $18 each added:

So here is a close up of the rollers at the end:
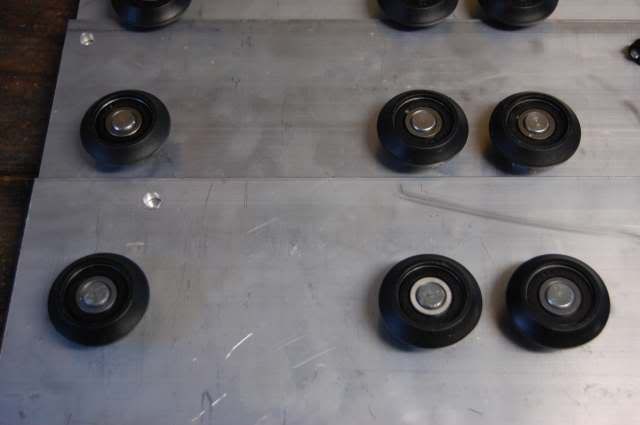
So the drawer will open as far as the pir of rollers close together. They say that with their sample drawer, they put 200 kg's in the front of the drawer and open it out full length. There will be about 300 mm of the drawer that does not extend.
I also spent a fair bit of the day stuffing around with the cubelock, to accommodate the ARB fitted fridge points:
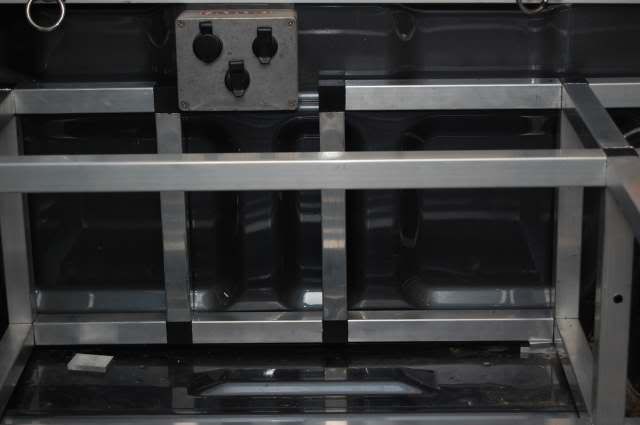
I think eventually I will remove this box and relocate all the fittings onto the end panel of the drawer unit (like the Skull Racing buildup).
Anyway, I thought it was about time I put it all together to make sue it was all good:
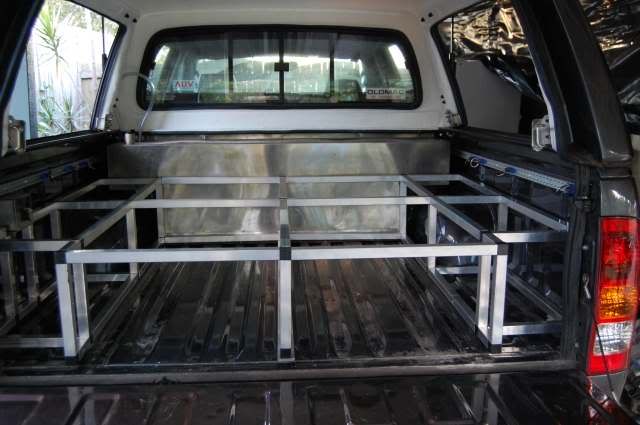
With the measurements I quoted yesterday, the drawers are such a tight fit accross the tub that it was hard to get it all in there, You have to build the top in two pieces, one piece goes from one side to the last drawer runner on the other side and the other piece is the short side wing component with the 220mm cross member. You have to set them up like an A frame tent and then it will all slip into position (with a bit of colourful language). But when you do get it all in place there is no movement at all, hardly need bolting down.
So now, all I have to do is to work out this nutsert thing and fix the frame to the tub. to do this, I will need to dissassemble the top so I can get a drill in there (which I am not looking forward to as it was such a tight fit).
Once that is done, I need to bolt on the top deck and build the drawers. I am paying the price of not having everything on hand before starting construction, there are a couple of things that i might do differently next time round to sort out the catches etc.